


Tag Archives: Cheerleading Safety

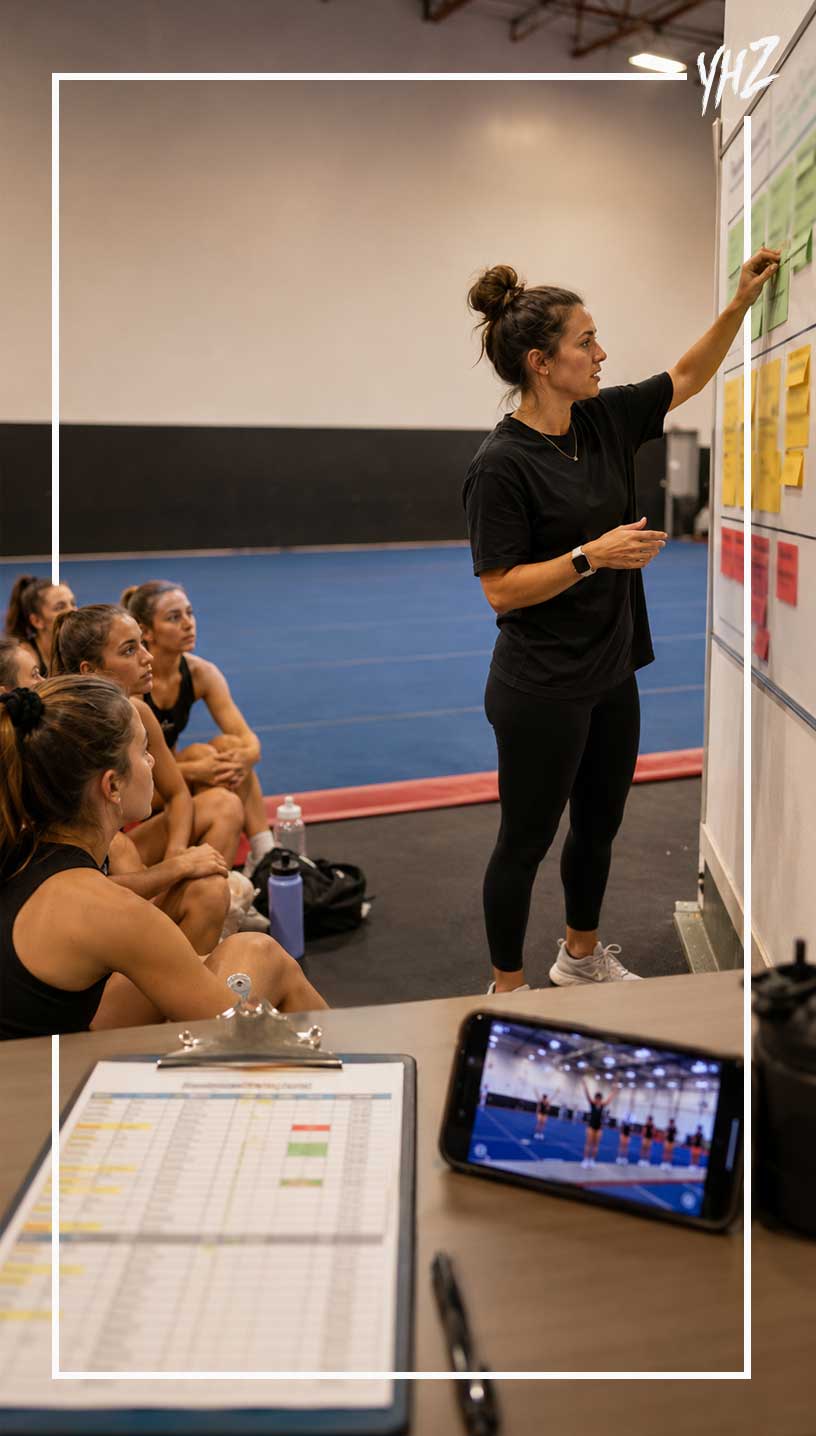
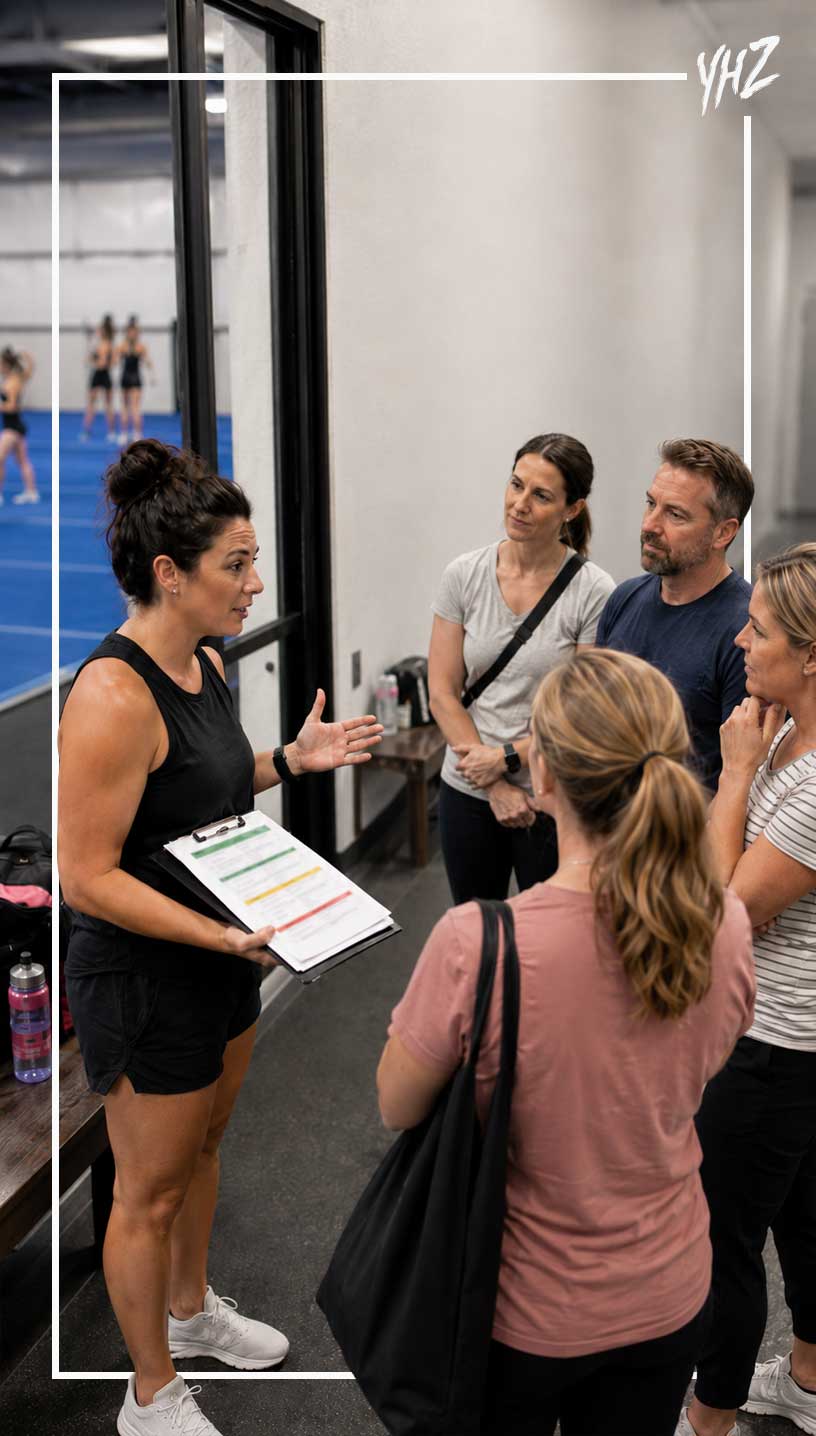
Does your cheer program have an emergency action plan?

cheerleading emergency action plan 1

By Steve Pawlyk

Published September 21, 2026

On September 16, 2026, a University of Connecticut cheerleader fell during practice at the UConn Volleyball Center. Paramedics treated the athlete at the scene, and a medical helicopter took the athlete to Hartford Hospital. The university said the athlete stayed overnight for evaluation and left the hospital the next morning with no major physical injuries. That good outcome does not make the incident easy to dismiss. It raises a direct question for every cheer coach: If an athlete suffers a serious fall at your next practice, does everyone know what to do?

A cheerleading emergency action plan answers that question before anyone gets hurt. It assigns jobs, gives responders the correct address, identifies the nearest AED and tells staff how to manage the rest of the team. A plan on paper is only the start. Your staff and athletes must practice it.
cheerleading injury response

What is a cheerleading emergency action plan?

An emergency action plan, often called an EAP, is a written response plan for a serious injury or medical emergency. It tells each person what to do from the moment activity stops until emergency medical services take control. It also covers team supervision, parent contact and incident records. USA Cheer provides a sample cheerleading emergency action plan, a 9-1-1 phone script, an athlete information card and a printable flip chart.

Those tools give programs a good starting point, but each program must adapt them to its own staff, athletes and facilities. Your school or gym may already have a general emergency plan. Read it, then check whether it works for cheer practice. A plan for the football field may fail inside an auxiliary gym with a locked exterior door and no athletic trainer nearby.

Write a different plan for each venue

One address does not equal one response plan. Your main gym, tumbling room, outdoor practice field and performance space may have different entrances. The AED may sit near one location but several hallways away from another. USA Cheer advises teams to create a separate plan for each venue. Practice also needs its own plan when the medical staff who attend games are not present.

The same rule applies when your team trains in a rented facility. A venue sheet gives every staff member the same information.

Create one page for every place where your team practices or performs, and include these details:

  • The full street address and ZIP code
  • The building name, room name and floor
  • The nearest cross street
  • The best entrance for an ambulance
  • The door or gate that staff must unlock
  • The AED location
  • The first-aid kit location
  • The name and phone number of the athletic trainer, nurse or facility manager
  • The location where a staff member will meet emergency responders

Do not assume that a person who calls 9-1-1 can describe the location from memory. Many athletes do not know the street address of their practice facility, and a visiting coach may not know which parking lot leads to the gym. Post the venue sheet near the practice floor. Keep a copy in the coach’s bag and on each staff member’s phone. Make sure staff can reach it if a power outage or weak internet connection blocks the usual system.

Assign jobs before the emergency

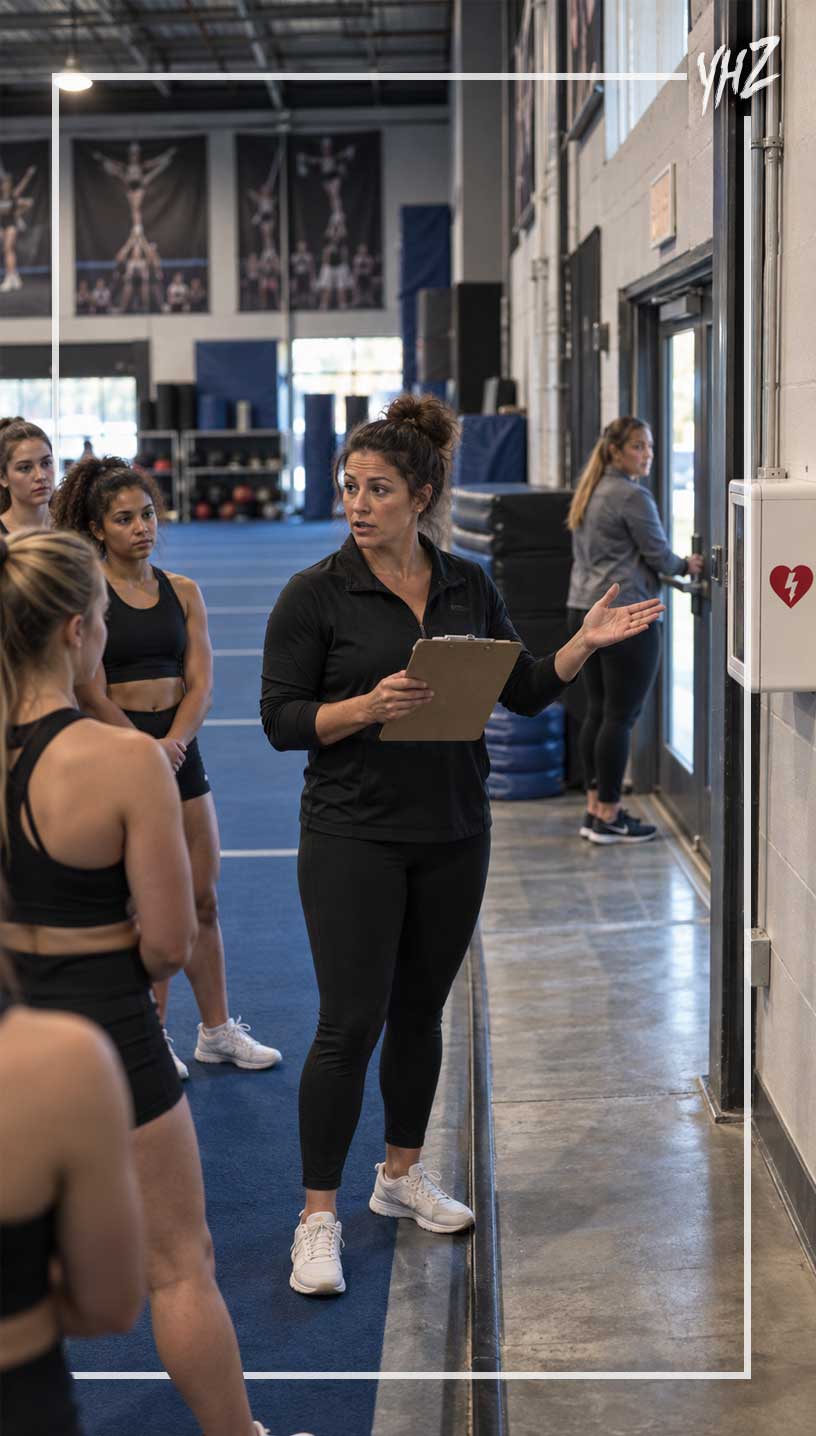
A vague instruction such as “someone call 9-1-1” wastes time. Name the primary person and a backup for each job, then update the names when staffing changes. The head coach or another trained adult should stay with the injured athlete. That person should give care only within the limits of their training. USA Cheer recommends that coaches complete first-aid and CPR/AED training.

Assign the remaining jobs to adults when possible. Use the roles below as a starting point. Add other jobs when your building or program requires them:

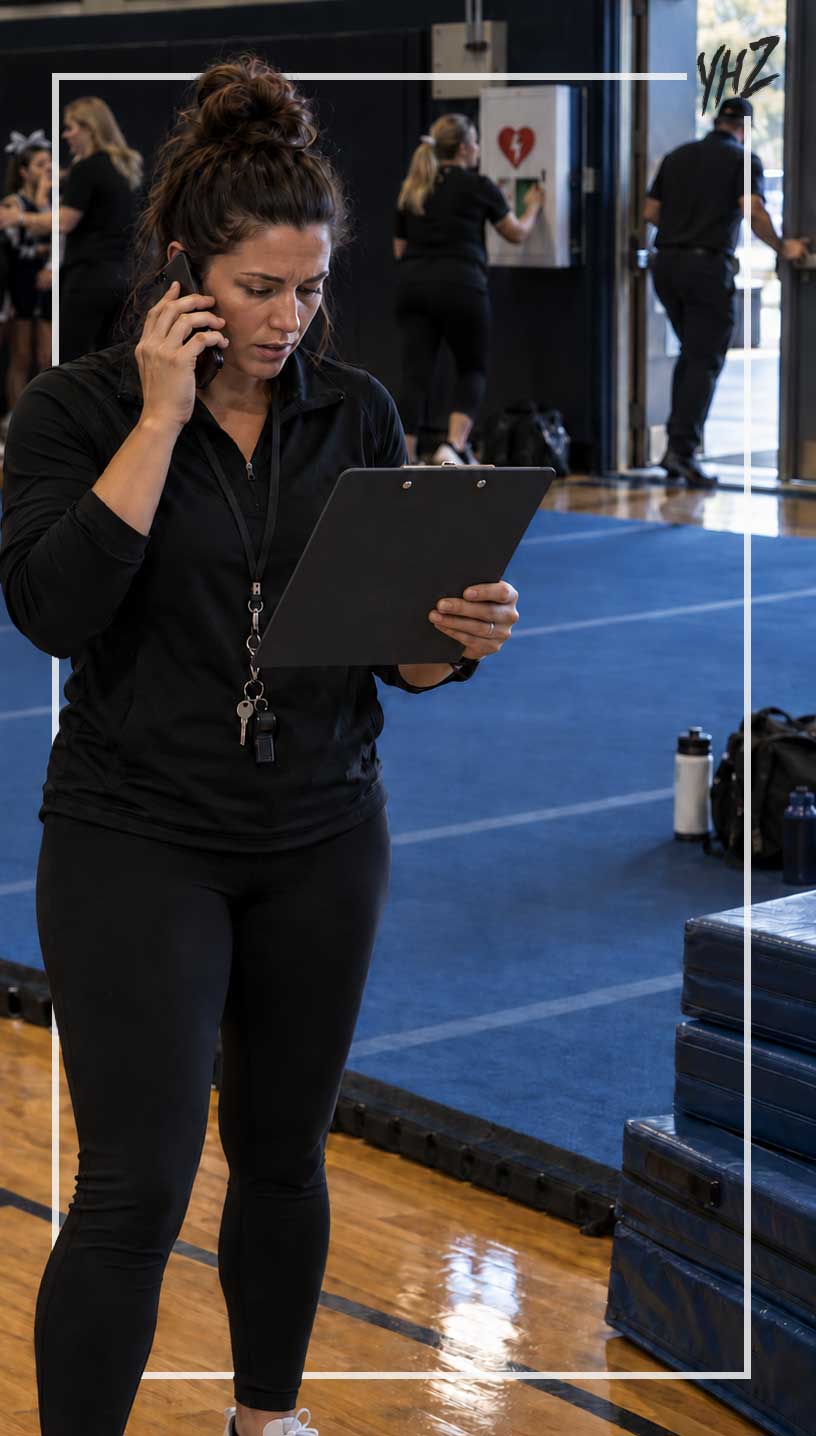
  • One person calls 9-1-1.
  • One person gets the AED and first-aid kit.
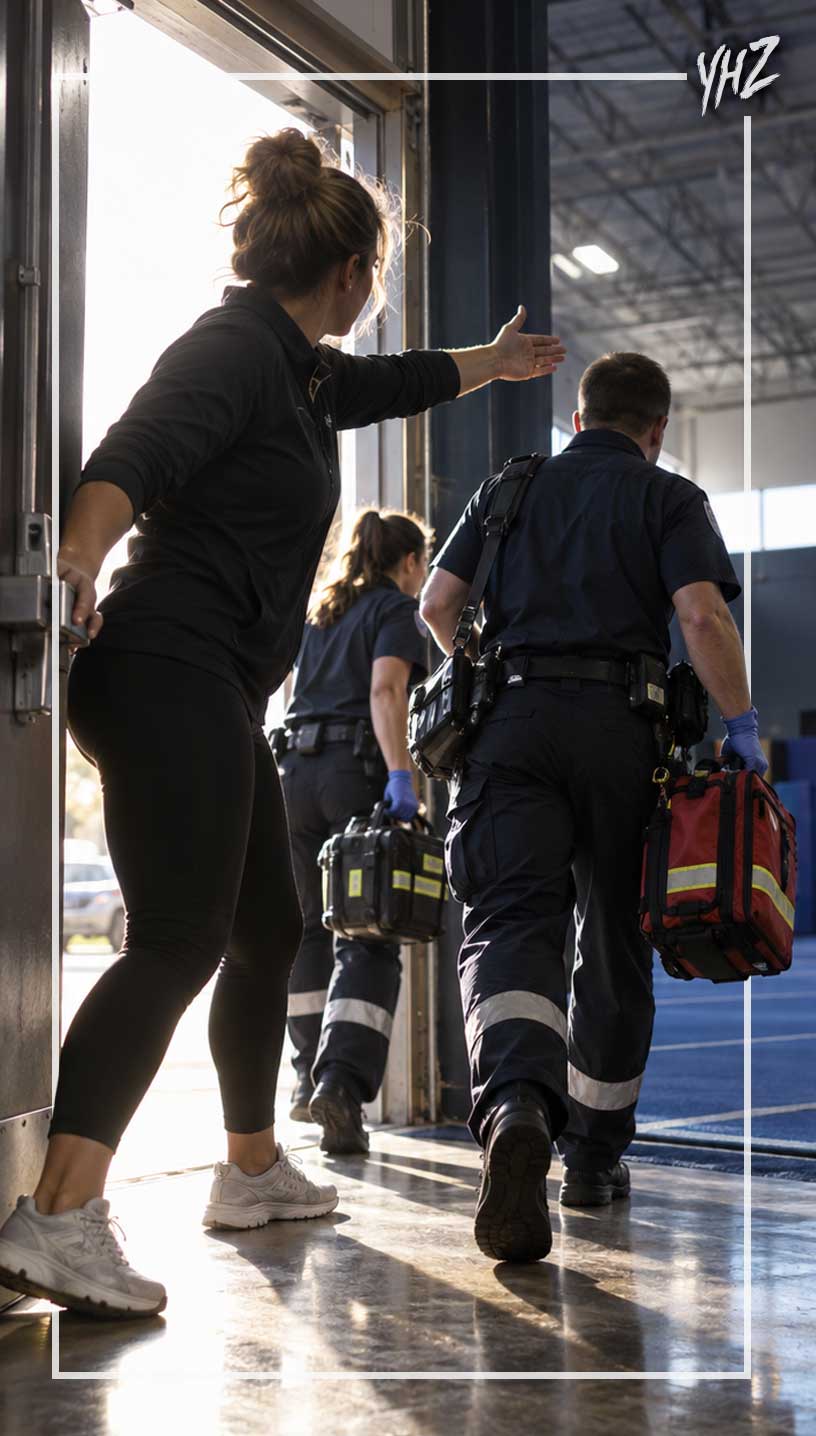
  • One person opens the correct entrance and meets emergency responders.
  • One person contacts the athletic trainer, nurse or facility manager.
  • One person supervises the rest of the team.
  • One person contacts the athlete’s parent or guardian.
  • One person records the timeline after medical staff take control.

Give every job a backup because the primary caller may be absent. The assistant coach may be the person who needs medical care. A useful plan still works when one assigned person cannot do the job. Review the assignments whenever your roster or staff changes.

You can give older athletes simple support jobs during a drill, such as clearing the entrance or guiding an adult to the correct door. Keep an adult in charge of the response. Do not make a minor solely responsible for medical care, team supervision or parent contact. Age-appropriate practice can still help athletes follow directions and stay calm.

Need Competition Music Blue 1

Prepare a 9-1-1 script

Stress changes how people speak and remember. A written script helps the caller give clear information without searching for words. Place the script beside the venue sheet. Give the caller a paper copy in case a phone battery dies.

The caller should know what information the dispatcher will request. Keep the details short and factual. The script should cover these points:

  • “We have a medical emergency.”
  • The full address and nearest cross street
  • The exact place inside the building
  • The athlete’s condition, including whether the athlete is conscious and breathing
  • A short description of what happened
  • The entrance where someone will meet responders
  • The phone number used for the call

The caller should answer the dispatcher’s questions and follow the dispatcher’s instructions. Do not guess about an injury or give a diagnosis. Describe what you can see and what happened. Run a phone-script drill without placing a real emergency call. Have each designated caller read the script out loud so you can fix awkward wording and missing information during practice.
emergency action plan for coaches

Clear a route for emergency responders

An ambulance in the parking lot does not help if responders cannot find the athlete. Locked doors, crowded hallways and unclear building names can slow access. Your plan must cover the full path from the road to the practice floor. Walk that path during the same hours when your team trains. A school entrance that stays open at noon may lock at 4:00 p.m.

Equipment carts, other teams or event barriers may block a route that looked clear in the morning. Assign one person to meet responders outside and place another person at any turn where the route becomes unclear. Give those people a way to unlock doors and gates. At competitions, ask event staff which entrance emergency crews use. Find the athletic training area and AED before warm-ups, then save the venue address in the team travel notes.

Keep medical and contact information ready

Emergency responders may need an athlete’s name, age, allergies, medical conditions and current medications. Coaches also need current parent or guardian phone numbers. Outdated forms can create another problem during an already difficult situation. Review athlete information before each season and ask families to report changes during the year.

Store the forms in a secure place that authorized staff can reach quickly. Decide who can open that file when the head coach is absent. Share medical information only with the people who need it for care. Do not discuss the athlete’s condition in a team group chat or on social media.
concussion protocol for cheerleading

Know where the AED is

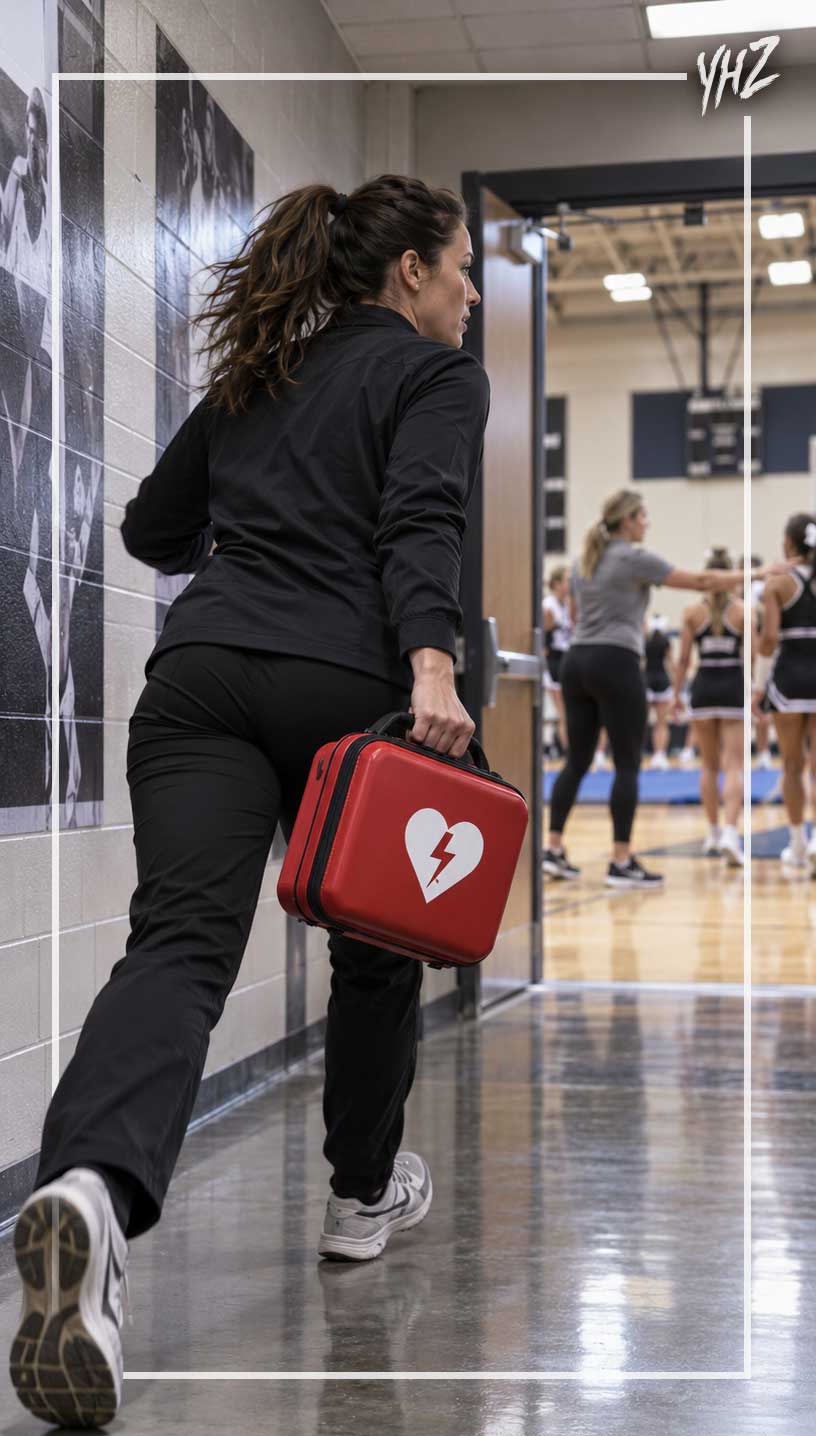
An automated external defibrillator cannot help if no one can find it or access it. Record its exact location in each venue plan. Check whether a locked office, closed school wing or after-hours schedule limits access. USA Cheer recommends CPR, first-aid and AED training for coaches. At least one trained adult should attend every practice, game and performance.

More than one trained adult gives the program coverage when a coach is absent or attending to another athlete. Include the AED in each drill. The assigned person should walk to it and return to the practice area. This test tells you how long retrieval takes and whether anything blocks access.

Treat a possible head, neck or spine injury with care

A coach should not diagnose an injury, but a coach must recognize when an athlete needs immediate medical help. Loss of consciousness, breathing trouble, loss of sensation or a suspected head, neck or spine injury calls for a trained response. USA Cheer’s emergency plan tells responders not to move an athlete when they suspect a head, neck or spine injury, unless an immediate hazard makes the location unsafe. Keep the athlete still and wait for trained medical help. Follow instructions from the 9-1-1 dispatcher.

Do not ask an athlete to “walk it off” after a serious fall. Do not let the desire to restart practice rush the decision. Stop activity and give responders room to work. Resume practice only after qualified staff say the area and remaining athletes are ready.

Use a firm concussion rule

A concussion can follow a hit to the head or a forceful hit to the body. Symptoms may appear without a loss of consciousness. Coaches should know the signs and remove the athlete from participation when they suspect a concussion. The coach should not judge the severity of a possible concussion.

The CDC HEADS UP guidance says to remove the athlete right away, check for danger signs and keep the athlete out for the rest of that day. A healthcare provider must clear the athlete before return to sport. Write that rule into your plan and explain it to athletes and parents before the season starts. A close competition or an important practice does not change the medical standard. This article gives emergency-planning information and does not replace medical advice, professional training or instructions from emergency personnel.

Manage the rest of the team

A serious injury affects every athlete in the room. Some athletes may panic, cry or crowd around their teammate. Others may reach for a phone and start recording. Assign an adult to move the team to a set location away from the injured athlete. Keep the group supervised and leave the access route open.

Tell athletes not to record, post or speculate about what happened. Give the team a short, factual update when you can do so without exposing private medical information. Do not blame an athlete, stunt group or coach during the emergency because staff can review the incident later. Your plan must also state who supervises the team if the head coach goes to the hospital. Do not leave minors alone or dismiss them without an approved pickup plan and confirmed parent contact.

Practice the plan like a routine

An unread EAP will not control a stressful room. Run a drill and give each person a job. Stop the clock when the assigned person reaches the AED and when the outside guide reaches the ambulance entrance. USA Cheer advises programs to practice the plan until everyone knows the assigned roles, then repeat the drill each month. The organization compares the process to a fire drill because repetition helps people act when the room becomes loud and confusing.

Test more than one situation. Run a drill with the head coach “unavailable,” then run another after normal school hours when exterior doors are locked. Test the plan during a travel practice or at a secondary facility. After each drill, ask whether the caller found the address, the guide opened the correct door and an adult supervised the rest of the team. Fix each failure before the next practice.

Review what happened after an emergency

Complete an incident report as soon as the situation allows. Record the time of the injury, the observed condition, the care provided, the 9-1-1 call and the transfer to medical personnel. Use facts and avoid guesses about fault or diagnosis. Meet with the adult staff after the emergency and check which parts of the plan worked. Note where the response slowed down.

Update the plan, replace used supplies and contact the proper school or gym administrator. Witnessing a serious injury can upset teammates and staff. Offer access to the school counselor or another qualified support person when needed. Give the injured athlete and family control over what medical information the program shares.
cheer safety plan

A 15-minute safety check for cheer coaches

You do not need a full staff meeting to find the largest gaps in your current plan. Take 15 minutes before your next practice and complete this check. Record any item that your staff cannot confirm:

  • Ask one coach to state the facility’s full address.
  • Ask one athlete to point to the nearest AED.
  • Check whether staff can open the ambulance entrance.
  • Confirm that at least one present adult has current CPR/AED and first-aid training.
  • Open the emergency contact file and check when families last updated it.
  • Name the adult who will call 9-1-1.
  • Name the adult who will supervise the team.
  • Walk the route from the street to the practice floor.
  • Schedule the first full drill.

Any answer of “I think” or “probably” identifies work that your program needs to do. Write down the correct answer, assign a person and test it. The best emergency drill feels boring because everyone moves to the assigned place, the caller reads the correct address and the right door opens. That is the goal.

Find the confusion during a drill, not while an injured athlete waits on the mat.

Steve Pawlyk Signature Full

IPP's Premade Mixes are USA Cheer Compliant and customizable!  Add Sound FX, swap songs, & more!  Add your Team Name to the mix for only $10! 

SLAM artwork
Full_Out_130 mp3 image
1 minute cheer mix
WAKE UP THE FIRE
SLAM artwork
WAKE UP THE FIRE
Full_Out_130 mp3 image
1 minute cheer mix

Sources

Return to Cheerleading After a Break: A Safer Practice Plan

return to cheerleading after a break

By Steve Pawlyk

Published September 10, 2026

The first practice after a break can create false confidence. Athletes remember the counts, grips, and skills, so everyone expects their bodies to follow. Some skills may look ready during the first few attempts. That does not mean the team can safely repeat them through a full practice.

Memory is not readiness.

Athletes may lose strength, timing, balance, endurance, or confidence during time away. Stunt groups can also lose the small adjustments that keep skills stable. Bases may reach at different times, flyers may rush transitions, and spotters may react a fraction too late. Coaches need to rebuild those connections before adding difficulty or volume.

A return to cheerleading after a break should follow demonstrated ability, not the calendar. Your team may move quickly through basic progressions. Another team may need several practices at one stage. Both responses can be correct.

cheerleading return to sport

New Research Points to a Return-to-Activity Risk

A 2026 study in Pediatrics examined 15,799 cheerleading injuries among athletes ages 6 through 18. The cases represented an estimated 551,258 emergency department injuries from 2004 through 2023. Fourteen percent involved concussions or other closed-head injuries. Stunting contributed to 39 percent, while teammate collisions contributed to 37 percent.

The researchers also found recurring injury peaks during return-to-sport or return-to-activity periods. They identified those periods as an opportunity for prevention. The study did not test a specific cheer practice plan. It did show why coaches should treat returns as distinct training periods.

The study also examined the 2012–2013 rule change that restricted double-down dismounts for high school and younger teams. Head injuries and teammate collisions declined after that change. The researchers connected the improvement with matching advanced skills to the athlete’s level and environment. You can read the full study summary through the American Academy of Pediatrics.

That principle also makes sense after a break. An athlete may have owned a skill three months ago but lack the current timing to perform it safely. Coaches should evaluate present ability instead of granting permanent ownership of a skill.

Not Every Return Requires the Same Process

“Returning to cheer” can describe several different situations. A team may return after summer, winter break, competition downtime, illness, or injury. Those situations require different levels of oversight. Coaches should identify the reason for the break before planning the athlete’s return.

This article mainly covers healthy athletes returning after scheduled or voluntary time away. It can also help coaches organize practices for medically cleared athletes. It cannot replace an individual rehabilitation or return-to-play plan. A healthcare professional must control medical restrictions and clearance.

Use four return categories:

Return Type

Who Controls the Progression?

Scheduled team break

Coach, using current athlete readiness

Reduced training or vacation

Coach, after reviewing recent activity

Illness

Parent, healthcare professional, school policy, and coach

Injury or concussion

Qualified healthcare professional and applicable return-to-play rules

Do not combine these groups without reviewing their needs. A healthy athlete returning from vacation may start with normal conditioning. An athlete returning from concussion may have strict limits. A single team practice plan cannot override those individual instructions.

Need Competition Music Blue 1

Start Before the First Practice

Send athletes a short return questionnaire before they enter the gym. Ask when they last trained, what they practiced, and whether they currently have restrictions. Include private lessons, camps, open gyms, strength training, and other sports. “I stayed active” does not tell you what the athlete’s body prepared to do.

Ask these questions:

  • When did you last complete a full cheer practice?
  • What cheer skills have you performed during the break?
  • Did you attend tumbling, stunt, strength, or conditioning sessions?
  • Do you have pain, unusual soreness, or movement restrictions?
  • Did you experience an injury, concussion, or significant illness?
  • Did a healthcare professional give you restrictions?
  • Do you feel nervous about any skill that previously felt comfortable?
  • Has your stunt position changed since your last season?
  • Are you returning to more than one cheer team?

Do not use this form as medical clearance. Use it to identify conversations that should happen before practice. When an athlete reports an injury or restriction, follow your organization’s medical procedures. Do not let the athlete “test it” during practice.

Review your emergency plan, mats, equipment, and staff assignments before the return session. Coaches often focus on athlete readiness while ignoring the environment. A crowded floor, missing spotters, or unclear tumbling lanes can create preventable problems. The gym must also return ready.

Check Current Readiness Without Turning Practice Into a Medical Exam

Coaches should assess cheer skills, not diagnose injuries. Your first practice should show how athletes move, land, balance, and respond to corrections. Start with skills below the team’s maximum difficulty. Watch repeated attempts instead of celebrating the best attempt.

A basic return assessment may include:

  • Dynamic movement and gradual warmup
  • Basic body positions
  • Controlled landings
  • Jump preparation and single jumps
  • Core control and balance
  • Motion technique
  • Low-level tumbling fundamentals
  • Stunt grips and timing
  • Prep-level stunt entries and dismounts
  • Spotter positioning and reactions

The goal is not to prove that athletes can survive practice. You want to see whether they can repeat basic movements with control. Watch what happens as mild fatigue appears. Technique that disappears after three attempts needs more work.

Keep the assessment separate from team selection or punishment. Athletes will hide problems when they think one weak session can cost them a position. Tell them why you are reducing difficulty. Honest communication gives you better information.

cheer preseason practice plan

Rebuild the Warmup for the Work Ahead

A few laps and static stretches do not prepare athletes for every cheer skill. Your warmup should match the work planned for that practice. Prepare landing mechanics before tumbling. Prepare shoulders, wrists, legs, and core control before stunting.

Increase the warmup gradually across the return period. Early practices may need more time for movement preparation and skill review. Later practices can move faster after athletes show consistent control. Do not copy the final-week competition warmup on the first day back.

The warmup also gives you your first fatigue check. Watch for athletes who struggle with movements they previously controlled. Ask questions before adding impact. A difficult warmup may mean the planned practice needs adjustment.

For more help organizing complete sessions, check out our guide to planning cheer practices effectively.

cheerleading injury prevention

Return to Stunting From the Ground Up

Stunt groups need a progression even when every athlete returns to the same position. Timing and trust can fade during a break. Start with grips, body positions, dips, catches, and verbal cues. Make each athlete explain their job before increasing height or difficulty.

A general stunt return can follow this order:

  1. Ground-level positions and grips
  2. Loading drills and controlled dips
  3. Prep-level skills
  4. Basic extensions
  5. Body positions
  6. Simple transitions
  7. More difficult entries and releases
  8. Dismounts, baskets, and pyramids
  9. Connected stunt sequences
  10. Routine-speed execution under fatigue

This list does not replace your governing rules or credential requirements. Adjust the order for your athletes, division, and legal skills. Do not skip a stage because the group performed the skill last season. Make them show current control.

Repeat skills enough to judge consistency, but do not chase exhaustion. Adding more repetitions can make a shaky skill worse. Stop when timing or technique begins to decline. Return to an easier version and correct the cause.

USA Cheer gives coaches a direct rule for repeated stunt falls. When falls happen too often, return to the previous progression and rebuild the technique. Its National Cheer Safety Month guidance also teaches coaches when to stop trying to save a failing stunt.

Spotters Need Their Own Progression

Coaches often focus on the flyer and bases while treating the spotter as automatic protection. Spotting also requires timing, positioning, attention, and practice. A spotter returning from a break may react late or reach toward the wrong area. That can turn a controlled error into a collision.

Review where spotters stand and what they watch. Practice responses to common failures at low difficulty. Teach when to help lower a stunt and when to move into a controlled catch. Do not introduce difficult releases before the spotters demonstrate readiness.

Avoid assigning an unfamiliar athlete to spot an advanced skill without preparation. Being nearby does not make someone an effective spotter. The athlete must understand the skill, likely failure paths, and required response. Coaches must also follow all applicable spotting rules.

Control Teammate Collisions

The 2026 Pediatrics study found that teammate collisions contributed to 37 percent of concussions and closed-head injuries in its dataset. The study does not prove that floor traffic caused every collision. Many likely occurred during stunts or catches. Coaches should still control every collision risk they can see.

Set clear tumbling lanes and one-way traffic. Separate standing tumbling, running tumbling, and stunt work whenever space allows. Do not let athletes walk across active lanes. Assign a coach to control starts when several groups share the floor.

Stunt groups also need enough room for safe catches and unexpected movement. A stunt that falls sideways should not enter another group’s space. Mark group areas when the floor becomes crowded. Reduce the number of active groups when spacing becomes unsafe.

Music can also hide warnings and verbal cues. Control volume during early stunt progressions. Athletes should hear coaches and teammates clearly. Save competition-level sound for sessions that actually require it.

Rebuild Tumbling in Layers

Start tumbling with shapes, landings, and basic skills that support later passes. Then add standing skills, running entries, connected passes, and routine combinations. An athlete who can throw one skill may not have the endurance for repeated passes. Evaluate both execution and recovery.

Separate current skill ability from previous skill history. Ask athletes to show the progression that leads to the target skill. If the setup, body position, or landing has changed, stay at the easier stage. Do not let pride choose the tumbling plan.

Control the number of passes. More attempts do not always create better training. Repeated poor attempts teach poor timing and increase fatigue. Stop the set when the athlete cannot maintain the required technique.

Use appropriate surfaces and qualified coaches. Follow your program’s rules for spotting and skill level. Never use the return period to rush a new tumbling skill before choreography. Restore existing foundations first.

Delay Full-Outs Until the Routine Parts Are Ready

A full-out combines skill difficulty, repetition, timing, performance, and fatigue. It exposes every weakness that basic drills can hide. Running a full routine too early does not prove toughness. It gives coaches poor information because several failures happen at once.

cheer stunt progressions

Build toward full-outs in stages:

  1. Walk counts and spacing
  2. Mark choreography without major skills
  3. Perform individual sections
  4. Connect two sections
  5. Run the routine with selected skills
  6. Add more difficulty while controlling repetitions
  7. Perform a full routine after every section meets the standard

Do not let a competition date force a full-out before the team is ready. Change the routine, reduce difficulty, or adjust the practice plan. A clean legal routine helps the team more than an ambitious routine that rarely survives practice. The schedule cannot perform the skills for your athletes.

When you begin full-outs, track where technique changes. Note missed grips, short landings, slow timing, and mental errors. Those failures may point to conditioning, skill readiness, or routine design. Do not answer every problem with more full-outs.

A Sample 10-Practice Return Plan

No fixed schedule can fit every team. Use this sample as a planning model, not automatic permission. Athletes must meet each practice goal before moving forward. Repeat or change a stage when the team lacks control.

Practices 1 and 2: Assess and Rebuild Basics

Review recent training, restrictions, and athlete concerns. Evaluate basic movement, landings, motions, jumps, tumbling foundations, stunt grips, and prep-level timing. Keep conditioning controlled and relevant to the planned skills. Do not run full-outs.

Use these sessions to identify groups that need separate progressions. Returning athletes may not start at the same point. Keep notes on consistency, confidence, and fatigue. Plan the next practices from those observations.

Practices 3 and 4: Restore Individual Skills

Add familiar tumbling and stunt skills after athletes demonstrate the required foundations. Keep difficult skills separate instead of connecting long sequences. Rebuild jump technique and basic conditioning. Continue training spotters at every stunt level.

Increase either difficulty or repetition with care. Do not increase both simply because the first practices looked good. Watch how athletes respond during the next session. Delayed soreness or fatigue may change your plan.

Practices 5 and 6: Reconnect Skills

Begin connecting tumbling passes, stunt transitions, jump combinations, and short routine sections. Keep a simpler version available for each difficult sequence. Use it when timing or technique declines. Do not reward athletes for hiding pain or fear.

Start building performance endurance through short sections. Allow enough recovery for athletes to maintain form. Track which section creates the first technical breakdown. That section needs work before the full routine does.

Practices 7 and 8: Add Routine Demand

Connect larger sections and add more routine-speed skills. Test spacing, transitions, communication, and spotter reactions. Continue to limit repetitions that lose quality. A failed section needs correction, not immediate punishment.

You may introduce partial full-outs during this stage. Choose the sections and skills in advance. Do not surprise athletes with added difficulty halfway through the run. Record the results and adjust the next practice.

Practices 9 and 10: Evaluate Full-Routine Readiness

Perform a controlled full routine only when each section meets your stated standard. Reduce difficulty when the team cannot maintain technique under fatigue. One completed full-out does not prove repeatable readiness. Review the run before adding another.

Some teams will reach this stage earlier. Others will need several more practices. The number does not matter as much as the execution. Your athletes should earn progression through current performance.

Need Competition Music Blue 1
first cheer practice after summer

Use Readiness Gates Instead of Dates

A practice number should never provide the only reason to advance. Set readiness gates for tumbling, stunts, jumps, and routine sections. Athletes should know what they must demonstrate. This approach makes your decisions easier to explain.

A readiness gate may require:

  • Several controlled repetitions
  • Legal technique for the athlete’s division
  • Stable timing across the stunt group
  • Safe catches and landings
  • Correct spotter positioning
  • No technique breakdown under normal practice fatigue
  • Athlete confidence without pressure or coercion
  • No conflict with medical restrictions
  • Enough space, mats, and qualified supervision

Choose the number of repetitions that fits the skill and your governing guidance. Do not invent one universal number for every team. A basic prep and an advanced release do not need identical standards. Higher-risk skills demand more evidence.

Document when a group meets each gate. This record helps when athletes miss practice or groups change. It also prevents the coaching staff from advancing one group based on excitement. Use the same standard throughout the team.

Watch What Fatigue Changes

Fatigue often appears first through technique. Bases may bend their arms early, flyers may lose body control, and tumblers may shorten landings. Spotters may drift or react slowly. Athletes may also forget counts that they knew at the start of practice.

Stop and review when several errors appear together. The team may need water, rest, a lower skill, or the end of that section. Do not add punishment conditioning after fatigue causes failures. That response adds load without correcting the original problem.

Ask athletes what changed. They may report fear, pain, poor sleep, or another practice earlier that day. You do not need to accept every explanation without question. You do need accurate information before deciding what happens next.

Record repeated patterns across practices. One difficult session may mean little. The same breakdown at the same point needs attention. Change the practice plan before the problem becomes normal.

Returning After Injury Requires Medical Direction

A coach cannot clear an athlete after injury. Follow the instructions from the athlete’s qualified healthcare professional and your organization. Ask for written restrictions when your policy permits it. Do not guess what “limited participation” means.

Medical clearance also does not require an immediate full-out. Follow the athlete’s prescribed return plan, then rebuild cheer timing within those limits. The healthcare professional controls medical readiness. The coach controls legal skill progressions and team placement.

Do not pressure athletes to return for a competition date. Do not ask parents to find a different medical opinion because the first answer disrupts your lineup. Build an alternate plan and protect the athlete’s long-term participation. The routine can change.

Concussion Return Follows a Separate Process

Do not use the sample 10-practice plan as a concussion protocol. The athlete must receive approval and supervision from a healthcare professional. The CDC uses a six-step return-to-sports progression based on international concussion guidance. Each stage usually takes at least 24 hours.

The athlete advances only when the current stage causes no new symptoms. If symptoms return, the athlete stops and contacts the medical provider. The provider may direct the athlete to return to the previous stage. Coaches do not shorten this process for cheer.

The CDC HEADS UP return-to-sports guidance moves athletes from regular activities through aerobic work, moderate activity, heavy non-contact work, practice, and competition. Cheer coaches must fit sport-specific activity within the provider’s plan. Stunting, tumbling, and full-outs do not belong in the early stages.

Keep the athlete connected with the team when appropriate. They may attend meetings, review video, or help with counts if their medical plan allows it. Do not make the athlete earn their position by ignoring symptoms. Recovery is not a character test.

Communicate the Plan to Parents and Athletes

Explain the return plan before the first practice. Parents should understand why the team will repeat easier skills. Athletes should know that coaches will use current execution to control progression. This message reduces pressure to prove everything on day one.

Tell families how to report pain, restrictions, or concussion symptoms. Give them one contact person and a private communication method. Do not discuss medical information in the team group chat. Share information only with staff who need it.

Explain how missed practices affect progression. An athlete who misses the first four sessions may need an individual assessment. Do not drop them directly into the team’s current stage. The group’s progress cannot prove that athlete’s readiness.

Common Return-to-Cheer Mistakes

Starting Where the Team Finished

Last season’s final routine represents months of training. It does not provide the correct starting point after a long break. Begin below the team’s maximum and move forward through evidence. Familiar skills can still require restored timing.

Using Conditioning as the Entire Return Plan

Conditioning supports cheer skills, but running and bodyweight exercises cannot restore stunt timing. Athletes need gradual sport-specific work. They also need controlled tumbling, landing, spotting, and group practice. General fitness does not replace technical readiness.

Chasing New Skills Too Soon

The return period should restore foundations before introducing major upgrades. New skills can hide problems because everyone expects errors. Familiar skills give you a cleaner view of current control. Add upgrades after the team restores dependable technique.

Letting Strong Athletes Pull the Whole Team Forward

Your most prepared athlete should not control the pace for every group. Athletes return with different training histories and bodies. Split groups when readiness differs. A fast group can progress without forcing another group to follow.

Treating Falls as Normal Repetition

Every stunt group will make errors. Repeated falls tell you that the current progression is not working. Return to the previous skill and correct the cause. Do not keep throwing the same stunt until chance produces one hit.

Advancing Because Competition Is Close

A deadline can guide planning, but it cannot create readiness. Reduce difficulty when the available training time cannot support the original routine. Coaches control routine design. Athletes should not carry the risk of unrealistic choreography.

Frequently Asked Questions About Returning to Cheerleading

How Long Should a Return to Cheerleading Take?

No universal number fits every athlete or team. The length depends on time away, recent training, age, skill level, and current execution. Use readiness gates instead of fixed dates. Medical returns must follow professional instructions.

When Should a Team Start Full-Outs After a Break?

Begin full-outs after athletes demonstrate control in every routine section. They should also maintain technique as fatigue increases. Start with marked routines, sections, and partial runs. Do not use a full-out to discover whether basic skills are ready.

Should Athletes Repeat Skills They Already Mastered?

Yes. Previous mastery does not prove current timing, strength, or consistency. A short progression allows the athlete to demonstrate readiness. Athletes who remain prepared may move through basic stages quickly.

Do Spotters Need Return Training?

Yes. Spotters need current timing, positioning, focus, and knowledge of the skill. Review catches and common failure paths at easier levels. Do not treat a spotter as passive protection. Their actions require preparation.

What Should a Coach Do When an Athlete Reports Pain?

Stop the activity that causes or changes the pain. Follow your school or gym procedures and contact the parent or medical staff when required. Coaches should not diagnose the problem. Medical professionals should control injury evaluation and return instructions.

Can an Athlete Return to Cheer as Soon as Concussion Symptoms Stop?

No. The athlete needs healthcare approval and a supervised, step-by-step return. The CDC progression usually requires at least 24 hours at each stage. Symptoms that return require the athlete to stop and contact the provider. Competition comes only after successful completion of the earlier stages.

Do Not Confuse Familiar With Ready

Your athletes may remember every skill they performed before the break. Their current bodies still need to prove timing, control, strength, and endurance. Start with foundations, watch repeated execution, and advance through clear gates. Move backward when the evidence tells you to.

A slower first week can protect the work that follows. A rushed return can cost far more practice time later. Build the team you have today, then train them toward the team they were before the break.

Steve Pawlyk Signature Full

IPP's Premade Mixes are USA Cheer Compliant and customizable!  Add Sound FX, swap songs, & more!  Add your Team Name to the mix for only $10! 

SLAM artwork
Full_Out_130 mp3 image
1 minute cheer mix
WAKE UP THE FIRE
SLAM artwork
WAKE UP THE FIRE
Full_Out_130 mp3 image
1 minute cheer mix

The summer skills audit: stop choreographing the cheer team you wish you had

cheerleading skills audit before choreography

By Steve Pawlyk

Published June 29, 2026

Every coach has done it.

You look at the team in June or July and imagine what they could become by competition season. The stunt group is close. The tumbling is almost there. The flyer has the body position if she stays tight. The bases can hit it when everyone is fresh. The jumps are not sharp yet, but they will be.

So the routine gets built around the future version of the team…a version that may never show up.

This is where a summer skills audit helps. It forces coaches to separate what athletes can actually hit from what they might hit later. That difference matters before choreography starts, before music gets ordered, and before athletes spend weeks learning a routine that does not fit them.

The goal is not to lower expectations. The goal is to build a routine with clean, realistic skills and smart upgrade paths. Coaches can still push the team. They just need to know which skills belong in the routine now, which skills need more time, and which skills should stay out until the team proves they can handle them.

What is a summer skills audit?

A summer skills audit is a routine-readiness check; not a tryout. It’s not a punishment or a way to embarrass athletes who are behind. It is a coaching tool.

The audit asks one question over and over: Can this team perform this skill safely, cleanly, and consistently enough for choreography?

cheerleading practice plan

A skill that hits once in practice is not ready. A stunt that works only with one perfect group is not ready. A tumbling pass that lands when the athlete feels good but disappears under pressure is not ready. A pyramid section that needs five coach saves before it works is not ready. Summer is when coaches should find that out. Too many routines get choreographed around hope. Hope is fine in a team meeting.  It’s not a routine strategy.

Why coaches overestimate summer skills

Coaches usually do not overestimate their teams because they are careless. They do it because cheer makes almost-finished skills look tempting.

A stunt that hits three times in a row can feel routine-ready. Then the group loses it when they add counts, music, formations, fatigue, and pressure. A tumbler who lands a pass on a dead mat can look ready. Then the pass changes when the athlete has to wait through a transition, run from a new corner, and perform after jumps.

A flyer may hit a body position during drills. Then the same body position falls apart inside a full sequence with choreography before and after it. That’s normal…practice skills and routine skills are not the same thing. A summer skills audit closes that gap. It asks athletes to prove the skill in conditions that look more like the routine.

The 8-out-of-10 rule

A clean routine needs skills that repeat. For most teams, a useful standard is simple: if a skill does not hit cleanly at least 8 out of 10 times in practice, it should not be locked into choreography yet. That doesn’t mean the team stops training it. It means the coach treats it as an upgrade, not a foundation.

Use 3 categories:

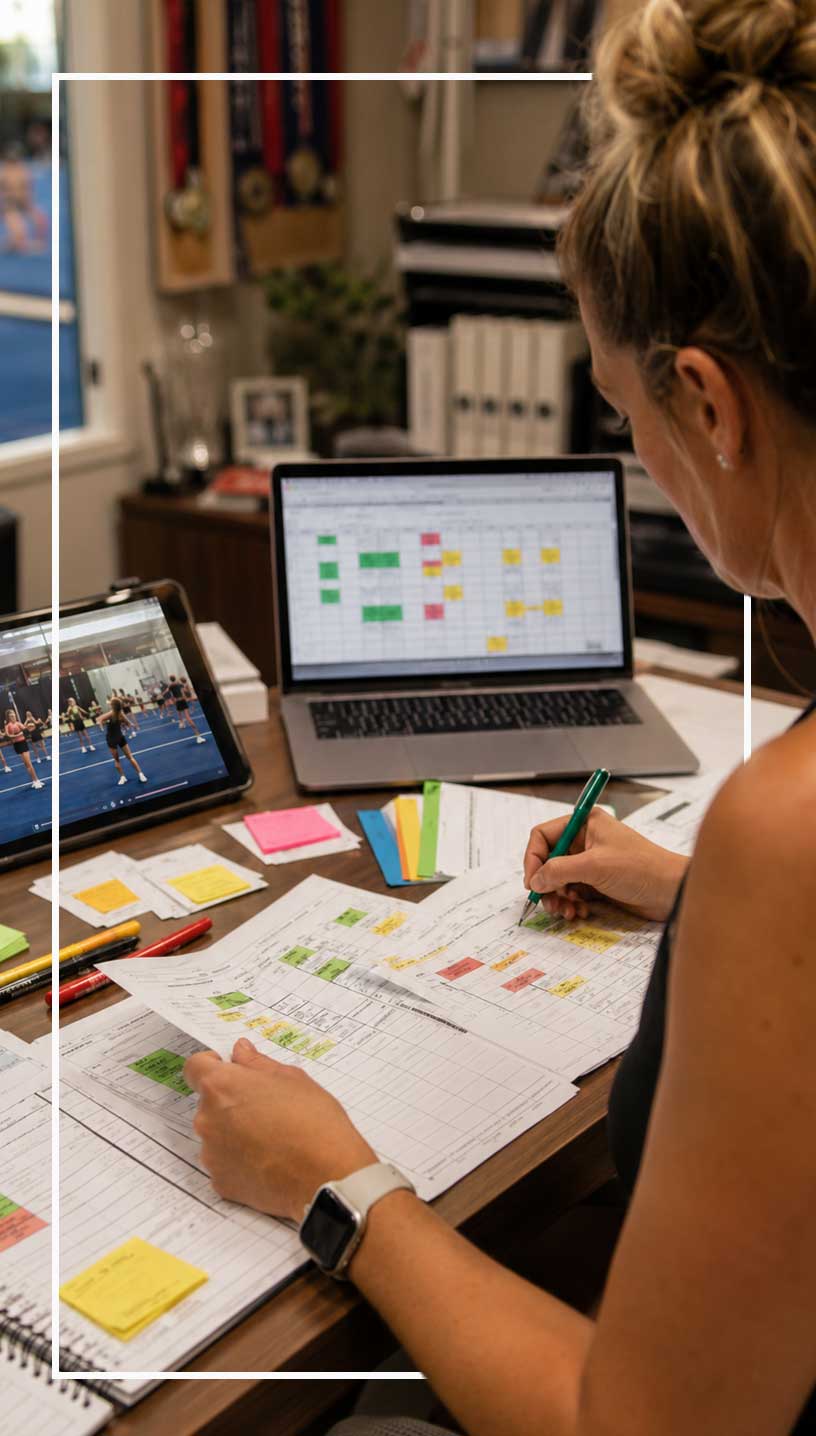
Green skills are ready. They hit most of the time. Athletes understand the timing. Coaches do not have to stop practice every time the skill appears. The skill can handle counts, music, and pressure.

Yellow skills are close. They hit sometimes, but they still need help. Timing changes. Technique slips. Groups need extra resets. These skills may work in a routine if the coach builds a backup plan.

Red skills are not ready. They miss too often, need heavy spotting, create safety concerns, or only work when conditions are perfect. Red skills belong in training, not choreography.

The categories should stay flexible. A yellow skill can become green. A green skill can become yellow when the team adds movement or music. The audit is not a one-day verdict. It is a way to keep the routine honest.

Need Competition Music Blue 1

Audit stunts first

Stunts deserve the first audit because they take the most time to fix after choreography. A shaky stunt section does not stay isolated. It affects formations, transitions, pyramid timing, music pacing, athlete confidence, and the rest of practice. If a coach builds the routine around stunt skills that are not ready, the team spends the whole season chasing the routine instead of cleaning it.

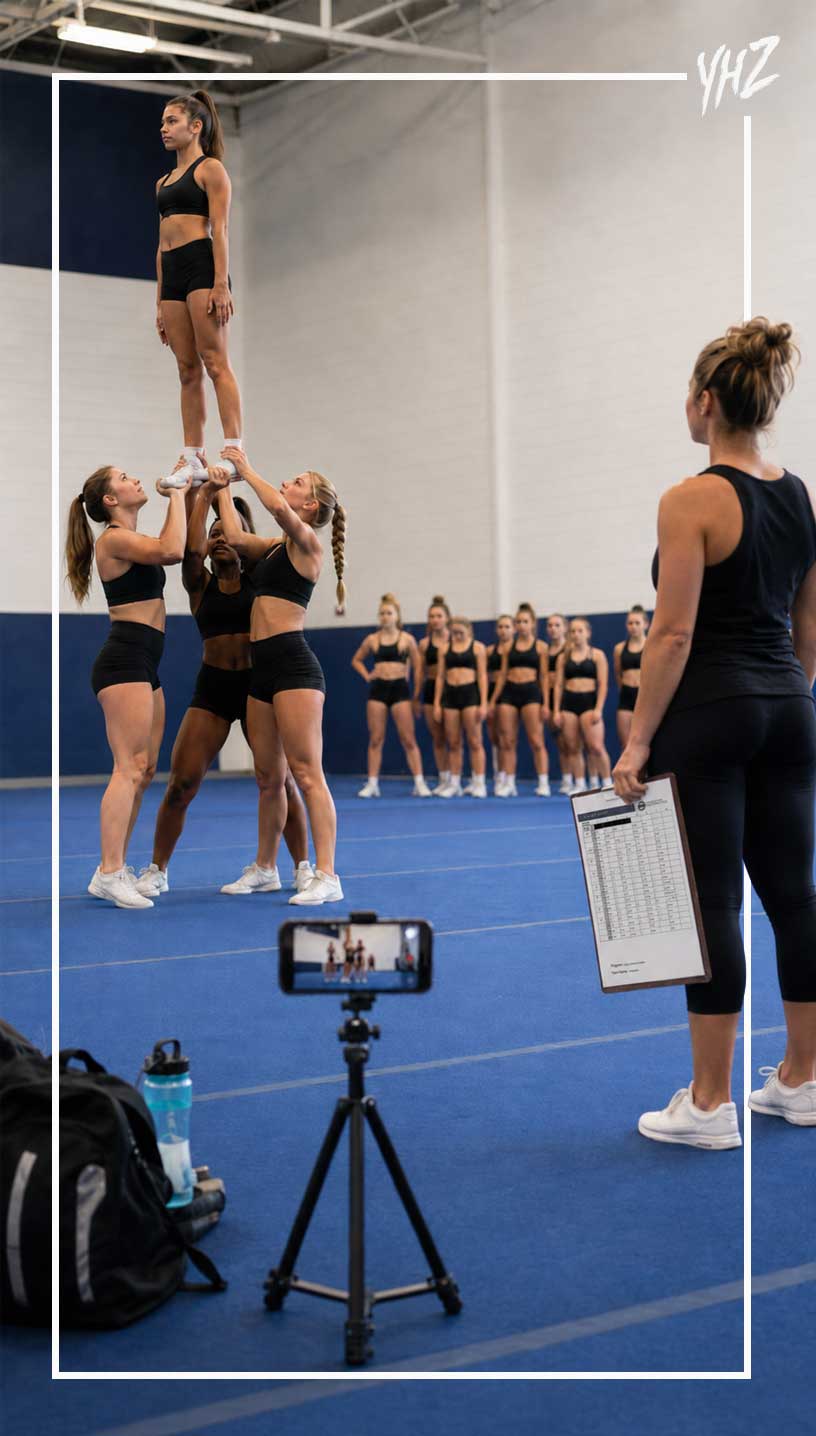
Start with each stunt group by itself. Ask the group to perform the skill ten times. Track clean hits, shaky hits, missed grips, late dips, unstable body positions, rough dismounts, and coach saves. Don’t count a skill as clean just because nobody fell.

A clean hit should look controlled. The flyer should show the intended body position. Bases should stay under the stunt. The back spot should not rescue every rep. The dismount should land safely. Athletes should know where they go next.

Then test the skill in motion. Add the entrance. Add counts. Add the transition before it. Add the transition after it. Add nearby groups. Add music when possible.

This is where the truth usually shows up. A stunt that looks good in isolation may not survive the routine. That does not make the skill useless. It tells the coach where the skill belongs.

Maybe it stays in training. Maybe it moves later in the routine. Maybe it gets simplified. Maybe only one group performs it. Maybe it becomes an upgrade after the first competition. That decision is easier in July than October.

summer skills audit

Do not let one strong stunt group trick you

One strong group can make a team look more advanced than it is. That group hits the elite skill. Everyone gets excited. The routine gets built around that level of difficulty. Then the other groups spend months trying to catch up.

This is a bad trade.

Competition routines are judged as full-team products. If one group looks great and two groups fight for survival, the routine does not look strong. It looks uneven. The summer skills audit should judge the team, not the best group.

If only one group can hit the skill, the coach has a choice to make. Feature that group intentionally, or choose a skill the full section can hit. Both choices can work. Pretending the whole team owns the skill does not work.

A clean stunt section with slightly lower difficulty will usually age better than a high-difficulty section that scares everyone in the gym.

Audit tumbling under routine conditions

Tumbling is another place where coaches overcount skills.

An athlete may have a pass. That does not mean the pass belongs in the routine.

Test tumbling in the way the routine will use it. If the athlete has to run from a corner, test that corner. If the pass comes after jumps, test it after jumps. If the pass comes after a long transition, test it after movement. If the athlete has to wait on music, test the timing.

A tumbling pass should not count as routine-ready until the athlete can land it with the same setup they will use in the routine.

Coaches should also separate technical readiness from performance readiness.

A pass may be legal and land safely, but still look messy. Bent legs, low chest, uncontrolled rebounds, and scary landings can hurt the routine. They can also make the athlete less confident over time.

Some passes need more training. Some need a different placement. Some need to come out until the athlete can hit them without the whole section holding its breath.

That is not negative coaching. That is good routine design.

Audit jumps without lying to yourself

Jumps often get treated as a small section. They should not.

A weak jump section can make a polished routine look unfinished fast. Bent knees, low height, loose arms, bad timing, and messy landings are easy to see. Judges do not need replay to notice them.

A summer jump audit should test three things: technique, timing, and recovery. Technique asks whether the jumps have the shape the coach wants. Timing asks whether the team can hit together. Recovery asks whether athletes can land and move into the next skill without falling apart.

That last part matters. Many jump sections look acceptable until the team has to tumble, transition, or stunt immediately after. If the jumps drain the athletes so much that the next section suffers, the coach needs to know that now.

Do not build the jump section around the one athlete with great flexibility. Build it around what the team can hit together. Clean, synchronized jumps usually beat ambitious jump combinations that land like popcorn.

cheer routine planning

Audit pyramids in pieces

Pyramids can fool coaches because small pieces may work even when the full structure is not ready. Start with the parts.

Can each group hit its job? Can the bracers stay connected? Can flyers maintain body positions? Can bases move safely? Can the team hit the timing without a coach talking them through every count? Then connect the pieces.

This is where pyramid problems usually appear. Groups that hit alone may not travel well. Bracers may arrive late. Flyers may look unsure. Transitions may take more counts than expected. The pyramid may technically hit, but the visual may not read from the front.

The audit should include a front-view check. Record the pyramid from the judges’ angle and watch it without sound. If the visual does not make sense on video, music will not fix it. Pyramid difficulty should serve the routine. It should not become a maze the team barely survives.

Audit transitions like skills

Transitions are skills. Coaches do not always treat them that way, but they should.

A transition needs timing, spacing, body control, traffic awareness, and performance quality. Bad transitions make strong skills look worse. They also create avoidable stress for athletes.

During the summer audit, coaches should identify the athletes who struggle with spacing, speed, direction changes, and formation responsibility. That information should shape choreography.

Some teams can handle fast, layered transitions. Some teams need cleaner pathways and simpler movement. Some teams need extra counts because they have younger athletes, mixed experience levels, or big formation changes. That does not mean the routine has to feel slow. It means the routine has to move in a way the team can execute.

A coach who ignores transition skill level will end up cleaning the same traffic problems all season.

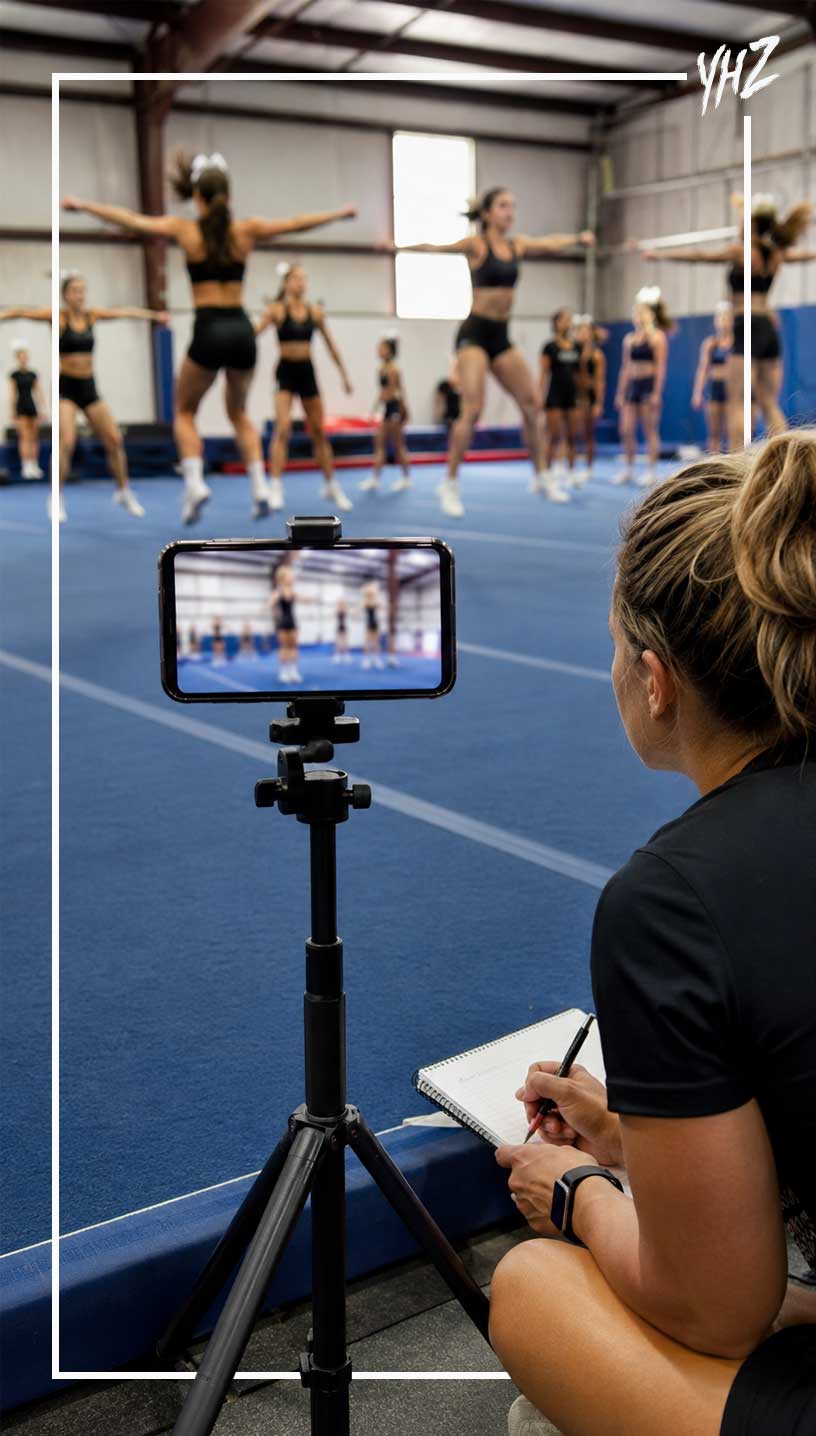
Film everything

Video makes the audit harder to argue with.

Athletes often feel like a skill hit because they survived it. Coaches may remember the best rep because it was exciting. Parents may hear that a skill is close and assume it should go in the routine.

Film solves a lot of that.

Record stunt reps, tumbling passes, jump sections, pyramid pieces, and short routine-style sequences. Watch them from the front. Watch them without stopping after the first hit. Watch the misses too.

The camera shows what the judges will see.

It also helps coaches spot patterns. Maybe a stunt group misses every time the flyer rushes the body position. Maybe a tumbler changes technique when tired. Maybe the jump timing problem starts with the arms, not the legs. Maybe the transition looks messy because two athletes cross the same lane.

Those details are easy to miss live.

A summer skills audit does not need fancy software. A phone camera and honest eyes are enough.

summer skills audit

Create a no-drama scoring system

A skills audit can get emotional if athletes think every result is a judgment of their worth. Keep the language clean.

Do not label athletes as good or bad. Label skills as ready, close, or still training. That distinction matters.

A flyer is not a problem because one body position is inconsistent. A base is not a failure because one grip needs work. A tumbler is not behind as a person because one pass is not routine-ready.

The audit should help athletes see the path forward.

Use simple notes:

Ready for routine
Needs more reps
Needs technique fix
Needs safer version
Use only in featured spot
Train as upgrade
Do not use yet

That kind of language gives coaches useful information without turning the audit into a public ranking.

Build the routine with a base version and upgrades

The smartest coaches do not choose between easy and hard. They build layers.

Start with a base routine the team can hit. Then plan upgrades that can replace sections when the team earns them.

For example, a stunt group may start with a cleaner prep-level body position, while training the extended version as an upgrade. A tumbling section may start with the passes athletes can land under pressure, while keeping harder passes ready for later. A pyramid may use a safer connection first, then add a harder visual once timing improves. This approach gives the team confidence early.

It also keeps the routine from becoming stale. Athletes can work toward upgrades without feeling like the first version is a failure. The base version should still look intentional. It should not look like a watered-down placeholder. It should be choreographed to score as cleanly as possible.

If the upgrade never becomes safe or consistent, the team still has a routine. That is the point.

Set deadlines for routine decisions

A skill cannot stay “almost ready” forever. Coaches need decision deadlines. Without them, the team keeps waiting for skills that may not arrive in time.

Set a date before choreography when each major skill must prove itself. Set another date after choreography for upgrades. Set a final date before the first competition when the coach stops adding risk and starts cleaning.

The exact timeline depends on the program, but the principle stays the same. At some point, a skill either belongs in the routine or it does not. This protects the team. It also protects practice time.

A team that changes major routine sections too late loses cleaning reps. Athletes get nervous. Coaches get frustrated. Music edits pile up. The routine starts to feel temporary. Temporary routines do not perform with confidence.

cheerleading tumbling audit

Watch for the “one more week” trap

“Give it one more week” can become a season-long habit. Sometimes one more week makes sense. A group may need reps. An athlete may be coming back from vacation. A stunt may need one technical fix. But coaches should ask what will actually change in that week.

Will the team get more reps with the full group present? Will a coach fix a specific technique problem? Will the athlete get private tumbling work? Will the group drill the entry that keeps breaking?

If the answer is no, one more week may only delay the decision. Hope is not a training plan.

When a skill stays inconsistent after repeated chances, the coach should move it out of the routine and keep training it separately. That choice may feel disappointing in the moment. It usually saves the routine later.

Match skills to the team’s identity

The summer audit should not only ask what the team can do. It should ask what the team can sell.

Some teams are explosive. Some are sharp and clean. Some have strong stunt technique. Some have big personalities. Some have excellent dancers. Some have powerful tumbling but need simpler transitions. Some have young athletes who perform better when the routine is clear and confident. The routine should fit that reality.

Do not build a routine that hides the team’s best qualities because everyone is chasing difficulty. Use the audit to find what the team can own.

If the team has strong jumps, give the jump section a real moment.

If the team has one standout tumbler, feature that pass without forcing everyone else into skills they cannot match.

If the team performs well, give them music and choreography that let them connect with the crowd.

If the team has clean stunts, do not bury them inside overcomplicated transitions.

A good routine makes the team look more like itself. A bad routine makes the team look like it is pretending.

Use the audit to guide music and count sheets

The skills audit should feed directly into the count sheet.

If the team needs extra time for stunt setups, the count sheet should show that. If a transition needs more room, plan the counts before the music gets built. If the pyramid has one major visual, make sure the music supports that moment. If jumps need a clean recovery before tumbling, do not cram the next section too close.

Music cannot solve a routine that ignores skill readiness. A producer can help with pacing, energy, voiceovers, sound effects, and section changes. But the coach has to know what the team can actually execute.

The audit gives the music producer better information. It also helps the choreographer make smarter choices. This is where planning pays off. The routine feels less forced because the counts, skills, and music all come from the same honest picture of the team.

What to do when parents push for harder skills

Parents hear what their athlete says. Athletes often say the skill is close. That can create pressure.

A parent may ask why a stunt is not in the routine. An athlete may say they hit it at practice. Another parent may compare the team to a rival program. Someone may post a video of one successful rep and wonder why the coach will not use it. This is where the audit helps.

The coach can explain that routine decisions come from consistency, safety, and full-team execution. One hit does not decide choreography. Ten reps tell a better story. Routine conditions tell an even better one. Keep the message simple.

The team will train upgrades. The routine will use the skills that give the team the best chance to hit. The goal is not to avoid difficulty. The goal is to earn it.

Most parents can understand that when the coach explains it before emotions take over.

A sample summer skills audit plan

Coaches can run a basic audit in one or two practices. Start with stunts. Test the main skills each group wants to use. Track clean hits out of ten. Add entries and exits after the first round.

Move to tumbling. Test standing tumbling and running tumbling from routine-style setups. Record landings, timing, and consistency.

cheer tumbling readiness

Run jumps as a group. Check height, timing, arm placement, landings, and recovery into the next section. Break down pyramid pieces. Test each group, then connect sections. Film from the front.

Finish with transitions. Give athletes formation changes and watch spacing, speed, and confusion points. After practice, sort the results into green, yellow, and red.

Then make routine decisions from that list.

Green skills can go into the first choreography plan.

Yellow skills need backup versions.

Red skills stay in training until they prove they are ready.

The audit does not need to be complicated. It needs to be honest.

The coach’s real job

Cheer coaches live between ambition and reality. Push too little, and the team never grows. Push too much, and the routine becomes a weekly emergency.

The summer skills audit helps coaches find the middle. It gives athletes room to improve without letting unfinished skills take over the routine. It helps choreographers build around truth. It helps music producers support the routine instead of guessing. It helps parents understand why consistency matters more than one good video.

Most of all, it protects the team from spending the season chasing a version of itself that only exists in the coach’s imagination.

Build for the team in front of you.

Train for the team they can become.

Those are different jobs. Good coaches know when they are doing each one.

Steve Pawlyk Signature Full

IPP's Premade Mixes are USA Cheer Compliant and customizable!  Add Sound FX, swap songs, & more!  Add your Team Name to the mix for only $10! 

SLAM artwork
Full_Out_130 mp3 image
1 minute cheer mix
WAKE UP THE FIRE
SLAM artwork
WAKE UP THE FIRE
Full_Out_130 mp3 image
1 minute cheer mix

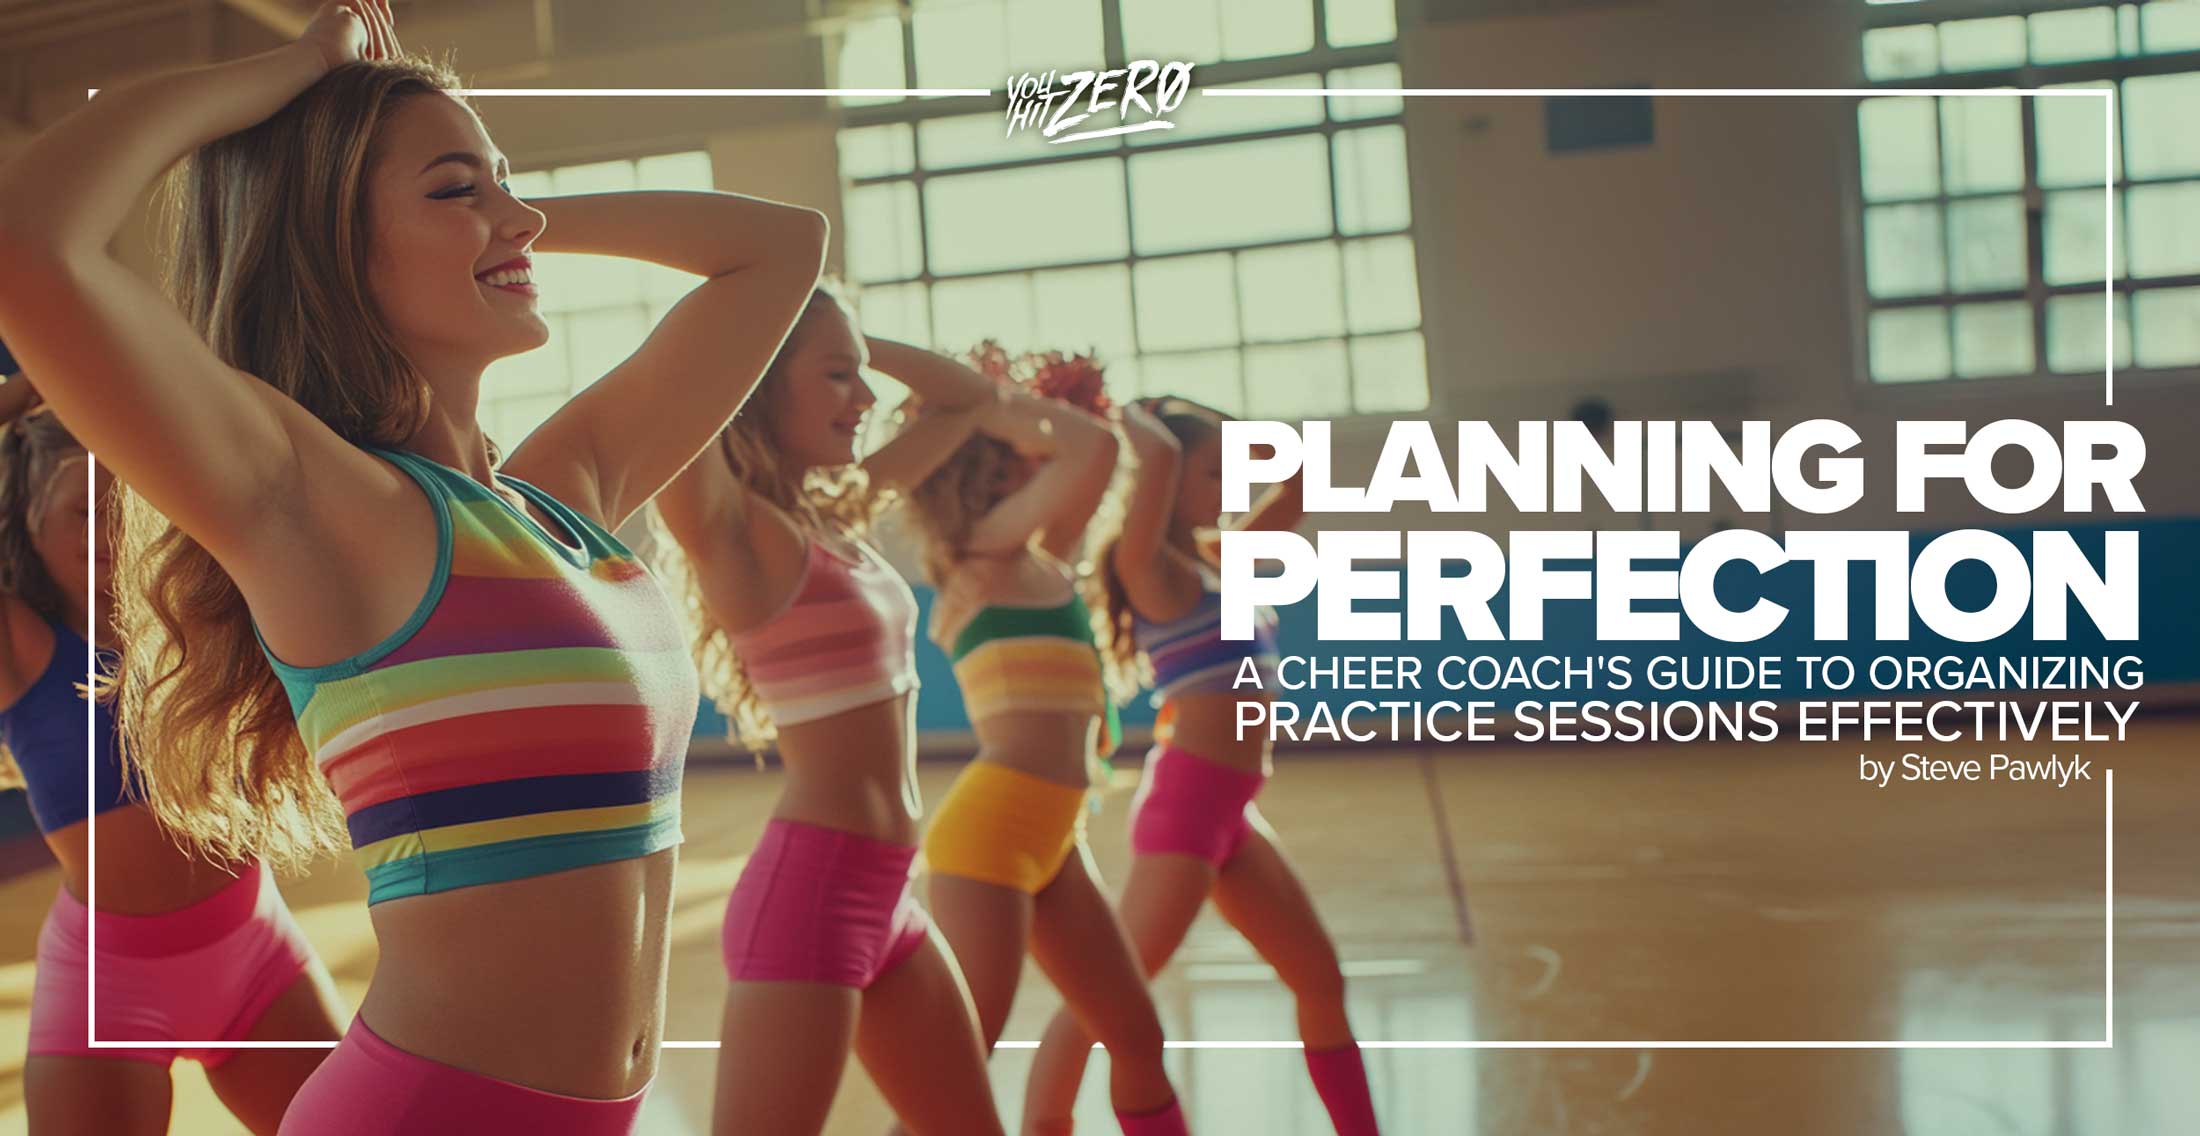
Planning for Perfection: A Cheer Coach’s Guide to Organizing Practice Sessions Effectively

Cheer Coachs Guide to Organizing Practice Sessions Effectively

By Steve Pawlyk

Published November 5, 2024

Organizing a productive cheer practice requires careful planning to ensure every minute is used to advance the team’s skills, conditioning, and confidence. With the right structure, coaches can help their teams not only perform at their best but also keep athletes motivated and engaged. Below is a step-by-step guide to planning an efficient cheer practice session from start to finish, complete with practical examples.

Step 1: Pre-Practice Preparation

Set Clear Objectives: Before practice even begins, define specific goals for the session. These can range from mastering a specific stunt sequence to improving synchronization in a dance routine. For example, if today’s focus is perfecting a pyramid, make that your main objective and communicate it to your athletes. Clarity ensures everyone is on the same page and working towards the same goal.

Create a Detailed Practice Plan: Write down the agenda and break the practice into blocks of time. Having a clear plan minimizes wasted time and helps you stay on track. Consider using a whiteboard or a shared document app (like Google Docs) that both coaches and athletes can access, ensuring everyone knows what to expect. Here’s an example:

  • Warm-Up: 10 minutes
  • Stretching and Conditioning: 15 minutes
  • Tumbling Drills: 20 minutes
  • Stunt Rehearsal: 30 minutes
  • Routine Run-Throughs: 20 minutes
  • Cool-Down: 5 minutes

Being flexible is also key—having a 2-3 minute buffer for each section will help adapt if needed.

Step 2: Start with Warm-Ups (10-15 minutes)

Dynamic Warm-Up: Start with a warm-up that not only prepares athletes physically but also keeps them engaged. Consider incorporating games like relay races or “Follow the Leader” to make it interactive and fun.

Example Warm-Up Routine:

  • High Knees: 1 minute
  • Butt Kicks: 1 minute
  • Arm Circles and Swings: 1 minute
  • Relay Race: 2 minutes

Adding these elements makes the warm-up less repetitive and helps build team spirit, which is essential for a strong group dynamic.

Step 3: Stretching and Conditioning (15 minutes)

Stretching: Flexibility is crucial in cheerleading. Utilize a progression approach to stretching:

  • Beginner Stretch: Start with hamstring stretches while seated on the floor.
  • Advanced Stretch: Move on to partner-assisted splits to push flexibility further.

Conditioning: Conditioning builds the strength needed for stunts and tumbling. To make conditioning more fun, turn it into a game. For instance, do “Last Athlete Standing” for wall sits, where athletes challenge each other to hold the wall sit as long as possible. Example conditioning exercises include:

  • Progressive Planks: Start with regular planks, then progress to shoulder tap planks or one-arm planks.
  • Wall Sits: Turn them into a friendly competition to motivate everyone.
Need Competition Music Blue 1

Step 4: Skill Drills (20-30 minutes)

Tumbling Drills: Break down tumbling into manageable progressions and set up multiple stations. For example:

  • Station 1: Spotted drills for back handsprings.
  • Station 2: Flexibility practice using resistance bands.
  • Station 3: Tumbling passes on mats.

Stunt Drills: Focus on the key components of each stunt. Break it down into entry, execution, and dismount:

  • Entry Practice: Use colored markers on the floor to indicate where each base and flyer should stand, making entries quick and precise.
  • Execution Practice: Ensure flyers hit sharp positions and bases maintain stability.
  • Dismount Practice: Focus on cradle drills to develop timing and proper catching technique.

Rotating through stations keeps athletes engaged and helps minimize downtime.

Step 5: Routine Run-Throughs (20 minutes)

Sectional Practices: Instead of running the entire routine repeatedly, focus on breaking it into sections and practice each part separately. Start at half-speed, then progress to full speed to ensure every athlete understands the timing and flow.

Full Routine Run-Through: After sectional work, conduct a full routine run-through with music. Assign one athlete as the “spotlight” for each run-through, rotating this role to ensure everyone gets personalized feedback. Recording these run-throughs for later analysis helps athletes visualize where improvements are needed.

Step 6: Cool-Down (5-10 minutes)

Static Stretching: Use static stretches to relax muscles, prevent soreness, and improve flexibility. Hold each stretch for at least 30 seconds, focusing on key muscle groups used throughout practice.

Team Reflection: Use this time to reflect on the practice. Highlight successes, identify areas for improvement, and encourage athletes to share their thoughts. This helps build communication and keeps everyone motivated.

Step 7: Post-Practice Review

Coach’s Notes: After practice, jot down observations to tailor future sessions. For instance:

  • Goal Achieved: The pyramid sequence was performed with clean transitions.
  • Focus for Next Practice: Spend more time on tumbling synchronization and flyer body control during stunts.

Keeping these notes will help you adjust and create effective practices in the future.

Practical Tips for Maximizing Practice Efficiency

  1. Use Timers: Keep a timer handy to stick to your schedule and maintain efficiency. Set a timer for each drill to prevent overspending time on one activity.
  2. Station Work: Set up stations for different drills—like tumbling, flexibility, and stunting—so that athletes can rotate every 10 minutes. This reduces waiting time and keeps everyone engaged.
  3. Assistant Coaches or Leaders: Utilize assistant coaches or experienced athletes as small group leaders. This allows for more individual attention and faster progression.
  4. Adapt Based on Energy Levels: If the team seems fatigued, spend more time on stretching or less intense skills to prevent injury and maintain morale.

Sample Practice Schedule

  • 5:00 – 5:10 PM: Warm-Up (Dynamic stretches and cardio)
  • 5:10 – 5:25 PM: Stretching and Conditioning (Static stretches, planks, wall sits)
  • 5:25 – 5:55 PM: Skill Drills (Tumbling and Stunt Progressions)
  • 5:55 – 6:15 PM: Routine Sectional Practice (Focus on transitions and timing)
  • 6:15 – 6:35 PM: Full Routine Run-Through and Video Review
  • 6:35 – 6:45 PM: Cool-Down and Team Reflection

Effective cheer practice planning is all about making sure each minute is used with purpose. By setting clear objectives, breaking down skills, utilizing drills, and ensuring proper pacing, coaches can help their athletes progress efficiently throughout the season. Remember that every practice builds towards competition day, so a well-structured practice plan can be the difference between a good routine and a great one. With the strategies above, your team will be ready to shine on the mat.

Steve Pawlyk Signature Full

IPP's Premade Mixes are USA Cheer Compliant and customizable!  Add Sound FX, swap songs, & more!  Add your Team Name to the mix for only $10! 
SLAM artwork
Full_Out_130 mp3 image
1 minute cheer mix
WAKE UP THE FIRE
SLAM artwork
WAKE UP THE FIRE
Full_Out_130 mp3 image
1 minute cheer mix

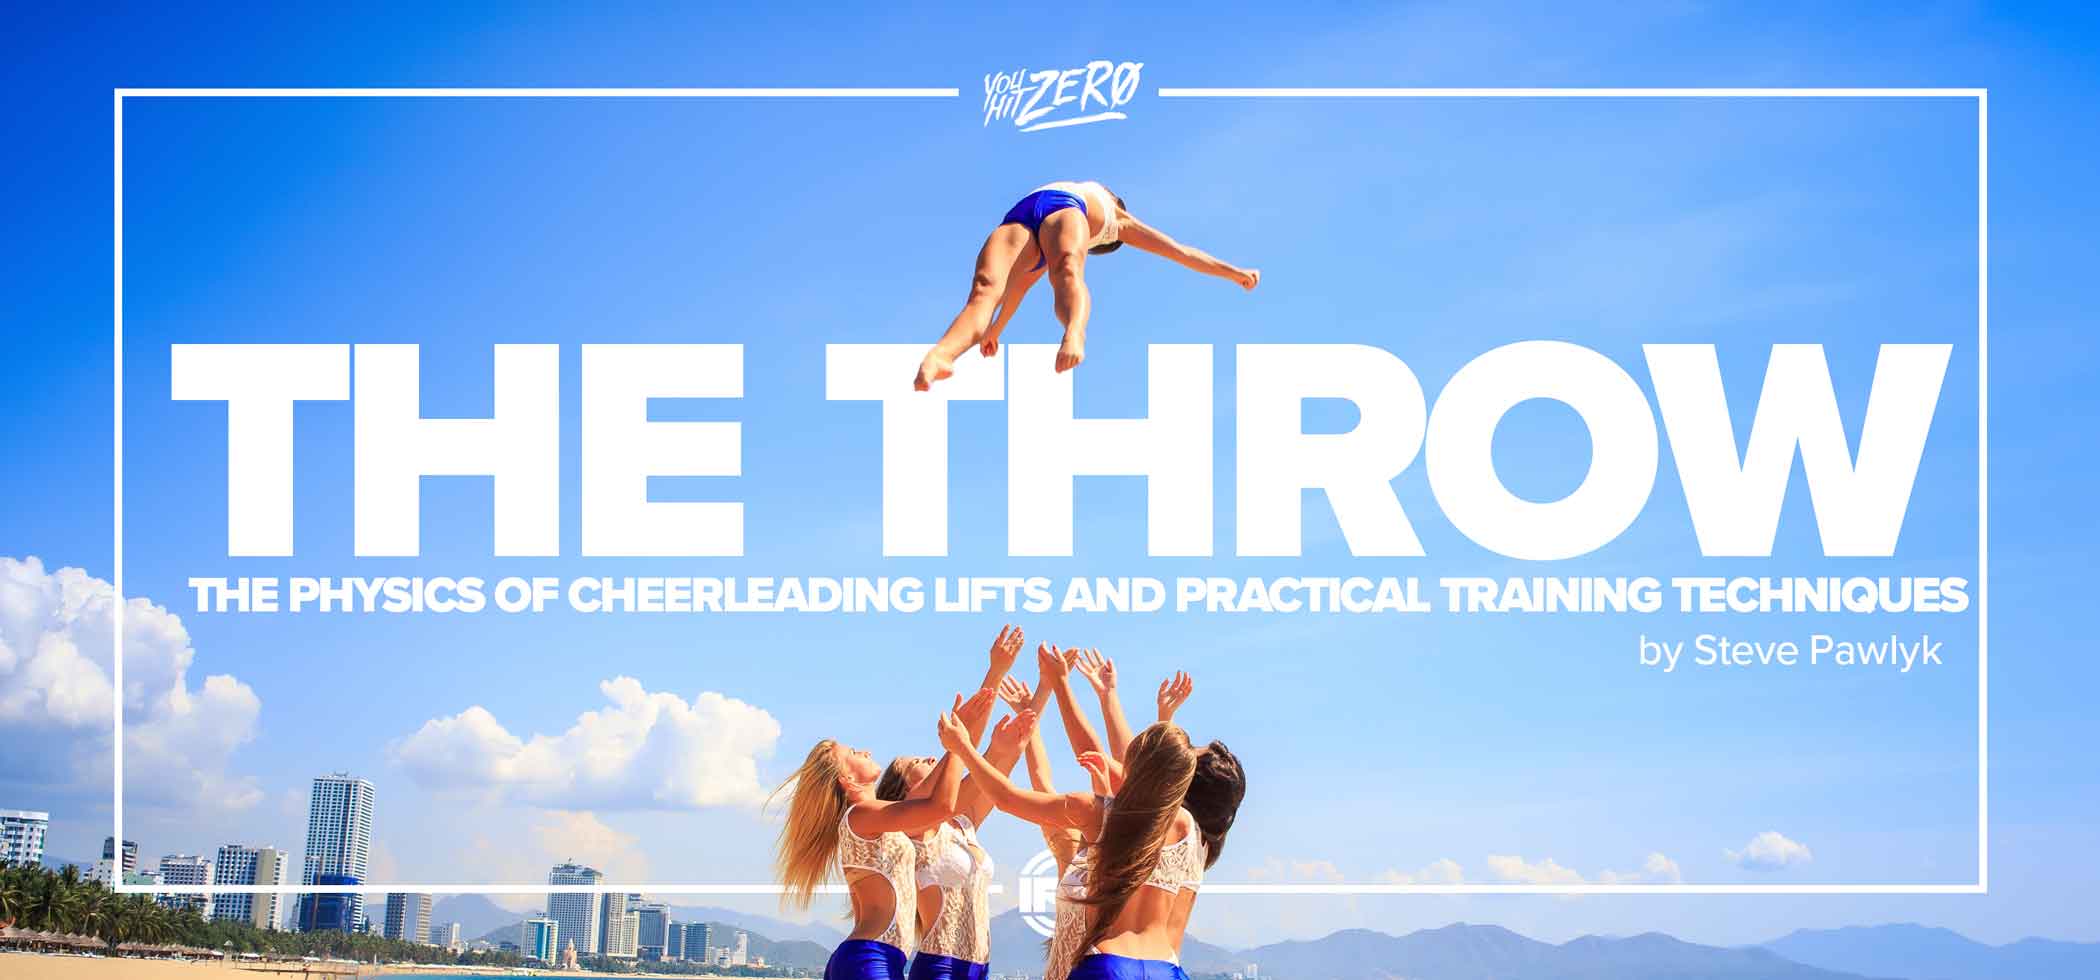
The Throw: The Physics of Cheerleading Lifts and Practical Training Techniques

The Throw The Physics of Cheerleading Lifts and Practical Training Techniques tips

By Steve Pawlyk

Published November 17, 2023

The captivating moment when a cheerleader is launched into the air during a stunt is the result of a precise application of physics principles between the base and the flyer. Understanding the mechanics behind this can vastly improve technique, safety, and performance. This article dives deep into the physics of the cheerleading throw and offers practical methods for coaches to enhance the training of their athletes.

The Fundamentals of Physics in Cheer Throws

Before delving into the training methods, it’s crucial to comprehend the basic physics at play. The throw involves concepts of force, energy, momentum, and angular momentum. Here, we’ll break down these principles and explain how they work in unison to execute a flawless lift.

Optimizing Force and Energy Transfer

The success of a throw hinges on the efficient transfer of energy from the base to the flyer. We will discuss how bases can optimize their application of force to maximize the height and stability of the throw, focusing on the timing, angle, and the explosive power needed.

The Technique Behind Momentum

Momentum is the product of mass and velocity and is conserved in the closed system of a base and flyer. Coaches can use drills to teach bases how to effectively transfer linear momentum to the flyer, ensuring a vertical lift that makes for an impressive stunt.

The spectacle of a cheerleader soaring gracefully through the air is a testament to the strength, timing, and precision cultivated through rigorous training. Strength and conditioning, drill repetition, and the correct application of force are the pillars of an effective cheer throw. This article will expand on these components to provide a comprehensive guide for cheerleading coaches aiming to refine the explosive power and synchronicity of their squad’s lifts.

Building a Foundation with Strength and Conditioning

The prowess of a cheerleading base begins with a robust foundation of physical strength, particularly in the legs and core. This is crucial for two reasons: it provides the power needed for a strong lift-off and ensures the stability required to support and control the throw. Here are key exercises to incorporate into a cheerleader’s regimen:

Need Competition Music Blue 1
  • Squats and Deadlifts: These compound movements are excellent for building leg strength. They mimic the lifting action of a cheer throw, engaging the quadriceps, hamstrings, and gluteal muscles.
  • Plyometrics: Exercises like box jumps and jump squats train fast-twitch muscle fibers, essential for the explosive power needed in a lift-off.
  • Core Workouts: Planks, Russian twists, and hanging leg raises build the core stability that bases need to maintain balance and control during a throw.

Perfecting the Art through Drill Repetition

Drill repetition is about creating muscle memory so that each movement becomes second nature, allowing for flawless execution during the high pressure of performances. Repetitive practice drills that focus on timing and coordination are vital:

  • Simulated Throws: Practice the motion of throws without the flyer to perfect the base’s technique and build endurance.
  • Timing Drills: Use metronomes or music to cue bases on when to initiate and release the throw, training them to act in unison.
  • Coordination Exercises: Group exercises where bases lift objects in sync can improve the collective coordination needed for synchronized throws.

The Science of Force Application

Teaching bases how to uniformly and directionally apply force can make the difference between a mediocre and a spectacular stunt. The uniform application of force ensures the flyer’s safety and the stunt’s success. Here are strategies to enhance this skill:

  • Directional Drills: Use targeted exercises to train bases on applying force in a consistent direction, which is often vertical for maximum height.
  • Resistance Training: Implement resistance bands or light weights to simulate the resistance a base feels when lifting a flyer.
  • Consistent Practice with Flyers: There’s no substitute for the real thing. Regular practice with flyers allows bases to adjust their force application in real-time, attuning to the flyer’s weight and movement dynamics.

Integrating Training into Routine Workouts

Incorporating these elements into a routine workout can lead to significant improvements:

  • Circuit Training: Create a circuit that includes leg and core strength exercises, plyometrics, and drill repetitions for a comprehensive workout.
  • Progressive Overload: Gradually increase the intensity and complexity of exercises to continuously challenge the athletes and promote strength gains.
  • Recovery and Mobility: Incorporate adequate rest and mobility work to prevent injury and ensure that athletes can perform movements with full range of motion.

Safety First: Ensuring a Secure Practice Environment

No discussion of cheerleading technique would be complete without a strong emphasis on safety. This section will cover the essential safety measures coaches must enforce, from proper spotting to ensuring that all stunts are practiced with mats and in a suitable environment.

Cheerleading throws are a complex blend of artistry and physics. By applying these principles in a structured training regimen, coaches can elevate their athletes’ performance and safety. This article serves as a guide to the scientific and practical aspects of cheerleading throws, providing coaches with the knowledge and tools to refine their team’s stunts to perfection.

Steve Pawlyk Signature Full

IPP's Premade Mixes are USA Cheer Compliant and customizable!  Add Sound FX, swap songs, & more!  Add your Team Name to the mix for only $10! 

SLAM artwork
Full_Out_130 mp3 image
1 minute cheer mix
WAKE UP THE FIRE
SLAM artwork
WAKE UP THE FIRE
Full_Out_130 mp3 image
1 minute cheer mix

Optimizing Gym Workouts for Cheerleading Back Spots

Gym Workouts for Cheerleading Back Spots

By Steve Pawlyk

Published November 14, 2023

Transitioning to the role of a back spot in cheerleading presents unique physical demands that go beyond general gym knowledge. Understanding the specific strength and conditioning needed can enhance performance and prevent injury. In this article, we explore targeted exercises that align with the skills required for back spotting, ensuring you’re not only gym-strong but also mat-ready.

Body:

The Role of a Back Spot:

A back spot is pivotal for the stability and safety of stunts. While there are similarities with one-man stunting, including the need for upper body strength and coordination, the back spot’s role is distinct in its requirements for balance, timing, and the ability to support and lift flyers.

Gym Exercises for Back Spots:

To prepare for this role, a comprehensive workout routine that includes the following exercises is recommended:

  • Pull Exercises:
    • Pull-Ups/Chin-Ups: These exercises strengthen the lats, biceps, and grip, which are essential for holding and lifting a flyer.
    • Rows: Both barbell and dumbbell rows will develop the back muscles necessary for maintaining stunt stability.
    • Deadlifts: They target the posterior chain, providing the foundational strength needed for lifting and supporting weight.
  • Core Stability Workouts:
    • Planks: To develop endurance in the core muscles.
    • Russian Twists: These will build rotational strength, important for adjusting and stabilizing stunts.
  • Leg Strength and Power:
    • Squats: Fundamental for developing leg strength to lift and support flyers from below.
    • Box Jumps: To enhance explosive power, which is vital for quick movements during stunts.
Need Competition Music Blue 1

Balanced Training Approach:

Training as a back spot in cheerleading requires a well-rounded fitness regime that not only builds muscle but also promotes harmony and balance in the body. This means integrating a mix of push and pull exercises into your workout routine. Push exercises, like push-ups and overhead presses, develop the chest, shoulders, and triceps, which are crucial for motions like hand-offs and extensions. Pull exercises, on the other hand, such as those suggested in the commenter’s advice—like rows and pull-ups—strengthen the back, biceps, and forearms, essential for the act of catching and stabilizing flyers.

Why is this balance important? Overemphasis on push movements without adequate pull exercises can lead to muscle imbalances, which in turn may cause poor posture—rounded shoulders, a forward head position—and increase the risk of injuries due to overuse of certain muscle groups. A balanced approach ensures that opposing muscle groups are equally strong, promoting better posture and more effective force generation, which is essential when you’re the foundation of a stunt.

In addition to muscular balance, incorporating flexibility training into your regimen is non-negotiable. A back spot must have a full range of motion to perform the intricate movements required in cheerleading. Flexibility exercises, like dynamic stretching and yoga, can enhance muscle elasticity, which allows for deeper squats, higher lifts, and more controlled catches. These exercises also aid in recovery and help prevent injuries by allowing muscles to work more effectively.

The Backbone of Cheer Stunts:

As the backbone of cheer stunts, the back spot’s role is as much about power and precision as it is about being the central point of stability and safety. Your training should, therefore, reflect the multifaceted nature of your role. This means focusing on developing the raw strength needed to lift and support flyers but also the stability to manage dynamic movements and the nuanced ability to adjust to the flyer’s motion mid-air.

A comprehensive gym regimen for a back spot should simulate the demands of cheerleading. This could include exercises that mimic the movements of stunts, like weighted squats that replicate the lifting of a flyer, and balance training that helps you remain steady on your feet no matter what’s happening above you. By preparing your body to handle the various challenges of being a back spot, you’ll be ready to support your team in every lift and stunt, ensuring that each performance is executed with confidence and skill.

Steve Pawlyk Signature Full

IPP's Premade Mixes are USA Cheer Compliant and customizable!  Add Sound FX, swap songs, & more!  Add your Team Name to the mix for only $10! 

SLAM artwork
Full_Out_130 mp3 image
1 minute cheer mix
WAKE UP THE FIRE
SLAM artwork
WAKE UP THE FIRE
Full_Out_130 mp3 image
1 minute cheer mix

Mastering Cheerleading Extensions: A Guide for Flyers with Troublesome Extensions

mastering-extensions-in-cheerleading-tutorial-tips

By Steve Pawlyk

Published September 15, 2023

If you’re a cheerleader struggling with extensions, especially as a flyer, you’re not alone. It’s an area that many flyers find challenging, but it’s crucial for nailing your routine and impressing the judges. Today we’re gonna go over how to improve your extensions, with specific reference to a Reddit post that highlights challenges such as balance issues and hypermobility. Let’s jump right in.

The Problem with Extensions

A Reddit user recently highlighted a common issue among flyers — difficulty in maintaining balance during two-leg extensions. Whether it’s wobbling, falling forward, or not being able to keep your feet together, these issues can throw off your entire routine.

The Role of Joint Hypermobility

If you, like the original poster, have excessive joint hypermobility, it’s essential to adapt your technique accordingly. This could mean avoiding locking your knees too tightly, as hyperextension can contribute to imbalance.

Need Competition Music Blue 1

Tips for Flyers Struggling with Extensions

  • Find the Sweet Spot: Balance is about weight distribution. Try to find that perfect balance between your heels and toes.
  • Engage Your Core: This is more than just “squeezing”. Your core muscles are essential for stability.
  • Alignment: Ensure that your hips are stacked over your knees and your knees over your ankles.
  • Feedback from Bases: Communication with your bases can offer vital feedback for improving your form.
  • Practice Low: Try practicing the extension at a lower height to build confidence and fine-tune your form.
  • Foot Position: Experiment with keeping your feet at hip-width versus together to see which offers better stability, gradually moving to the desired position.
  • Consult a Specialist: If hypermobility is a concern, consult a physiotherapist familiar with cheerleading injuries.

Takeaway for Coaches

Coaches, if you’re primarily experienced as a base, it may be beneficial to bring in an experienced flyer to provide specific tips to your team. The simple directive to “just squeeze” might not cut it for everyone.

Extensions are a vital part of any cheerleading routine, but they can pose challenges, especially for those new to flying or those with hypermobility. With the right techniques and a bit of focused practice, you can turn your troublesome extensions into a showcase skill. And remember, communication with your team and coach is vital for identifying problems and implementing solutions.

Steve Pawlyk Signature Full

IPP's Premade Mixes are USA Cheer Compliant and customizable!  Add Sound FX, swap songs, & more!  Add your Team Name to the mix for only $10! 

SLAM artwork
Full_Out_130 mp3 image
1 minute cheer mix
WAKE UP THE FIRE
SLAM artwork
WAKE UP THE FIRE
Full_Out_130 mp3 image
1 minute cheer mix

The Cheer Coach’s Toolkit: Essential Resources and Tools for Success

The-Cheer-Coach's-Toolkit--Essential-Resources-and-Tools-for-Success

By Steve Pawlyk

Published September 10, 2023

In the fast-paced, competitive world of cheerleading, having the right tools and resources can make or break your team’s success. Whether you’re a seasoned veteran or a newcomer, this comprehensive guide will equip you with everything you need to excel. Let’s get started!

Training Aids

Spring Floors

Why It’s Essential: A quality spring floor provides the necessary bounce and cushioning, reducing the risk of injury. The springs absorb the impact, allowing athletes to perform high-flying stunts and complicated tumbling passes with a lower risk of injury.

How to Employ: When selecting a spring floor, consider factors like spring density, foam thickness, and surface material. Make sure it meets the safety standards set by cheerleading organizations.

Example: A spring floor with a carpet-bonded foam surface can provide both the grip and cushioning needed for intricate stunts and tumbling.

Tumble Tracks

Why It’s Essential: Tumble tracks are inflatable or foam tracks that mimic the feel of a spring floor but are portable. They are excellent for practicing tumbling skills without the hard impact on the body.

How to Employ: Use tumble tracks for focused tumbling practice. They can be set up in gyms, outdoors, or even at home for extra practice.

Example: Use the tumble track to practice back handsprings. The softer surface reduces the fear factor, encouraging athletes to commit to the skill.

Stunt Stands

Why It’s Essential: Stunt stands help athletes practice stunts safely by simulating the hands of bases. They are especially useful for training flyers on balance and body control.

How to Employ: Use stunt stands to isolate specific elements of a stunt, such as the flyer’s body position or the timing of the cradle.

Example: Have your flyer practice liberty stunts on the stunt stand to improve ankle stability and body alignment.

Need Competition Music Blue 1

Software Solutions

Routine Choreography Software


Why It’s Essential: Choreography software allows you to design and visualize routines, making the process more efficient and collaborative.

How to Employ: Use the software to map out formations, transitions, and stunts. Share the visualizations with your team for better understanding.

Example: ProCheer software can help you visualize a pyramid sequence, ensuring that all athletes are in the correct positions.

Video Analysis Tools


Why It’s Essential: Video analysis tools like Coach’s Eye enable you to record and analyze performances, providing valuable feedback for improvement.

How to Employ: Record your team’s practice or performance and use the software to break down each element. Look for areas that need improvement, such as timing or technique.

Example: Use Coach’s Eye to analyze the height and form of basket tosses, providing precise feedback to your athletes.

For a deeper dive into video tools for cheer, check out our other post here

Team Management Software


Why It’s Essential: Managing a cheer team involves juggling schedules, communications, and tracking athlete progress. Team management software streamlines these tasks.

How to Employ: Use platforms like TeamSnap to schedule practices, send out notifications, and track attendance.

Example: Set up automated reminders for upcoming competitions or fundraising events, ensuring everyone is informed and prepared.

Music and Audio

Customized Cheer Music


Why It’s Essential: Music sets the tone for your routine. Customized cheer music ensures that your soundtrack is unique, engaging, and compliant with copyright laws.

How to Employ: Work with a specialized service like IPP Music to create a customized mix that complements your routine’s theme and tempo.  You can get a fully customized mix, where you pick all the songs used and it’s fit perfectly to your routine, or you can go with a premade mix which is much less, cost-wise, and customize that with one of our many options, like voicoeovers or sound fx.  We’ll add your team name to the mix for just $10!

Example: If your routine has a “Superhero” theme, a customized music mix can incorporate iconic superhero themes with beats that match your choreography.  Alternatively, our premade mixes are sortable by their theme, so you can easily find the right fit for your routine 

Portable Speakers


Why It’s Essential: High-quality portable speakers are essential for practice sessions to ensure that the music is loud and clear, allowing athletes to catch musical cues.

How to Employ: Choose speakers with good battery life and sufficient volume range. Place them in a position where the sound evenly covers the practice area.

Example: Use a Bluetooth speaker with a built-in battery for outdoor practices, so you’re not tied down by power outlets.

Safety Gear

Mats


Why It’s Essential: Safety mats provide a cushioned surface for stunting and tumbling, reducing the risk of injury from falls.

How to Employ: Use mats for high-risk elements like pyramids or new stunts that the team is still learning.

Example: Place mats under the stunt group when practicing a new dismount to ensure a softer landing in case of a fall.

Wrist Guards and Ankle Braces


Why It’s Essential: These provide additional support to joints, reducing the risk of sprains and other injuries.

How to Employ: Athletes should wear wrist guards and ankle braces during both practice and performances for added support.

Example: Flyers can wear wrist guards to reduce the impact on their wrists during handstands or other weight-bearing elements.

Educational Resources

Coaching Clinics


Why It’s Essential: Coaching clinics provide hands-on training and insights into the latest techniques and safety protocols.

How to Employ: Attend clinics regularly to stay updated and network with other coaches.

Example: A clinic might introduce you to a new stunt progression method that you can implement to improve your team’s performance.

Books and Journals


Why It’s Essential: Publications like the “Cheer Coach’s Handbook” offer valuable insights into coaching strategies and athlete management.

How to Employ: Use these resources to supplement your knowledge and resolve specific challenges you may face.

Example: A book might offer strategies for effective team communication, helping you resolve conflicts and build a cohesive team.

Online Blogs and Forums


Why It’s Essential: Blogs like YouHitZero offer a wealth of information, from tips and tricks to event information and competition results.

How to Employ: Regularly read articles and participate in forums to stay updated and gain new perspectives.

Example: An article on YouHitZero about competition preparation could provide you with a checklist that ensures you don’t overlook any details 😉

Success in cheerleading coaching is not just about your skills and passion; it’s also about having the right tools and resources. This comprehensive toolkit is designed to help you excel in every aspect of coaching, from training your athletes to managing your team effectively.


Steve Pawlyk Signature Full

IPP's Premade Mixes are USA Cheer Compliant and customizable!  Add Sound FX, swap songs, & more!  Add your Team Name to the mix for only $10! 

SLAM artwork
Full_Out_130 mp3 image
1 minute cheer mix
WAKE UP THE FIRE
SLAM artwork
WAKE UP THE FIRE
Full_Out_130 mp3 image
1 minute cheer mix

The Essential Guide to Cheerleading Tumbling Progression

cheer tumbling progression chart

By Steve Pawlyk

Published June 29, 2023

Tumbling is an integral part of cheerleading. It enhances the visual appeal of routines and showcases the athletic prowess of the cheerleaders. However, learning tumbling skills is a gradual process that requires consistency, patience, and above all, a clear understanding of progression levels. In this article, we will walk through the tumbling progression guide, breaking down each level to help cheer coaches better structure their athletes’ training.

  • Level 1.0: The Foundation
    The first level focuses on basic gymnastic skills that lay the groundwork for more advanced moves. At this level, athletes will learn forward and backward rolls, handstands, and cartwheels, as well as handstand snap-downs, bridge downs, and opposite cartwheels. Each of these moves builds core strength, flexibility, and body awareness, critical attributes for future progress.
  • Level 1.5: Building Momentum
    At Level 1.5, the focus is on slightly more complex skills that build on the foundations set in Level 1.0. Here, athletes start learning moves like 2-step round-offs, power hurdle round-offs, backward roll press ups, and front and back walkovers. The Valdez, a graceful move performed from a seated position, also makes its debut at this level.
    • Level 2.0: Introducing the Back Handspring

      The back handspring – a cheerleading staple – is introduced at Level 2.0. Also added to the repertoire are round-off back handsprings, front handsprings, front walkover-round-offs, and back extension rolls. These moves require and help develop upper body strength, better control, and enhanced spatial awareness.

    • Level 2.5: Mastery of the Back Handspring

    Level 2.5 emphasizes the mastery and integration of the back handspring. The goal is to perform multiple back handsprings and seamlessly transition from a front walkover to a round-off back handspring. This level encourages fluidity in motion and lays the foundation for complex tumbling sequences.

    • Level 3.0: Daring Heights

      By Level 3.0, cheerleaders should be comfortable performing solo and sequence back handsprings. They’re now ready for high-flying moves like round-off back handspring tucks, standing tucks, and aerials. The cheerleader will also start working on coin tosses, punch fronts, and toe touch back handsprings, further expanding their tumbling skill set.

    • Level 4.0: Layouts & Advanced Skills
      Level 4.0 focuses on layouts and more advanced skills. Athletes start to incorporate skills like the round-off back handspring layout, cartwheel tuck, T-jump tuck, and whip throughs into their repertoire. They will also work on punch front step-outs, front handspring front punches, and Onodis.
    • Level 5.0: Full Twisting and Arabians
    • With a strong foundation in place, Level 5.0 cheerleaders are ready for full twists and Arabians. They’ll also learn whip tucks, toe touch tucks, and standing fulls. At this level, athletes also start practicing fulls with kicks, further enhancing their flexibility and control.

  • Level 6.0: Elite Tumbling
    Level 6.0 is the final and most advanced stage in this tumbling progression. Athletes at this level are expected to execute difficult skills like back handspring fulls, whip punch double twists, and Arabian step outs to double twists. They also continue practicing fulls with kicks. Mastery at this level reflects the pinnacle of tumbling proficiency.
  • Conclusion

    The process of learning and mastering tumbling in cheerleading is a journey that requires patience, practice, and persistent effort. By understanding and following this tumbling progression guide, cheer coaches can ensure their athletes develop the necessary skills in a safe and systematic manner. Remember, each level forms the foundation for the next – it’s important to master each skill before moving on to more advanced moves. Happy tumbling!

    Steve Pawlyk Signature Full

    IPP's Premade Mixes are USA Cheer Compliant and customizable!  Add Sound FX, swap songs, & more!  Add your Team Name to the mix for only $10! 

    SLAM artwork
    Full_Out_130 mp3 image
    1 minute cheer mix
    WAKE UP THE FIRE
    SLAM artwork
    WAKE UP THE FIRE
    Full_Out_130 mp3 image
    1 minute cheer mix

    Mastering Cheer Stunting 101: A Comprehensive Guide for New Cheer Coaches

    Mastering Cheer Stunting 101: A Comprehensive Guide for New Cheer Coaches

    By Steve Pawlyk

    Published June 28, 2023

    Every cheerleading performance is a mesmerizing blend of rhythm, athleticism, and sheer enthusiasm, with stunting taking center stage. Stunting, the act of lifting a team member during a performance, is not just about the high-flying spectacle; it requires precision, strength, and an intricate understanding of cheerleading guidelines. For any new cheer coach looking to ensure their team’s stunting routines are not only breathtaking but also adhere to American cheerleading rules and regulations, this guide offers a step-by-step breakdown.

    Understanding the Key Roles in Cheer Stunting

    Each stunt in cheerleading is made possible by the combined effort of the flyer, the bases, the backspot, and, sometimes, the front spot. All roles are bound by the safety guidelines set forth by the American Association of Cheerleading Coaches and Administrators (AACCA) and the U.S. All Star Federation (USASF).

    1. Flyer: Flyers need a solid sense of balance, flexibility, and confidence. They must follow safety guidelines, such as not reaching out to the crowd or performing any dangerous dismounts without proper support.
    2. Bases: Bases must be strong enough to lift and catch the flyer. They should always watch the flyer and not the crowd or competition, as stipulated by AACCA safety guidelines.
    3. Backspot: The backspot’s responsibility extends to ensuring the stunt’s timing, protecting the flyer’s head and neck, and maintaining constant awareness of the stunt group’s stability.
    4. Front Spot: This optional role can add an extra layer of safety, aiding in lifting the flyer, and providing additional stability to the stunt.

    Stunt Conditioning Drills: Building Strength and Stability

    The next step is conditioning your cheerleaders for stunting. Strength, flexibility, and balance exercises should be part of your team’s regular workout regimen, in line with the conditioning guidelines of the USASF.

    1. Core Strength Exercises: The core is fundamental for all stunting roles. Exercises such as planks, sit-ups, and Russian twists can help build core strength.
    2. Leg and Arm Strength Workouts: Squats, lunges, and push-ups can help bases and spotters develop the power they need to support flyers.
    3. Balance Drills: Balance exercises, such as yoga poses or balance beam exercises, are important for flyers to maintain their poise while aloft.
    4. Flexibility Training: Stretching routines, straddle stretches, and split routines help flyers achieve the flexibility they need to perform various stunts.

    Stunt Progressions: Learning to Stunt Safely

    Safety is paramount in cheerleading, and stunt progressions allow your squad to build confidence and skills while adhering to the AACCA’s risk management guidelines. Here are a few progression steps:

    1. Thigh Stand: This beginner-friendly stunt helps team members understand the basics of balance and coordination.
    2. Prep or Half Elevator: Here, the flyer stands on the bases’ hands at chest level. This stunt introduces height and requires more strength from bases.
    3. Full Elevator or Extension: This full-height stunt is a test of your team’s stunting abilities and should only be performed once the other levels are mastered.

    It is essential to incorporate these progressions into your training regimen, making sure to adhere to the USASF Level Rules and Age Grids.

    When teaching stunts, remember that every cheerleader’s safety is your priority. Use appropriate safety mats and spotting until your squad is fully comfortable with their stunts. As a cheer coach, your primary goal should be to foster an environment where your cheerleaders can safely learn, grow, and shine under your guidance.

    The art of stunting is one of the many elements that make cheerleading performances compelling and breathtaking. By incorporating the right drills, exercises, and safety practices into your coaching, and always adhering to the cheerleading rules and regulations, you can ensure your squad delivers not just a great performance, but a safe one. Keep the spirit high, the music inspiring, and let the joy of cheerleading resonate with every stunt your team executes.

    Steve Pawlyk Signature Full

    IPP's Premade Mixes are USA Cheer Compliant and customizable!  Add Sound FX, swap songs, & more!  Add your Team Name to the mix for only $10! 

    SLAM artwork
    Full_Out_130 mp3 image
    1 minute cheer mix
    WAKE UP THE FIRE
    SLAM artwork
    WAKE UP THE FIRE
    Full_Out_130 mp3 image
    1 minute cheer mix

    The Essential Guide for First-Year Cheerleading Coaches in Australia: Navigating Aussie Rules

    Australian cheerleading rules
    1. By Steve Pawlyk

      Published June 26, 2023

    As a first-year cheerleading coach, stepping into the sport can be a thrilling yet daunting task. With the rules, techniques, and team management tasks, it may seem overwhelming. But fear not, because this guide will help you navigate the unique and engaging world of cheerleading in Australia.

    Cheerleading in Australia is a rapidly growing sport, with many unique regulations and practices. For a first-year coach, these rules can often seem complex and specific, but don’t worry – we’ve got you covered. This guide will delve into the key rules and regulations in Australian cheerleading, providing you with the tools you need to succeed.

    Understanding Australian Cheerleading: Key Rules and Regulations

    The cheerleading leagues in Australia operate under the Australian All Star Cheerleading Federation (AASCF). This body sets out the specific rules and guidelines that all teams and coaches must follow.

    Age Grouping

    In Australian cheerleading, competitors are grouped by age. The six primary divisions are Tiny (6 & under), Mini (8 & under), Youth (11 & under), Junior (14 & under), Senior (18 & under), and Open (14 & over). Make sure to familiarize yourself with these categories to ensure you’re training your team appropriately.

    Performance Times

    Depending on the team’s division and category (cheer or dance), there are different performance time requirements. For example, a Mini Level 1 Cheer team will perform for 2 minutes 30 seconds, while a Senior Level 6 team might perform for up to 2 minutes 45 seconds.

    Skill Regulations

    Each division in Australian cheerleading has specific skill regulations. These restrictions apply to stunts, tumbles, and pyramids. Ensure you’re aware of these regulations when choreographing routines.

    Music: The Heartbeat of Cheerleading

    One crucial aspect of cheerleading that significantly contributes to the energy and vibe of the performance is the music. Choosing the right music can make or break your routine. It’s essential to consider a reliable and high-quality music service like IPP Music to give your team a competitive edge.

    Notably, the AASCF has regulations around the music used in performances. You must own the appropriate rights to any music you use, which could include licensing, and must provide proof if asked. IPP Music provides a range of pre-licensed and custom mixes tailored to cheerleading needs, so you can ensure you’re meeting these regulations while creating an electrifying atmosphere for your routine.

    Keeping Safety First

    Safety is paramount in cheerleading, with regulations in Australia putting a heavy emphasis on the safety of performers. All cheerleading coaches in Australia must complete a safety certification course approved by the AASCF. Ensuring your athletes understand and abide by safety guidelines should always be a top priority.

    Other Important Rules

    Remember, the AASCF’s National Rules and Regulations Handbook is your bible. It covers everything from costume requirements to scoring systems and disciplinary procedures. Spend time getting to know it – it will be your best friend!

    Conclusion

    Embracing your role as a first-year cheerleading coach in Australia is an exciting journey. Remember, the key to success is understanding the rules that govern the sport in Australia. This knowledge, paired with enthusiasm, a love for the sport, and great music from IPP Music, will ensure your first year as a cheerleading coach is a memorable and successful one. You’re not just building routines; you’re building future champions!

    Keep the spirit high, and happy coaching!

    Essential Tips and Rules for First-Year British Cheer Coaches

    Essential Tips and Rules for First-Year British Cheer Coaches

    By Steve Pawlyk

    Published June 23, 2023

    Cheerleading is an art and sport that fosters unity, promotes physical fitness, and instils a sense of leadership among participants. If you’re a first-year coach of a British cheer team, you might find the role challenging yet rewarding. This blog post is your handy guide, brimming with advice, tips, and insights into the rules specific to cheerleading in the United Kingdom

    1. Understanding the Basics of Cheerleading

    The first tip, which may sound obvious but is worth emphasizing, is understanding the basics of cheerleading. It’s not all about pom-poms and high-energy chants. Cheerleading in the UK, like any other sport, demands discipline, teamwork, athleticism, and creativity. The British Cheerleading Association (BCA) provides an excellent resource for coaches and athletes alike to understand the rules and basics of cheerleading.

    2.Ensuring Athlete Safety

    The safety of your athletes should always be your top priority. Always ensure they are properly warmed up before practice and cool down afterwards. Ensure your team learns and perfects basic cheerleading skills before moving on to more complex stunts. Know the regulations regarding the mats and other equipment, which need to be compliant with BCA and UKCA (United Kingdom Cheerleading Association) rules.

    3. Encourage and Motivate

    Your team’s morale will play a significant role in their performance. As a coach, it’s your responsibility to keep the team motivated. Recognize each team member’s strengths and build on them. Constructive criticism is a great tool, but make sure it’s balanced with praise and encouragement.

    4. Teaching Teamwork

    Cheerleading is all about teamwork. Facilitate exercises that foster trust, cooperation, and communication among your team members. Remember, a successful stunt isn’t just about athleticism—it’s about impeccable timing and unyielding trust in each other.

    5. Understanding Cheer Rules Specific to the UK

    In the UK, cheerleading is governed by organizations such as BCA and UKCA, which enforce rules to ensure the sport is safe and enjoyable. Familiarise yourself with their guidelines, especially if your team participates in competitions.
       – Age Groups: The BCA outlines specific age groups for cheerleading teams: Peewee (6 and under), Mini (8 and under), Youth (11 and under), Junior (14 and under), and Senior (10 and above). Ensure your team members fit within the correct age bracket.
       – Team Sizes: Depending on the competition category, team sizes may vary from one (for individual categories) to 36 athletes.
       – Routine Duration: For most categories, routines should be a maximum of 2 minutes and 30 seconds.
       – Music: If you use music in your routine, it must be licensed for use. The BCA and UKCA have strict rules on music copyright.
       – Costumes: Costumes should be modest, tasteful, and provide enough coverage. They must also allow for the safe execution of cheerleading moves.
       – Stunts and Tumbling: Certain stunts and tumbling moves are prohibited in specific age categories for safety reasons. Always check the latest BCA or UKCA rules before incorporating a new move into your routine.

    As Vince Lombardi once said, “”Coaches who can outline plays on a blackboard are a dime a dozen. The ones who win get inside their player’s heads.” Embrace this philosophy, and you’re already halfway to success.

    6. Continuous Learning

    As a first-year coach, never shy away from learning opportunities. Attend coaching seminars, engage with experienced cheer coaches, and stay updated with the latest cheerleading trends and techniques. Both the BCA and UKCA regularly offer training and educational resources to help you become a more effective coach.

    7. Focusing on Fitness

    Cheerleading is a physically demanding sport, and thus it’s critical for your athletes to maintain a high level of fitness. Focus on strength, flexibility, and endurance training. Regular conditioning can help prevent injuries and improve performance.

    8. Managing Time

    Managing your time and your team’s time effectively is crucial. Your practice sessions should be structured and efficient, with a clear goal in mind. Be punctual, respect your athletes’ time, and encourage them to do the same.

    9. Ethical Considerations

    As a cheer coach, you play a vital role in shaping young athletes’ attitudes and behaviours. It’s important to exhibit ethical behaviour both on and off the cheer mat. This includes fair play, respect for all team members, and a strong commitment to the team’s success.

    10. Building a Community

    Finally, fostering a sense of community can help your team achieve greater success. Encourage parents to get involved, reach out to local businesses for sponsorship, and participate in community events. A supportive community can greatly enhance your team’s morale and provide necessary resources.
    Being a first-year British cheer coach might be challenging, but it’s also an opportunity to inspire young athletes, create memorable experiences, and instill lifelong values. Keep the above advice and rules in mind, and remember, the key is not to strive for perfection but progress. You’re embarking on a journey filled with cheers, challenges, and triumphs – embrace it wholeheartedly!
    In conclusion, your journey as a first-year British cheer coach will undoubtedly be a learning curve. Remember, every experienced coach was once a beginner, and with dedication, persistence, and a positive mindset, you’ll be leading your team to new heights. Stick to the rules, prioritize safety, foster an environment of mutual respect, and above all, don’t forget to have fun!
    May your first year of coaching be the beginning of a rewarding journey filled with cheers, passion, and unparalleled success. Now, get out there and let your cheer spirit shine!

    Steve Pawlyk Signature Full

    The Perfect BPM for Cheer Music: A Comprehensive Guide

    cheer music bpm tempo

    By Steve Pawlyk

    Published May 15, 2023

    Are you a cheerleader or cheer coach looking to perfect your routine with the right music tempo? Understanding the beats per minute (BPM) of cheer music is critical to synchronizing your team’s movements and timing. The majority of cheer industry professionals consider the ideal BPM for most cheer music to be around 146 BPM.

    Understanding BPM in Cheer Music

    BPM, or beats per minute, is a unit used to measure the pace of music. It tells you how many beats there are in a minute of a particular song or musical piece. In cheerleading, the BPM of the music plays a crucial role as it forms the backbone of the cheer routine’s timing and synchronization. 

    When it comes to cheer music, the consensus in the cheer community is that 146 BPM is the sweet spot. This tempo is fast enough to keep the energy high and the routine exciting, but not so fast that the cheerleaders can’t keep up.

    The Magic of 146 BPM in Cheer Music

    Why 146 BPM, you might ask? This BPM strikes the perfect balance between energy and control. At this pace, cheer routines can have a high-impact, dynamic performance without losing synchronization or risking safety. The tempo allows cheerleaders to perform their stunts, tumbling, and dance movements in time with the music, creating a seamless, rhythmic routine that is a pleasure to watch.

    Using IPP Music to Understand Cheer Music BPM

    IPP Music has become a go-to resource for cheerleaders and cheer coaches trying to understand the relationship between music counts and BPM. Their comprehensive guides and informative graphs provide valuable insights into how BPM affects the execution of cheer routines. By studying IPP Music’s resources, you can better comprehend why 146 BPM is often the chosen tempo for cheer music.

    Within every premade mix page on the IPP Music site, you’ll find helpful guides that show how to count music and match these counts with your cheer routine. These guides can be particularly helpful when choreographing routines to music with a BPM of 146, ensuring every beat is met with precision and enthusiasm.

    IPP's Premade Mixes are USA Cheer Compliant and customizable!  Add Sound FX, swap songs, & more!  Add your Team Name to the mix for only $10! 

    SLAM artwork
    Full_Out_130 mp3 image
    1 minute cheer mix
    WAKE UP THE FIRE
    SLAM artwork
    WAKE UP THE FIRE
    Full_Out_130 mp3 image
    1 minute cheer mix

    Conclusion

    In the high-energy world of cheerleading, music is not merely a backdrop; it’s an integral part of the performance. Choosing cheer music with a BPM of 146 can provide the right tempo to enhance the excitement of the performance while ensuring the safety and synchronization of your team.

    Whether you’re a cheerleader, a coach, or someone interested in the mechanics of cheerleading, understanding the BPM of cheer music is essential. Resources like IPP Music can provide you with the tools and knowledge you need to navigate the world of cheer music BPM confidently. Remember, the next time you’re selecting or choreographing to cheer music, aim for that magic number: 146 BPM.

    Steve Pawlyk Signature Full

    SHARE YOUR CART