Category Archives: Cheer How-To Series

How to Teach the Heel Stretch: Step-by-Step From Beginner to Performance Ready

How to Teach the Heel Stretch Step by Step From Beginner to Performance Ready

By Steve Pawlyk

Published March 2, 2026

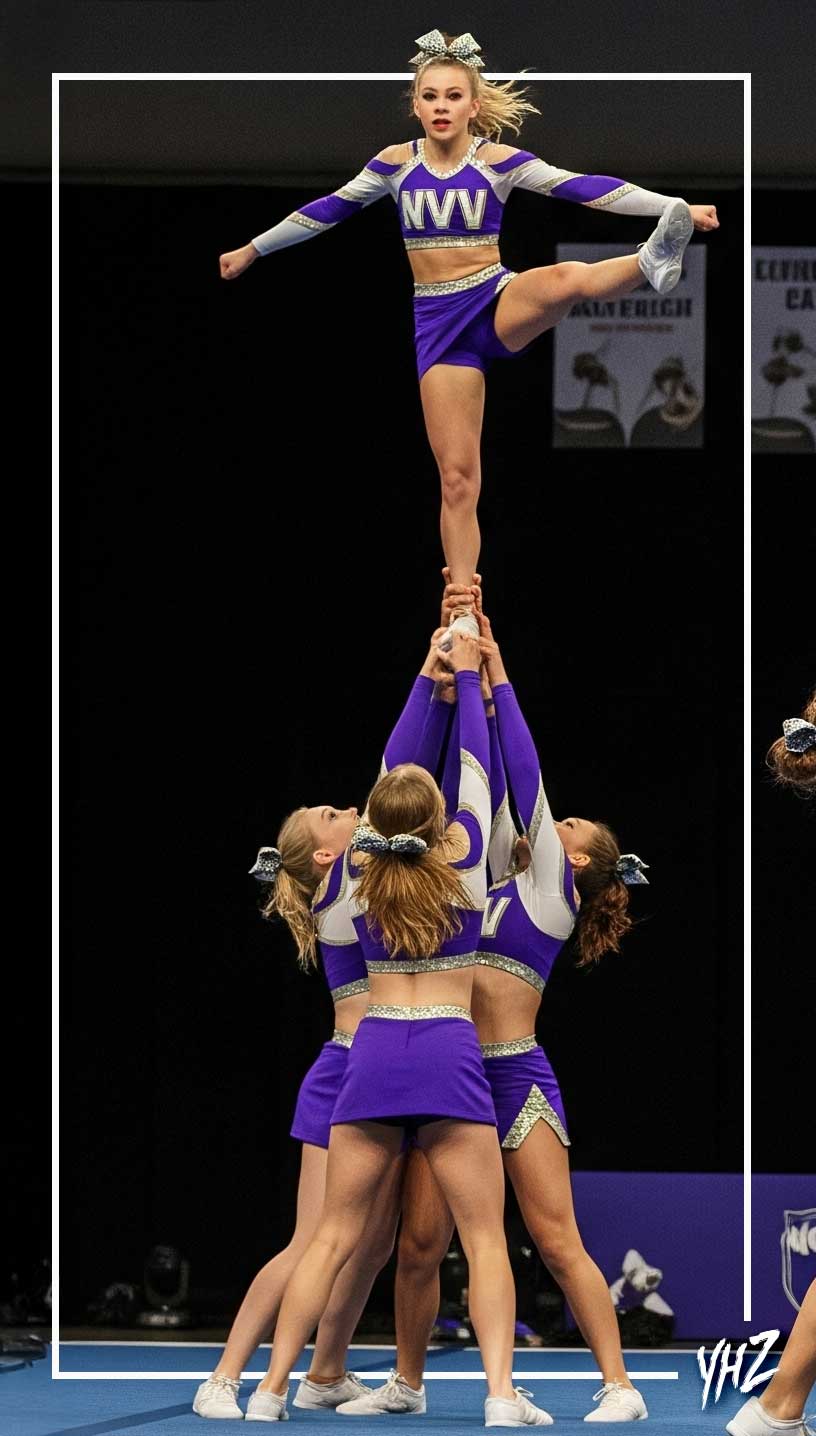
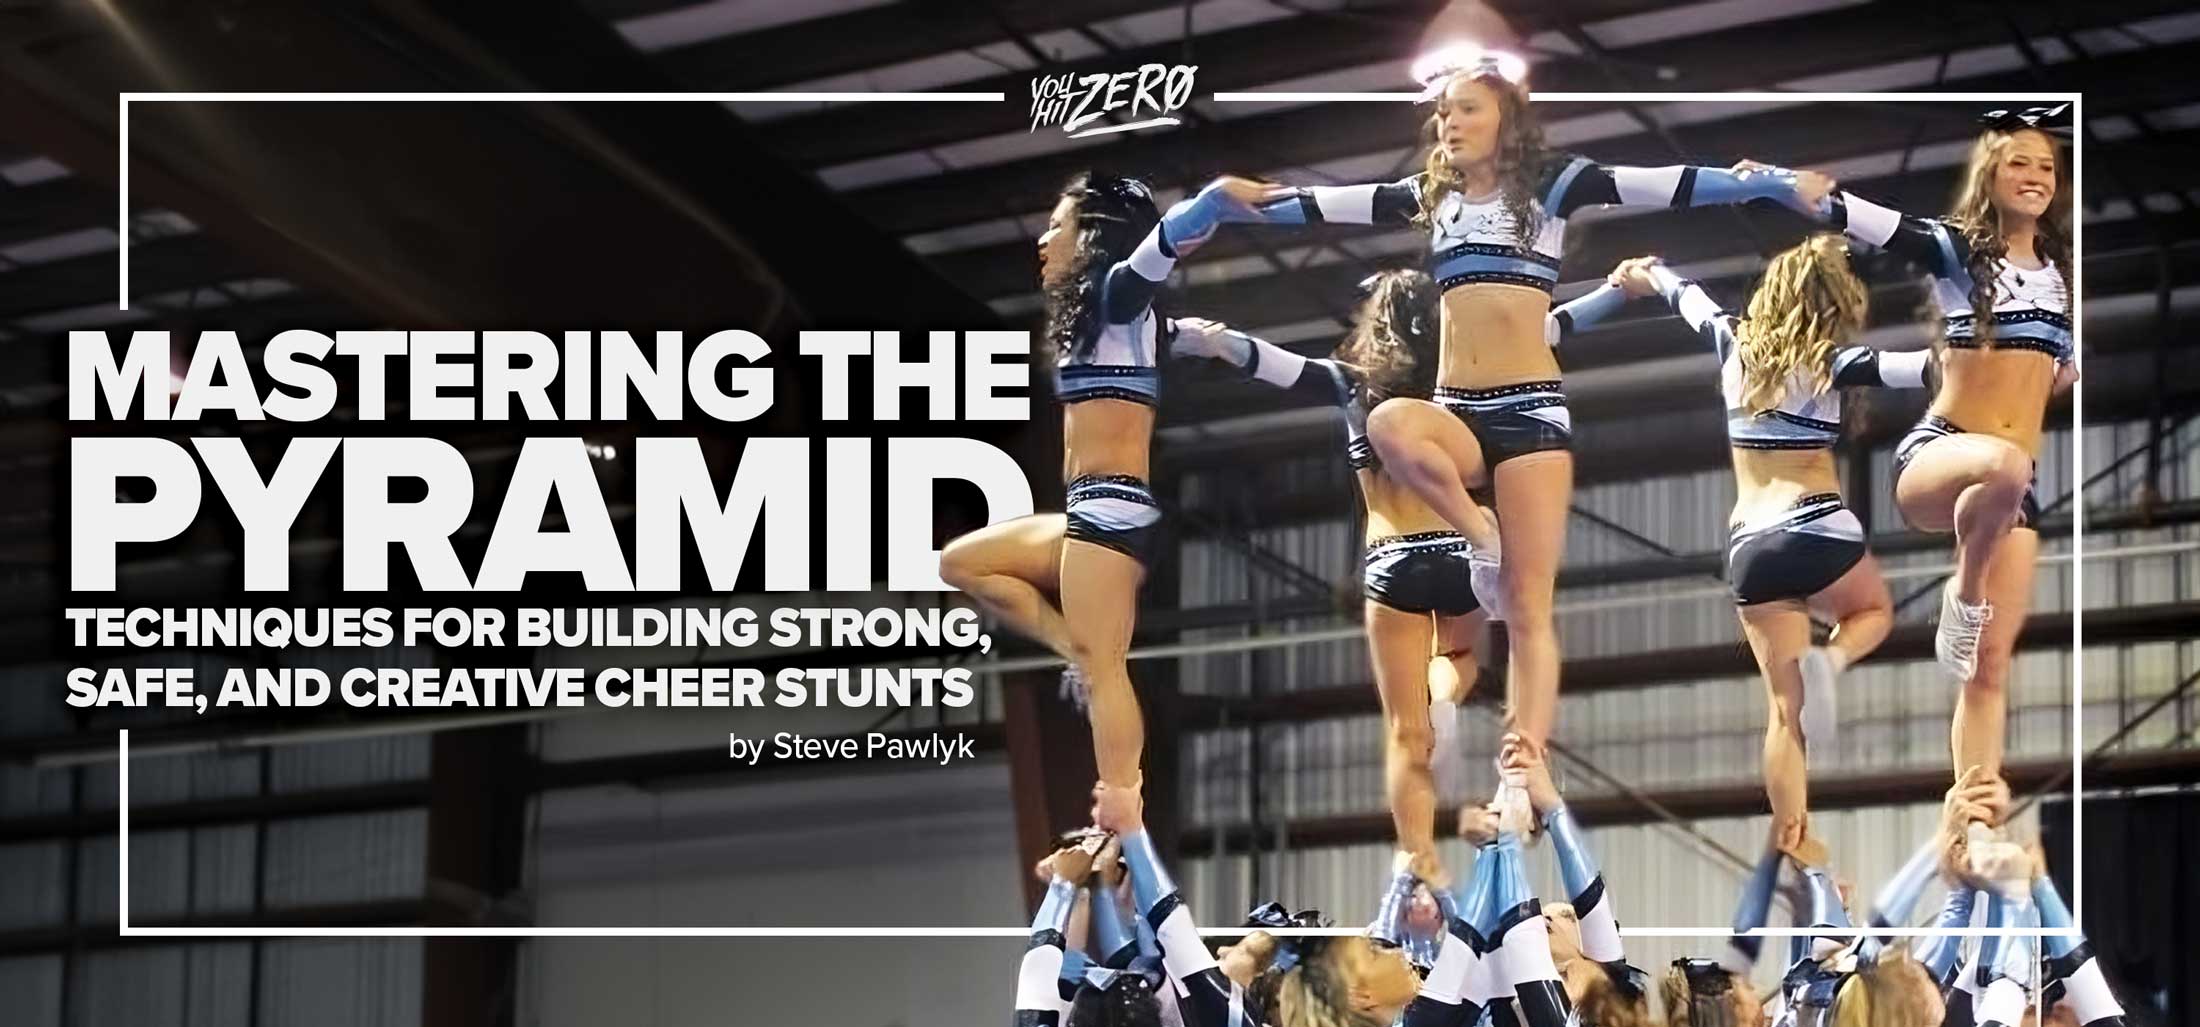
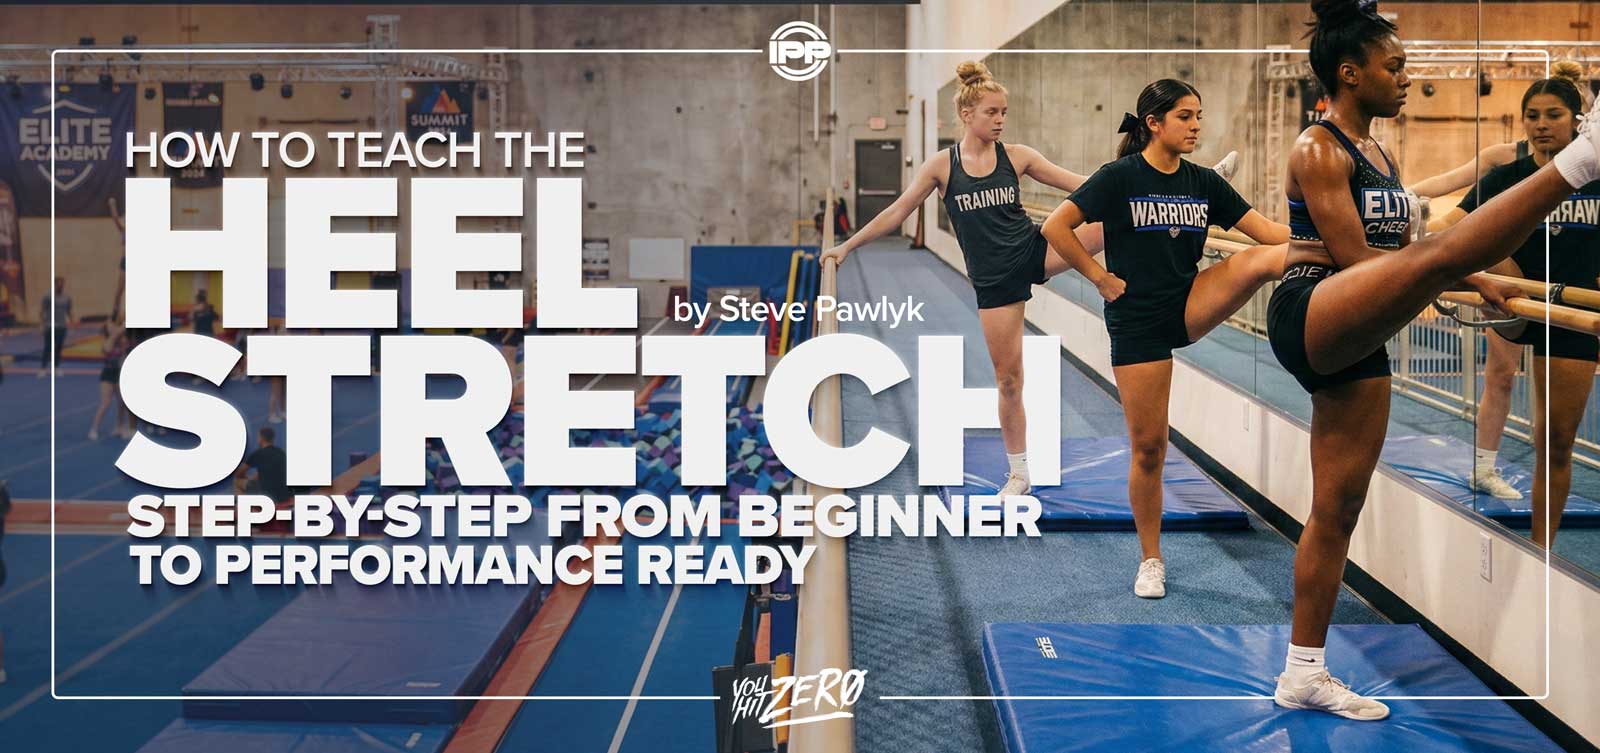
The Heel Stretch is one of the most recognizable flyer skills in competitive All-Star cheerleading — and one of the easiest to perform incorrectly. A clean Heel Stretch requires more than flexibility; it depends on balance, body awareness, and coordinated engagement through the core, back, and shoulders. Whether you’re coaching a first-time flyer or refining elite athletes, teaching this skill systematically helps prevent common issues like bent supporting legs, wobbly bases, and over-pulled extensions.
This guide walks you through a complete progression for teaching the Heel Stretch, including one-on-one coaching methods, small group practice structures, team integration, and drills for strength, balance, and flexibility.

all star cheer coaching heel stretch drills

Understanding the Mechanics of the Heel Stretch

Definition:
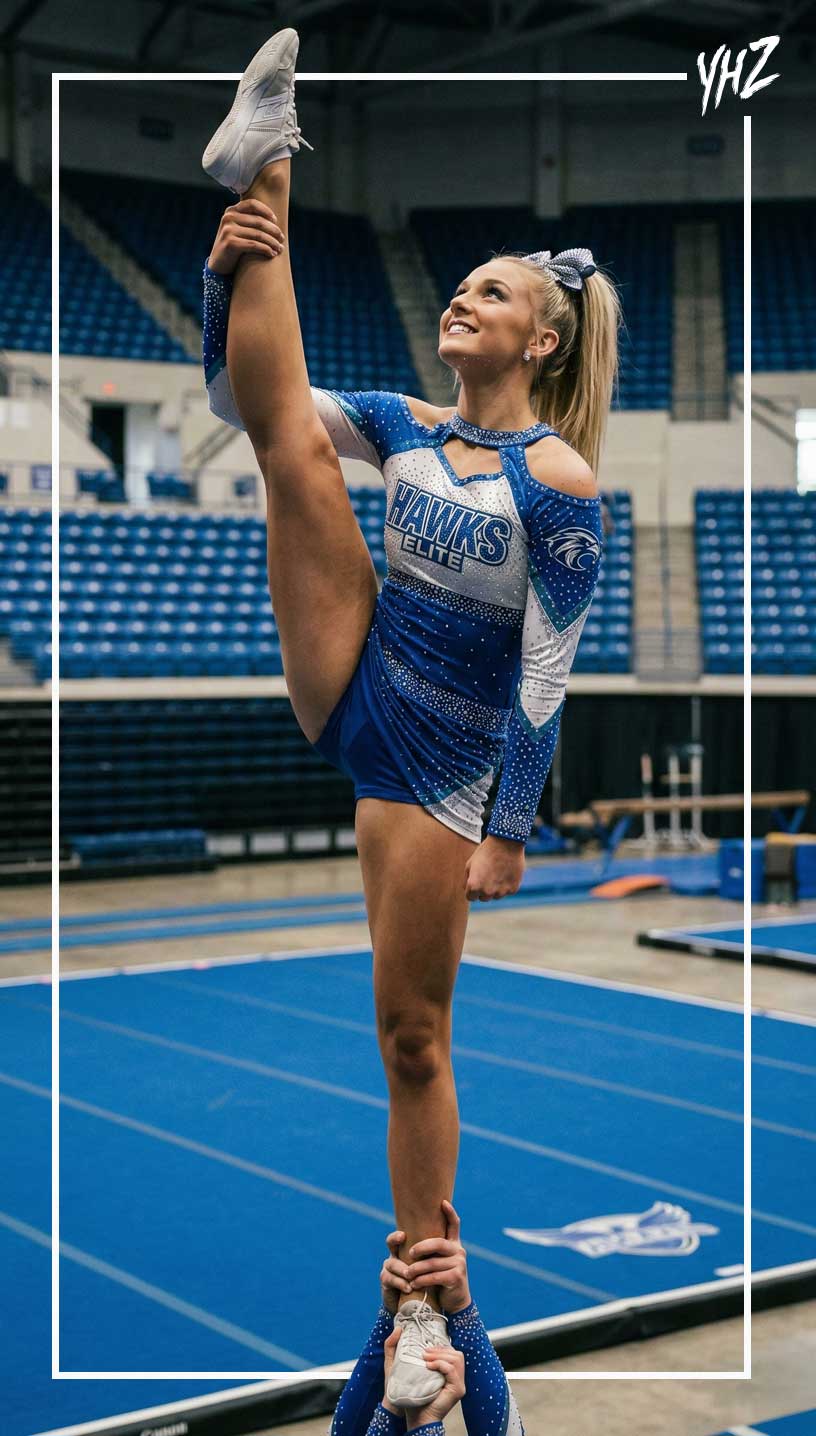
A Heel Stretch is a stunt or body position where the flyer balances on one leg while pulling the opposite leg straight upward, holding the heel with the same-side hand, and extending it near the head.

Technical Breakdown:

  • Base leg: Strong, locked, and aligned over the foot center.
  • Pulling arm: Reaches across to grab the same-side foot (right hand to right foot).
  • Pulling leg: Straightened through the knee, ankle pointed, foot flexed slightly inward.
  • Core: Engaged and centered; ribs remain stacked over hips.
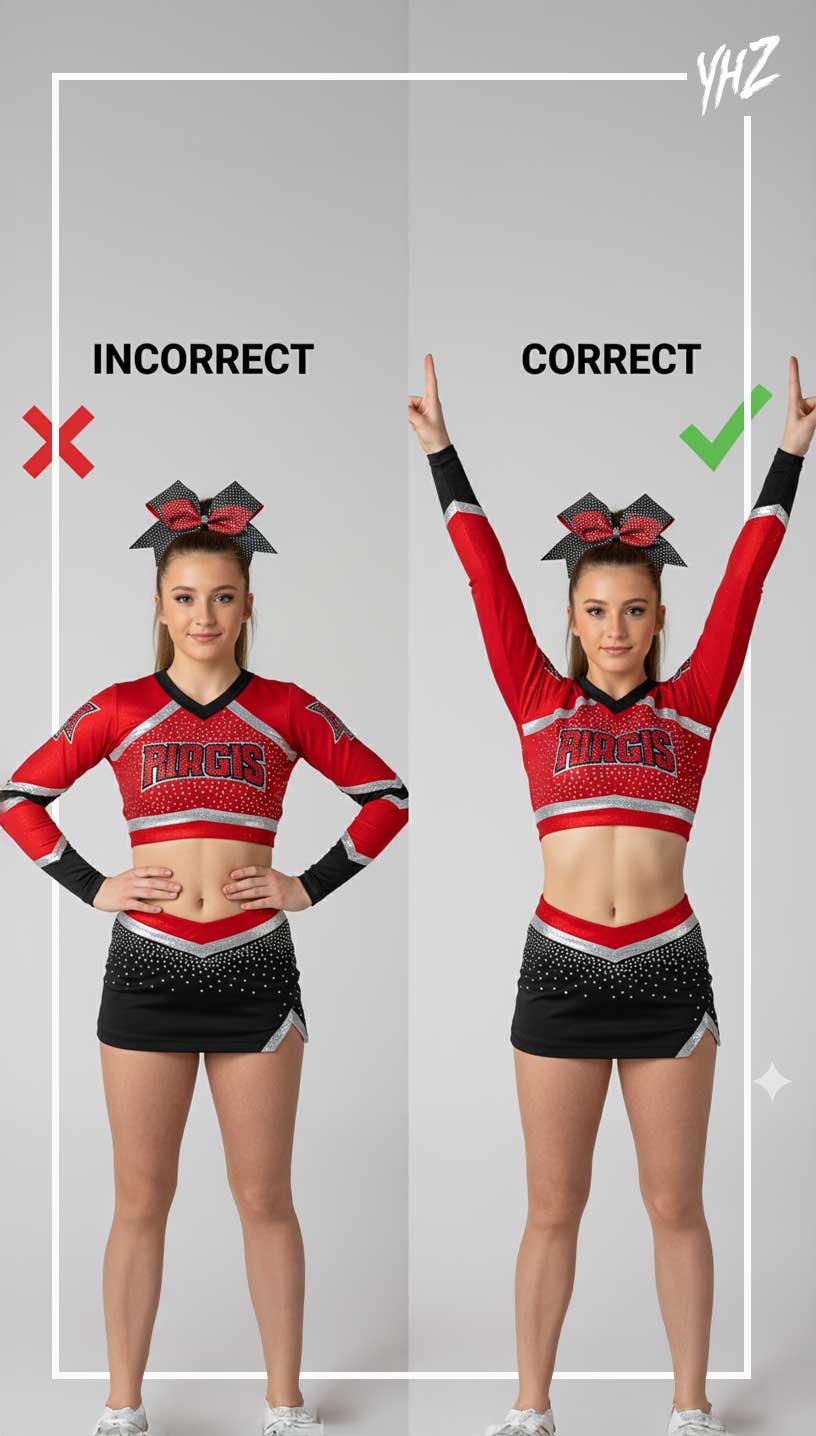
  • Shoulders: Square, not twisted toward the pulled leg.
  • Chest: Lifted and open.

Key Concept:
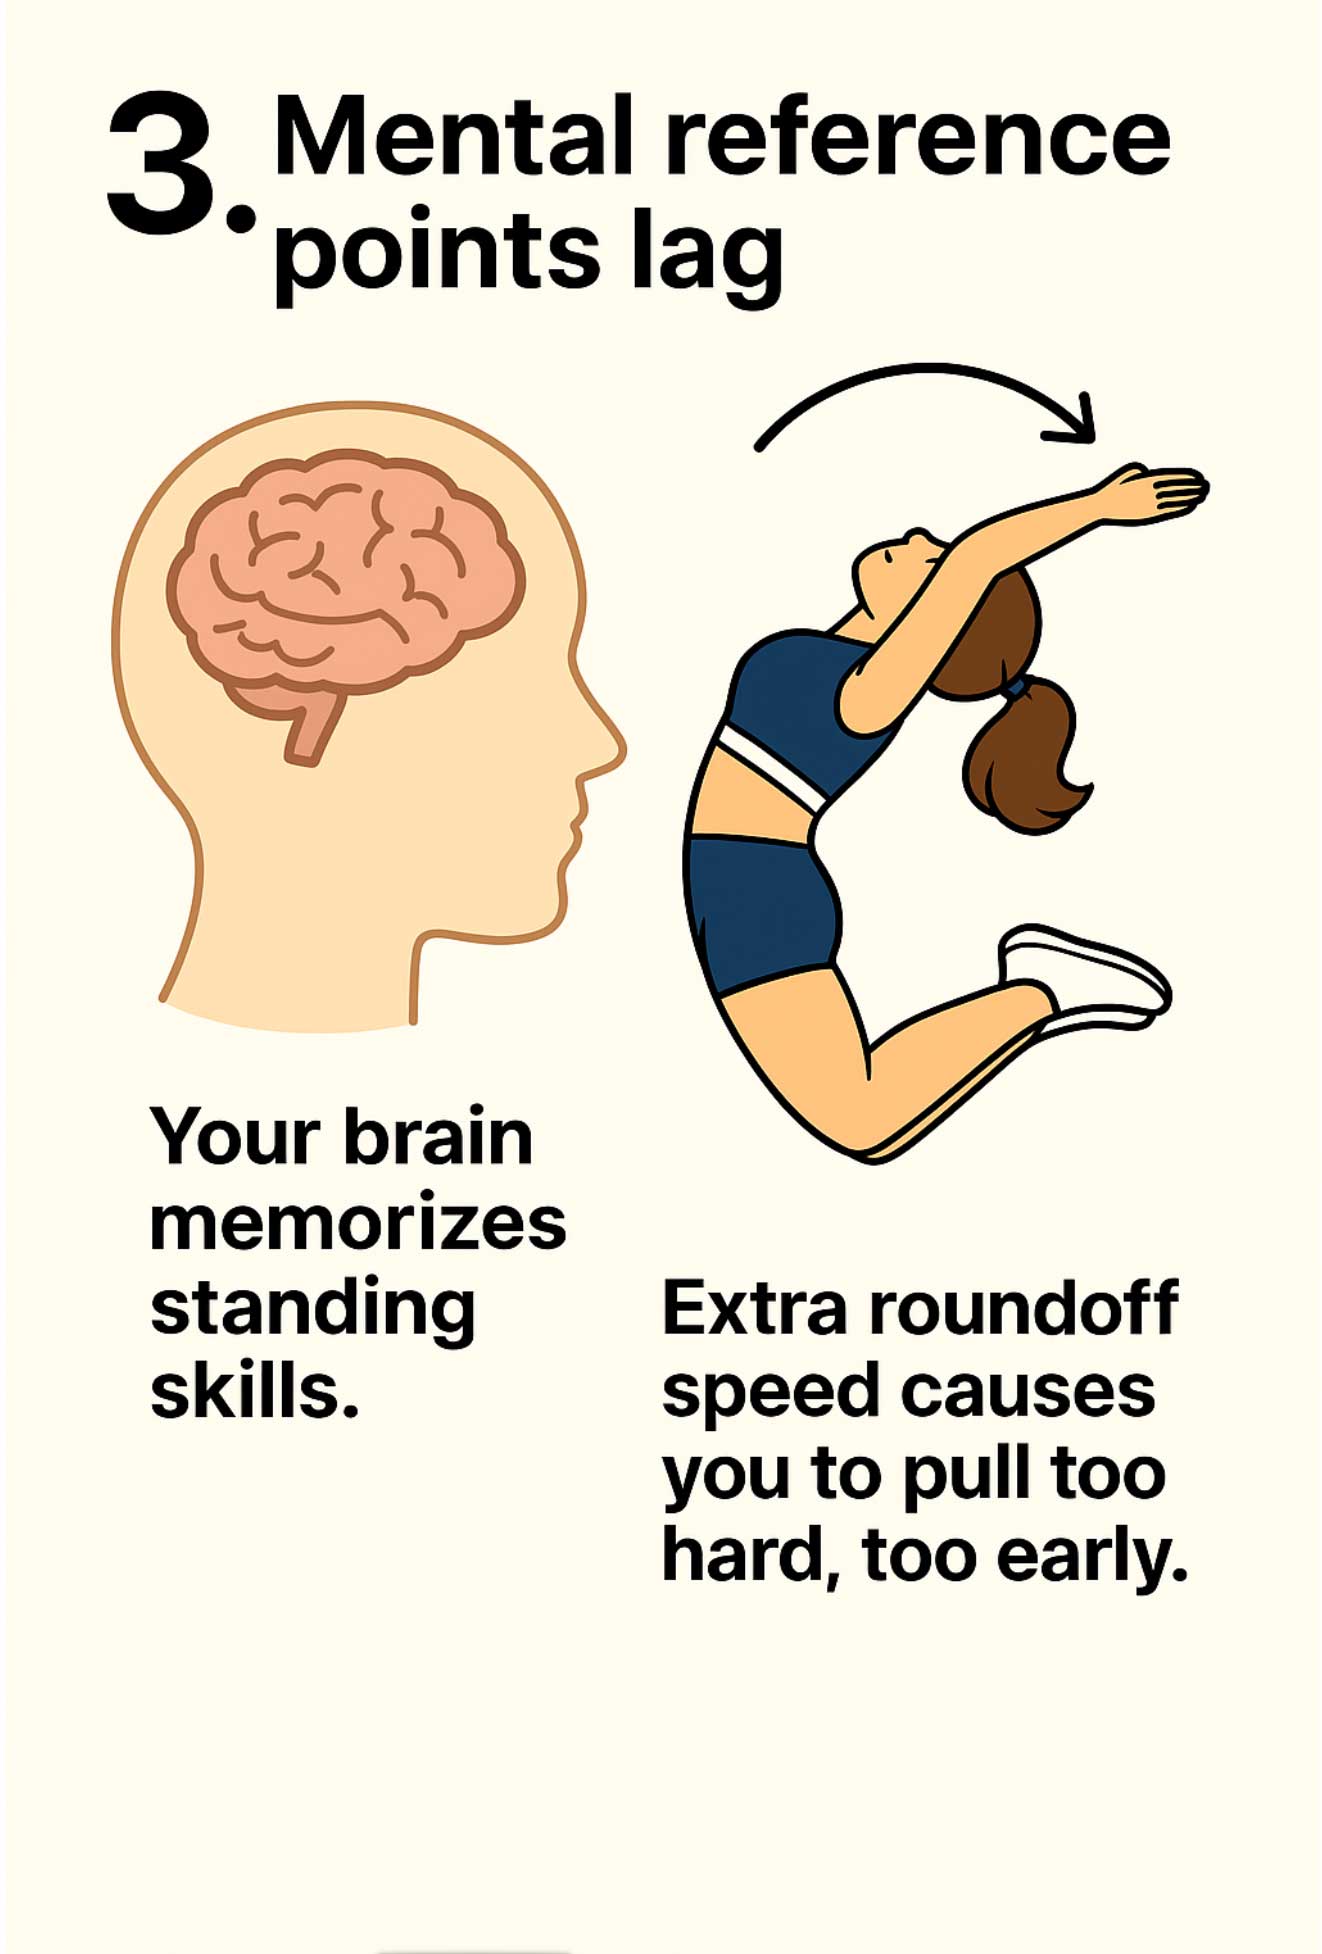
The Heel Stretch isn’t a flexibility move — it’s a balance and control move that happens to require flexibility.

Step-by-Step: Teaching the Heel Stretch One-on-One

Step 1: Warm-Up and Flexibility Prep

Before any attempts, the flyer must stretch hamstrings, hips, and shoulders.

  • Dynamic prep: Leg swings, high kicks, and hip circles.
  • Static stretches: Pike stretch, seated straddle, standing quad hold.
    Cue: “Flexibility is freedom — control is what makes it beautiful.”

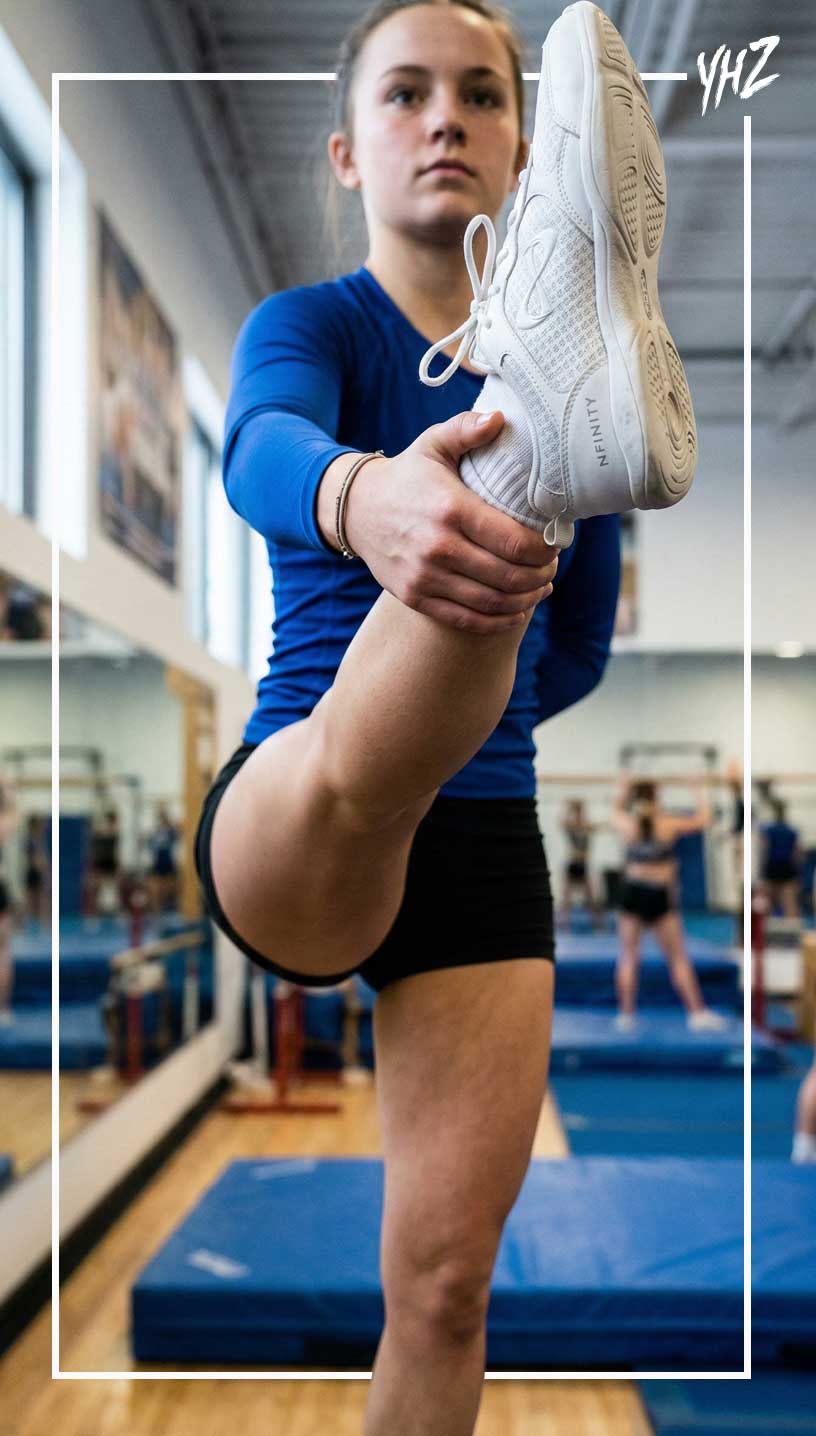
Step 2: Teach the Proper Grip

  • Have the athlete lift one leg slightly and grab the heel (not the arch or ankle).
  • Cue: “Thumb on the inside, fingers wrapping around the outside edge.”
  • The arm should extend upward and slightly outward to allow shoulder space.
Need Competition Music Blue 1

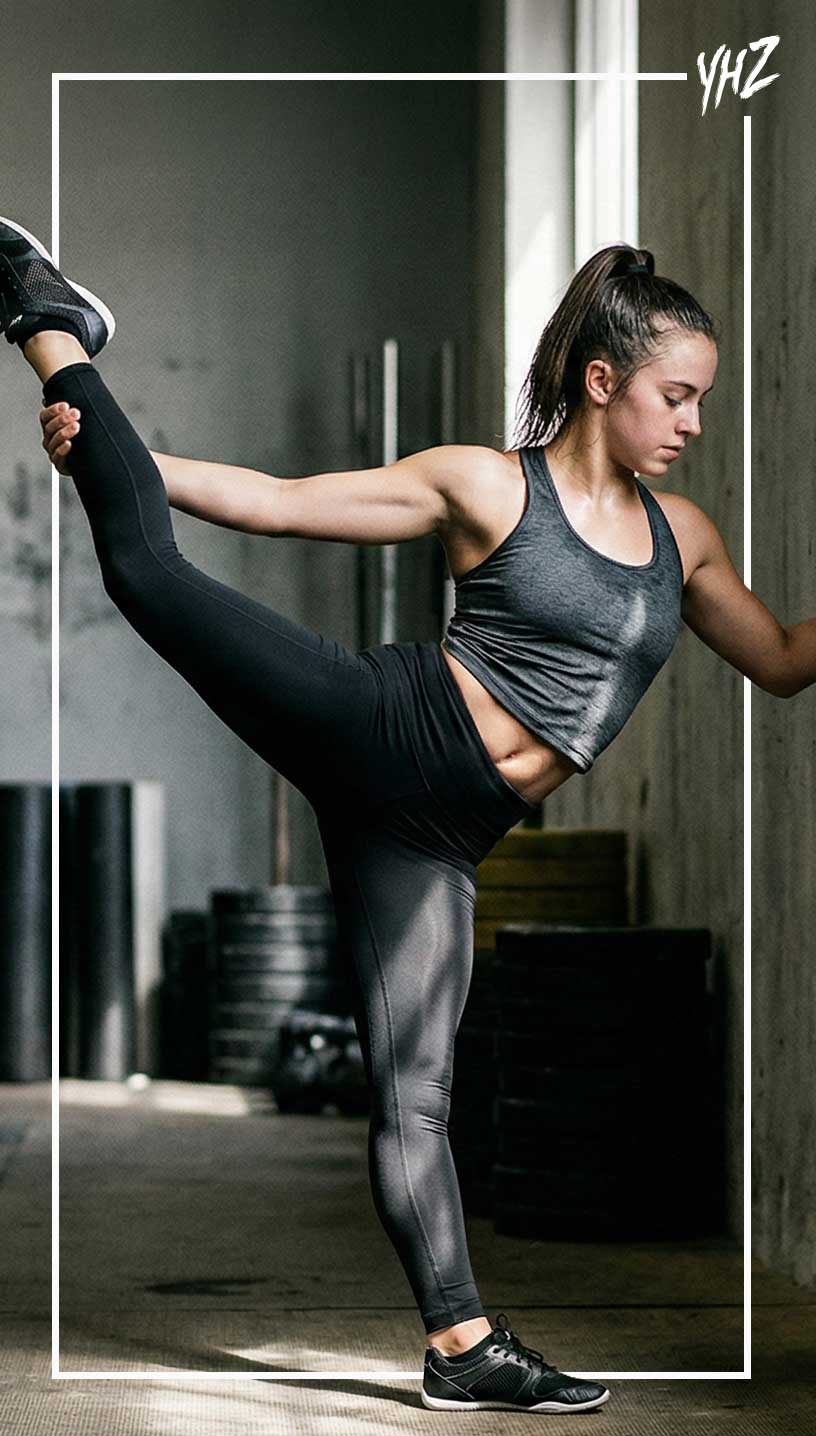
Step 3: Build Core Balance on the Ground

  • Begin on flat ground in front of a mirror.
  • Athlete holds a wall or barre for balance while lifting leg to waist level.
  • Cue: “Keep your standing knee locked and your hips even.”
  • Focus on posture and tension before adding height.

Step 4: Gradually Increase Height

Use progressive height goals:

  • Waist level → chest level → chin level → full extension.
    Between each, correct for shoulder tilt, bent leg, or hip rotation.

Step 5: Isometric Holds for Strength

  • Hold the Heel Stretch for 5–10 seconds, release slowly.
  • Cue: “Pull up through your heel, not from your back.”
  • Repeat 5 times per leg for strength and endurance.
cheer balance drills body control leg flexibility

Teaching Small Groups

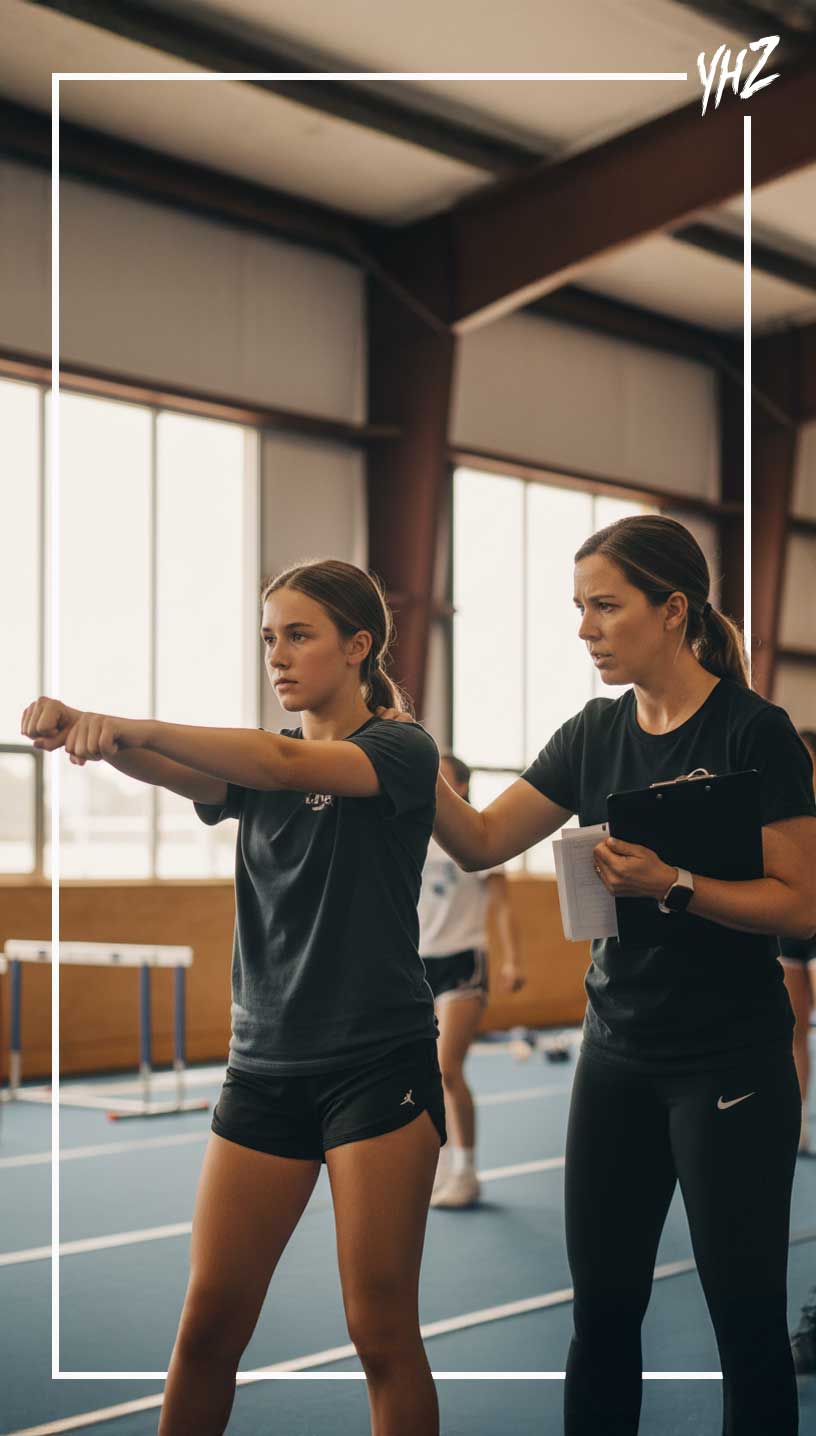
Step 1: Partner Assistance for Grip and Balance

Pair flyers with a partner or coach to stabilize shoulders and hips.

  • The partner gently supports the flyer’s wrist or extended leg for form.
  • Cue: “Balance through your belly button — not your hand.”

Step 2: Mirror Group Training

Have 3–4 flyers practice Heel Stretches side by side facing mirrors.
Visual feedback helps reinforce symmetry and prevent over-pulling.

Step 3: Controlled Release Drills

Flyers practice controlled lowering from full stretch to prep position in 3 counts.
Cue: “Lower with control — don’t drop your power.”

cheer heel stretch flyer heel stretch

Teaching the Full Team

Step 1: Progression-Based Grouping

Divide flyers by readiness level:

  • Level 1: Learning grip and hip alignment.
  • Level 2: Holding at chest/chin height.
  • Level 3: Full extension and stability.

Each group works specific goals simultaneously to keep all athletes engaged.

Step 2: Integration With Bases

When progressing to stunt groups:

  • Bases must focus on stability first, not height.
  • Cue bases: “Drive through your legs, not your arms.”
  • Cue flyers: “Stand tall before you stretch — don’t chase the leg.”

Step 3: Team Visual Cohesion

When multiple Heel Stretches are performed at once (e.g., pyramid or opening stunt sequence), use video review to check for consistent pull angles and line heights.

Common Athlete Errors and How to Correct Them

Error

Cause

Correction Strategy

Bent pulling leg

Lack of hamstring flexibility

Add daily hamstring stretches and band-assisted leg lifts.

Hips rotate open

Over-pulling or weak glutes

Cue: “Square your hips to the front.” Incorporate hip stability drills.
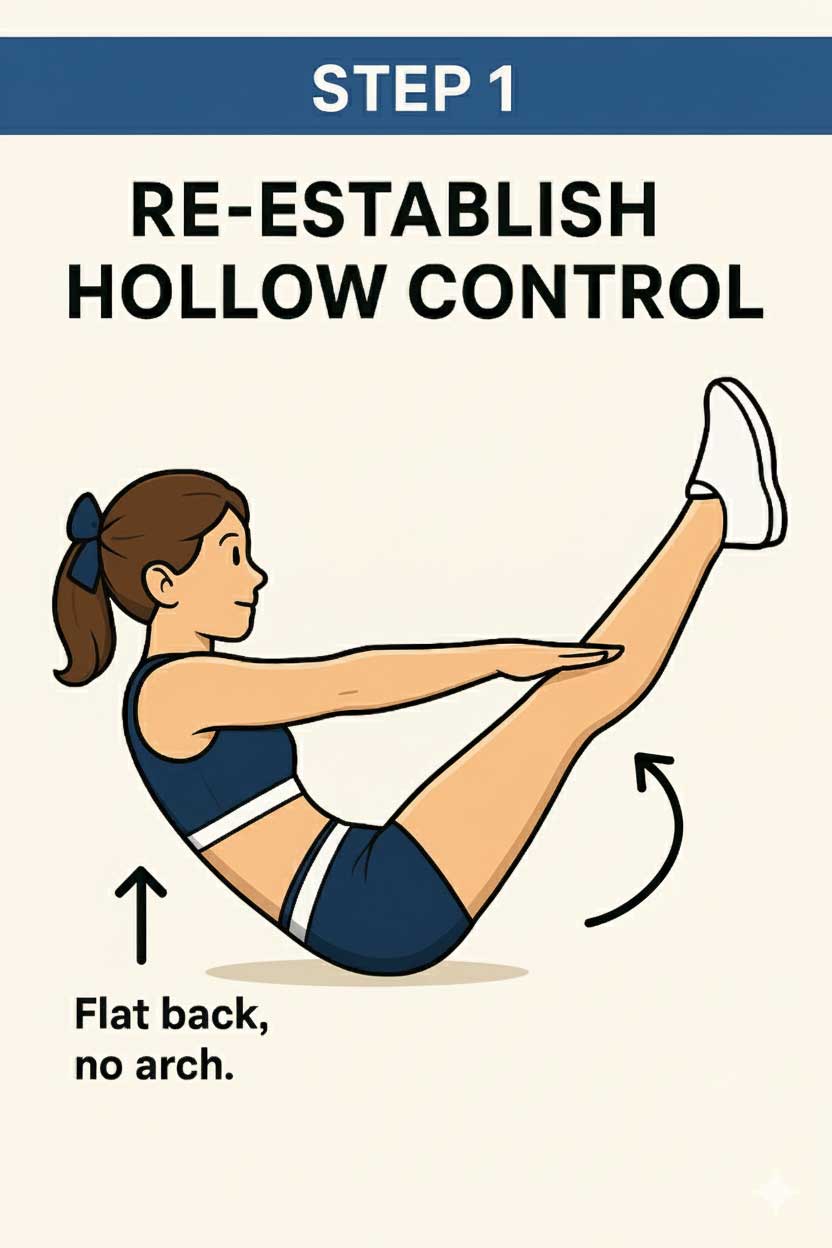
Chest drops forward

Core disengagement

Add hollow holds and planks; cue “Lift your ribs.”

Shoulders twisted

Pulling across the body

Adjust grip; cue “Keep your sternum forward.”

Wobbling base leg

Weak ankle or poor balance

Train balance on Bosu ball or single-leg squats.

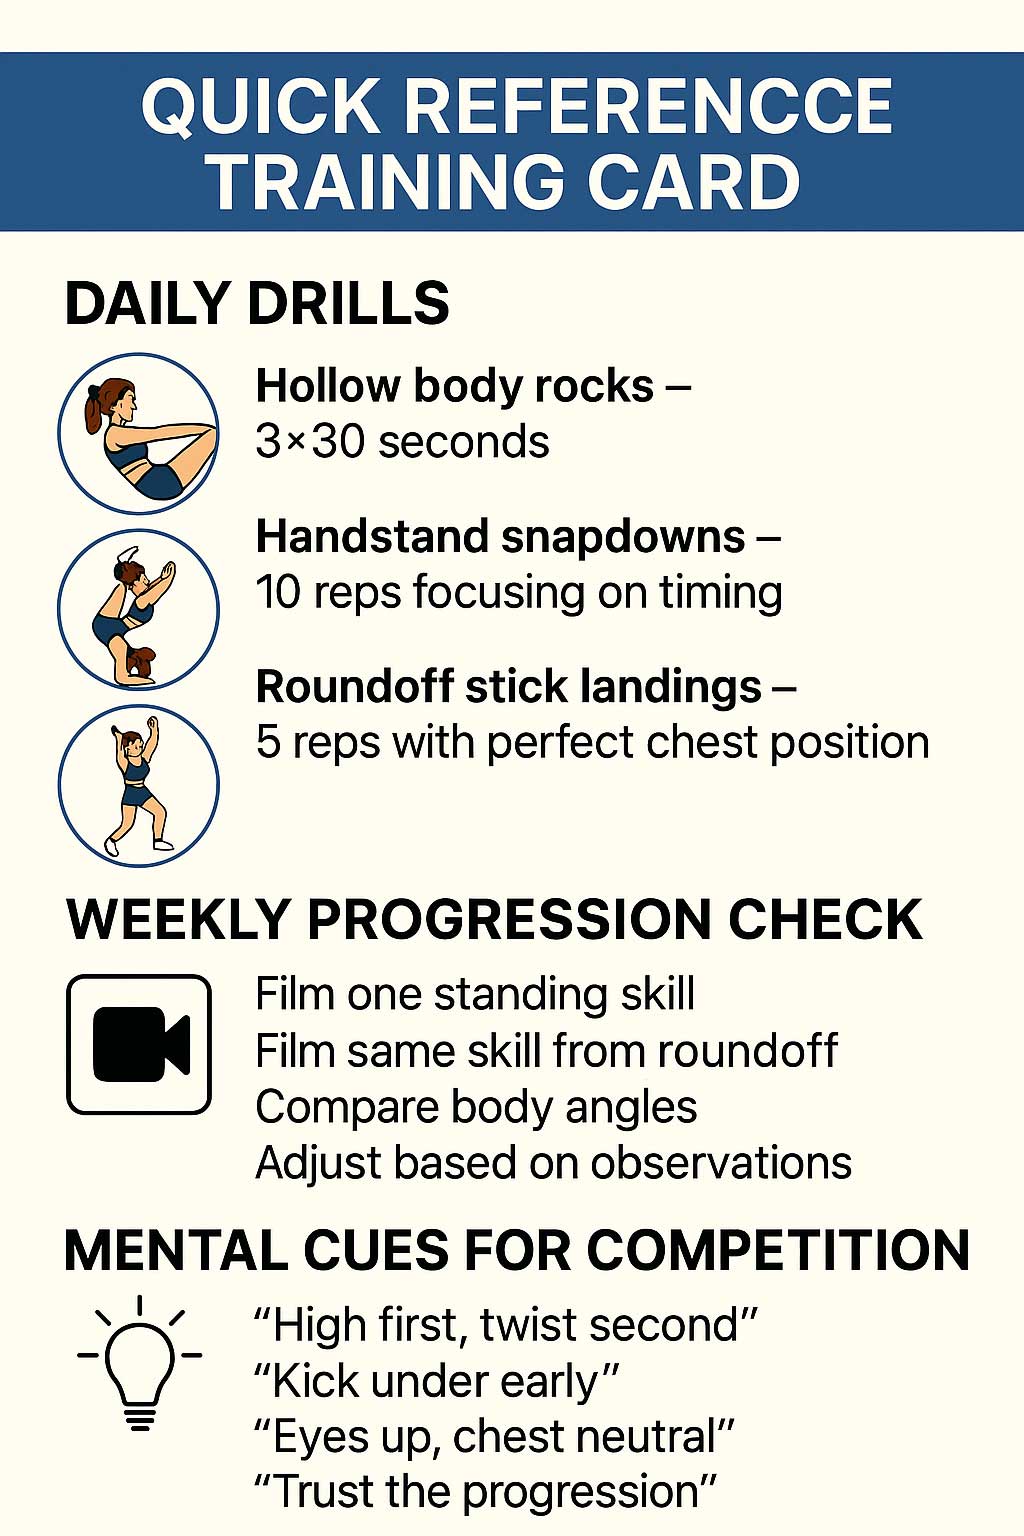
Drills to Build Heel Stretch Mastery

  1. Wall-Assisted Heel Stretch
    Flyer stands near wall, uses fingertips for support. Practice slow lifts to build stability and balance.
  2. Elastic Band Leg Lifts
    Attach a resistance band to the foot and hold the other end in the hand. Lift the leg upward for 8 reps to strengthen hip flexors.
  3. Three-Phase Hold Drill
    Lift and hold Heel Stretch for 3 counts, release halfway for 3 counts, then return to full stretch. Builds endurance and control.
  4. Mirror Line Drill
    Perform Heel Stretch facing mirror, aligning both hips and shoulders to the visual line.
  5. Full-Team Balance Challenge
    All flyers hold Heel Stretch for 10 seconds. Any wobble restarts the clock. Promotes focus and balance under pressure.

Conditioning for Heel Stretch Power and Stability

  • Single-leg Romanian deadlifts: 3×10 each leg for balance and hamstring control.
  • Core rotations with resistance band: 3×15 to stabilize trunk.
  • Glute bridges and clamshells: 3×20 for hip alignment.
  • Overhead shoulder presses: 3×12 for supporting arm endurance.
    Cue: “Every muscle that holds you still makes your Heel Stretch better.”

Final Coaching Takeaways

A perfect Heel Stretch blends flexibility with control. Teach it progressively — never force it. Prioritize core engagement, posture, and hip alignment before height. The best Heel Stretches look effortless because the strength and balance behind them are trained deliberately. With repetition and precision, your flyers will perform controlled, confident Heel Stretches that wow both judges and spectators.

cheer heel stretch technique

Steve Pawlyk Signature Full

IPP's Premade Mixes are USA Cheer Compliant and customizable!  Add Sound FX, swap songs, & more!  Add your Team Name to the mix for only $10! 

SLAM artwork
Full_Out_130 mp3 image
1 minute cheer mix
WAKE UP THE FIRE
SLAM artwork
WAKE UP THE FIRE
Full_Out_130 mp3 image
1 minute cheer mix

How to Build Muscle Memory for Strong, Consistent Motions Through Repetition Drills

How to Build Muscle Memory for Strong Consistent Motions Through Repetition Drills

By Steve Pawlyk

Published November 18, 2025

Consistency in motion execution is what makes a cheer team look professional and synchronized under pressure. Every perfect hit, clean line, and timed transition is the product of muscle memory – the body’s ability to reproduce movement automatically after enough structured repetition. Building that memory isn’t about doing endless reps; it’s about doing the right reps, with precision, timing, and awareness.
This guide provides All-Star and High School coaches with a system for teaching athletes how to engrain sharp motions into their neuromuscular patterns through progressive drills, cue phrasing, and conditioning that reinforce strength and accuracy over fatigue.

Understanding Muscle Memory in Cheer Technique

Definition:
Muscle memory is the automatic execution of a movement pattern through repeated neural reinforcement. When taught correctly, it allows athletes to hit perfect motions even under stress or fatigue.

How It Works:

  1. Cognitive Stage: Athlete consciously focuses on technique and positioning.
  2. Associative Stage: Movements become smoother as the brain refines timing and coordination.
  3. Autonomous Stage: The athlete executes motions without conscious effort – consistency achieved.

Key Principle:
Repetition alone doesn’t create good muscle memory – perfect repetition does. Poorly executed reps hardwire bad habits.

cheer muscle memory

Step-by-Step: Building Muscle Memory One-on-One

Step 1: Lock in Perfect Form

Before any repetition begins, correct form must be flawless.
Cue: “You’re not training speed yet – you’re training accuracy.”

  • Have the athlete hold each motion (High V, T, Low V, etc.) for 10 seconds.
  • Check alignment: wrists, elbows, shoulders, and posture.
  • Only when it’s perfect, begin repetitions.

Step 2: Use Isolated Reps

Perform each motion independently for 20–30 reps.

  • Start slow (counted tempo).
  • Cue: “Every hit should feel identical – no freelancing.”
  • Record video for self-analysis if possible.

Step 3: Add Controlled Transitions

After form mastery, link two or three motions together (e.g., T → High V → Low V).
Cue: “Same path, same stop, same body tension every time.”

Step 4: Integrate Feedback Loops

Have the athlete perform 10 reps, pause, and assess one technical element (e.g., wrist height).
This breaks the mindless repetition cycle and keeps focus on micro-correction.

Teaching Small Groups

Step 1: Repetition Blocks

Group athletes in sets of 3–5 and assign a “motion captain.”

  • The captain counts rhythm and monitors alignment.
  • After 20 reps, rotate captains to develop peer correction habits.

Step 2: The “Mirror Wall” Method

Line up facing mirrors. Perform the same motion sequence simultaneously.
Cue: “Every reflection should move as one body.”

Step 3: Accountability Through Counting

Use a metronome or voice count (“1-2-HIT”) to unify timing.
If anyone breaks rhythm or position, the group restarts.
Encourages focus, teamwork, and precise repetition.

Teaching Full-Team Consistency

Step 1: Team Motion Circuits

Design circuits combining 4–6 motions repeated for 8-count cycles.
Example: High V → T → Punch → Low V → High V → T
Run for 4 sets of 8 counts each, resting 15 seconds between.

Cue: “Every rep builds your muscle’s memory bank – make it count.”

Step 2: Layered Speed Progression

  1. Slow drills for angle control.
  2. Medium-speed drills for rhythm.
  3. Full-speed music drills for endurance and performance readiness.

Step 3: Coach’s Visual Consistency Check

Record full-team reps from multiple angles.
Freeze frames to compare arm levels, tension, and spacing.

Need Competition Music Blue 1

Coaching Language That Reinforces Repetition Quality

Effective Cues:

  • “Precision over pace.”
  • “Your body learns what you repeat – teach it the right thing.”
  • “Every rep is a blueprint.”
  • “Consistency lives in your shoulders and core.”
  • “Don’t just move – memorize.”

Avoid:

  • “Again!” without feedback – it trains errors.
  • “Faster!” before accuracy is built.

Common Athlete Errors and How to Correct Them

Error

Cause

Correction Strategy

Inconsistent arm height

Visual feedback missing

Mirror or video recording between reps.

Fatigue leading to slouch

Weak shoulder/core endurance

Add plank variations and static V-holds.

Speed sacrificing control

Overemphasis on tempo

Return to half-speed repetitions with counts.

Bent elbows mid-rep

Poor tension control

Cue: “Steel arms, soft shoulders.” Use resistance bands.

Uneven motion timing

Lack of auditory rhythm

Drill with metronome or 8-count track.

Drills to Build Long-Term Muscle Memory

  1. Timed Repetition Sets
    Perform 30 seconds of continuous motions, focusing on identical form each rep. Rest 15 seconds. Repeat 3 sets.
  2. Mirror Match Drill
    Partner athletes to mirror one another’s timing and motion accuracy. Visual reinforcement builds synchronization.
  3. Count Control Drill
    Run 8-count transitions slowly, freezing on each count. Forces awareness of arm path and pause integrity.
  4. “Fade Test” Drill
    Perform 25 perfect reps, then 5 more at fatigue level. Evaluate how form deteriorates. Reinforces endurance awareness.
  5. Endurance Ladder
    Add one rep per round (10 → 11 → 12, etc.). Athletes must maintain quality under load.

Conditioning for Muscle Memory Retention

Muscle memory relies on neural efficiency and physical endurance. Integrate these supportive exercises:

  • Shoulder isometric holds: 3×30 seconds per position.
  • Core rotations: 3×15 to maintain torso control through motion.
  • Scapular pushups: 3×20 to reinforce shoulder stability.
  • 8-count repetition drills: 4 rounds at full speed to simulate performance pressure.

Cue: “Train your body to remember perfect, not just repeat motion.”

cheer repetition drills

Repetition is only effective when it’s intentional. Muscle memory develops through technical accuracy, consistent cueing, and mindful pacing. As an All-Star coach, your job is to make every repetition meaningful – teaching athletes that quality repetition builds confidence and reliability under competition stress. Perfect repetition creates automatic excellence.

Steve Pawlyk Signature Full

IPP's Premade Mixes are USA Cheer Compliant and customizable!  Add Sound FX, swap songs, & more!  Add your Team Name to the mix for only $10! 

SLAM artwork
Full_Out_130 mp3 image
1 minute cheer mix
WAKE UP THE FIRE
SLAM artwork
WAKE UP THE FIRE
Full_Out_130 mp3 image
1 minute cheer mix

Drilling Sharp Transitions Between Motions: From Punch to T, T to High V, and Beyond

Drilling Sharp Transitions Between Motions From Punch to T T to High V and Beyond

By Steve Pawlyk

Published November 12, 2025

Sharp transitions are what separate a good routine from a championship-level one. Every clean line depends not only on where a motion lands but how it gets there. In All-Star cheer, those split-second pathways between positions – Punch to T, T to High V, High V to Low V – are where most visual sloppiness occurs. This guide explains how to teach precise, fast, and uniform transitions step-by-step, with drills and cue language that create muscle memory, synchronization, and control across your entire team.

cheer motion transitions

Understanding Motion Transitions

Definition:
A motion transition is the controlled movement connecting two defined positions in a routine. The transition must travel the shortest, most direct path with even tension and zero bounce at the endpoint.

Core Mechanics:

  • Economy of Motion: The arms travel the smallest path possible between positions.
  • Constant Tension: Shoulders, core, and wrists stay engaged throughout.
  • Timing: Every athlete hits the new motion on the same count.
  • Stillness Between Movements: Once a position hits, there is no residual wobble.

Common Transition Types:

  1. Linear: Straight pathways (e.g., T → High V).
  2. Rotational: Turning the arms around the axis of the shoulders (e.g., Punch → T).

3. Sequential: Linked multi-position changes (e.g., T → High V → Low V).

Step-by-Step: Teaching Sharp Transitions One-on-One

Step 1: Isolate the Start and End Points

Begin by teaching each motion independently until the athlete can hold both perfectly.
Cue: “You can’t travel cleanly between two crooked spots.”

Once the endpoints are mastered, have the athlete slowly connect them — pausing halfway to confirm arm path and shoulder control.

Step 2: Slow-Motion Rehearsal

Execute the transition in four counts:

  • Count 1–2: Travel halfway.
  • Count 3–4: Arrive at endpoint and freeze.
    Cue: “No swinging. No bouncing. Just slide and stop.”

Step 3: Gradual Acceleration

Once technique is clean, reduce to 2 counts, then 1 count, maintaining the same pathway discipline.
Use a metronome (90–120 BPM) to build rhythmic consistency.

Step 4: Add Visual Checkpoints

Use mirrors or record video to ensure elbows and wrists track symmetrically.
Cue: “Both hands should take the same route, same speed, same finish.”

Need Competition Music Blue 1

Teaching Small Groups

Step 1: Synchronization Drills

  • Have 3–5 athletes perform T → High V together to an 8-count.
  • Assign one athlete as “visual lead.” Others mirror their timing and endpoint.
  • Cue: “If you can see another arm move before yours, you’re late.”

Step 2: Mirror Pair Work

Partners face each other and perform transitions simultaneously.
Each athlete watches for delay, angle deviation, or path wobble.
Swap partners every 30 seconds for fresh observation.

Step 3: Pathway Consistency

Use painter’s tape on the mirror or wall to mark arm travel paths.
Have athletes trace those lines visually while transitioning.

cheer technique drills

Teaching the Whole Team

Step 1: Sectional Isolation

Work in formation lines. Each line executes a single transition (e.g., Punch → T) repeatedly on count 8.
Front line serves as timing reference for the rest of the team.

Step 2: Layered Tempo Progression

Run the same transition series at three speeds:

  1. Half-tempo with pauses for alignment.
  2. Full-tempo to counts.
  3. Music-speed under pressure.

Record each version for video review.

Step 3: Full-Team Transition Pyramid

Group the team by skill level: beginners drill T ↔ High V, intermediates add Low V, advanced groups run sequential combos.
Cue across levels: “Fast is fine, sloppy is not.”

cheer motion transitions

Coaching Language That Reinforces Clean Transitions

Effective Cues:

  • “Travel tight – elbows scrape your ribs.”
  • “Path, not power.”
  • “Snap through, don’t swing through.”
  • “Freeze like the motion owes you money.”
  • “Speed without chaos.”

Avoid:

  • “Faster!” – without form reference, it causes flailing.
  • “Bigger!” – encourages over-rotation

Drills to Build Transition Precision

  1. Four-Count Path Drill
Execute one transition in four controlled counts. Builds awareness of midpoint control.
  2. Metronome Timing Drill
Perform continuous transitions to beats at 100–120 BPM; freeze on downbeat. Develops rhythm discipline.
  3. Laser Line Drill
Use a low laser or elastic cord to mark shoulder height. Arms should never cross below or above during T → High V.
  4. Mirror Snap Challenge
Athletes face mirrors; coach calls random transitions (“T → Punch,” “High V → Low V”). Points for exact count accuracy.
    5. Full-Team Transition Ladder
Entire team runs a chain of motions (Punch → T → High V → Low V → T). Each error restarts the ladder. Builds endurance and focus.

Common Athlete Errors and How to Correct Them

Error

Cause

Correction Strategy

Arm swing too wide

Lack of spatial awareness

Tape floor/mirror lines; cue “Shortest path wins.”

Delay between counts

Weak timing control

Use audible 8-counts or metronome to reinforce rhythm.

Over-rotation or bounce

No core engagement

Add planks and hollow holds; cue “Stop from your ribs.”

Elbows bent mid-path

Fatigue or poor triceps activation

Strengthen with resistance bands; cue “Lock then travel.”

Unsynchronized finishes

Visual dependency

Drill “eyes closed” reps to develop proprioception.

Conditioning for Transition Endurance

Sharp transitions demand explosive muscle control and sustained tension. Integrate:

  • Shoulder raises: 3×12 front/lateral combo sets.
  • Core twists with med ball: 3×20 for torso stabilization.
  • 8-count motion circuits: Repeat 3 rounds nonstop for stamina.

Cue: “You don’t just hit motions — you connect them with power.”


Transitions define the rhythm, cleanliness, and energy of your choreography. Precision between motions communicates professionalism and teamwork.
Teach your athletes to value the space between counts as much as the counts themselves. Clean transitions are a learned habit — built through repetition, awareness, and exact language from you, the coach.

Steve Pawlyk Signature Full

IPP's Premade Mixes are USA Cheer Compliant and customizable!  Add Sound FX, swap songs, & more!  Add your Team Name to the mix for only $10! 

SLAM artwork
Full_Out_130 mp3 image
1 minute cheer mix
WAKE UP THE FIRE
SLAM artwork
WAKE UP THE FIRE
Full_Out_130 mp3 image
1 minute cheer mix

How to Teach Proper High V and Low V Technique Without Tension or Slouch

How to Teach Proper High V and Low V Technique Without Tension or Slouch

By Steve Pawlyk

Published November 11, 2025

The High V and Low V are two of the most common motions in competitive All-Star cheer – and two of the most frequently performed incorrectly. Even experienced athletes struggle with shoulder elevation, flared ribs, or collapsing posture that make these basic shapes look soft or uneven. For coaches, mastering how to teach and refine these motions builds the foundation for every visual element that follows.

Watch elite teams like Cheer Extreme Raleigh SSX (six-time World Champions as of 2025) or GymTyme Illinois Fever (back-to-back World Champions and 2025 MAJORS Champions), and you’ll immediately notice the razor-sharp precision of their V motions. Teams like South Coast Cheer Fearless (three consecutive World titles from 2023-2025) and Cheer Athletics Plano Cheetahs (2025 MAJORS Champions in Large Coed) demonstrate how flawless fundamentals translate to championship-level performances. Top Gun All Stars TGLC, with nine World Championship titles, and The Stingray Allstars Peach and Orange (both 2025 MAJORS Champions) exemplify what happens when shoulder placement, angle consistency, and core engagement become non-negotiable standards.

This guide breaks down the biomechanics, teaching progressions, drills, and cue language that produce clean, strong V-lines without stiffness or slouching – the same techniques that separate world-class programs from the rest.

Understanding the Mechanics of the High V and Low V

High V: Arms extend upward at approximately 45° from the head, forming a “V” with palms facing forward. Shoulders remain depressed, core engaged, and wrists aligned with the forearm.

Low V: Arms extend downward at approximately 45° from the hips with the same shoulder and palm orientation. The torso remains tall; no leaning or hip shift.

Key Concepts:

  • Shoulder stability: Press shoulders down and back to avoid lifting into the neck.
  • Core control: The rib cage should stay locked over the hips.
  • Angle precision: Both arms hit identical 45° angles from the body’s centerline.
  • Hand posture: Palms open, fingers tight, wrist flat with forearm.
cheer v motions

Step-by-Step: Teaching the High V and Low V One-on-One

Step 1: Establish Correct Posture

Have the athlete stand in front of a mirror, feet together, core tight.
Cue: “Imagine a straight pole running from your ears through your hips — stay tall against it.”

Checkpoints:

  • No rib flare.
  • No arched back.
  • Shoulders pressed down, not forward.
    Step 2: Build Arm Pathways
  • Start in a clean stance. Slowly lift arms to High V using a controlled path.
  • Cue: “Slide your arms up invisible rails until they stop at 45°.”
    Reverse to Low V while keeping the chest tall.
    Step 3: Activate Proper Muscle Engagement

Have the athlete perform isometric holds for 10 seconds in each position.

  • Cue: “Press your shoulders down into your back pockets while reaching long through your fingertips.”
    This balances relaxation and engagement — no over-tightening through the traps.

Teaching Small Groups

When working with 3–5 athletes, visual consistency becomes the goal.

Step 1: Mirror Line Drill

Athletes line up facing a mirror. Coach calls “High V!” — everyone hits and holds.
Cue: “Your wrists should live on the same invisible shelf.”

Step 2: Shoulder Suppression Awareness

Place light resistance bands under each athlete’s armpits, anchored behind them. As they hit High V, they feel upward resistance.
Cue: “Keep your shoulders under control — don’t let the band lift you.”

Step 3: Peer Alignment Feedback

Partners watch from the side to ensure the 45° line is consistent.
Correction language: “Your V is too narrow/wide — match your partner’s arm spacing.”

GymTyme Illinois is particularly known for their attention to technical detail in every transition and count. Coach Colleen Peddle notes that their athletes “strive to be their best every time they practice,” which is evident in Fever’s consistent execution of fundamentals like V motions throughout their championship routines.

Need Competition Music Blue 1

Teaching the Whole Team

Step 1: Floor Grid for Angle Consistency

Mark 45° lines on the floor with tape extending outward from each athlete’s center point. These act as alignment guides for both High V and Low V. Cue: “Hit your V to the line – not beyond it.”

Step 2: Visual Synchronization

Film the team from the front and above if possible. Pause frames at each V to identify uneven angles. Adjust arm width and height as a group.

This filming technique is standard practice at top programs. Watch any performance from The California All Stars Black Ops or World Cup All Stars Shooting Stars and you’ll see the results of this level of video analysis – perfect synchronization that creates powerful visual impact.

Step 3: Integration into Choreography

Transition drills: practice moving from T → High V → Low V → punch → High V on counts 1-8. Cue: “Every V is identical – same reach, same stop, same confidence.”

Coaching Language That Resonates

The words a coach uses determine how tension or relaxation manifests. Effective cues:

  • “Lift without shrugging.”
  • “Reach from your back, not your neck.”
  • “Arms long, ribs in.”
  • “Energy out your fingers, not your traps.”
  • “Tall spine, heavy shoulders.”

Avoid:

  • “Tighten up” – creates trap tension.
  • “Higher arms” – causes shoulder lift.

Common Athlete Errors and How to Correct Them

Error: Shoulders lift toward ears

Cause: Over-activation of upper traps

Correction: Cue downward press: “Slide shoulders into your back pockets.” Add lat-pull drills.

Error: Rib flare / arched back

Cause: Weak core engagement

Correction: Incorporate plank and hollow-body holds; cue “ribs down, core tight.”

Error: Uneven V angles

Cause: Dominant arm or shoulder imbalance

Correction: Mirror practice; use resistance band symmetry drills.

all star cheer coaching

Error: Soft wrists

Cause: Lack of forearm tension

Correction: Reinforce “blade hand” cue; add wall-press tension exercises.

Error: Bent elbows

Cause: Poor triceps control

Correction: Light dumbbell V-holds to build endurance.

South Coast Cheer Fearless has demonstrated how eliminating these errors at the foundational level leads to three consecutive World Championship titles. Their XSmall division team proves that when every athlete masters these corrections, the collective visual impact is unmatched.

Drills for Developing Perfect V Technique

1. Wall Alignment Drill

Stand six inches from a wall. Perform High V and Low V without touching it. If wrists or elbows hit, the V is too narrow or wide.

2. Resistance V Holds

Loop a light band around wrists. Maintain outward pressure while holding a High V for 15 seconds; repeat Low V. Builds symmetrical engagement.

3. Tempo V Transitions

Execute controlled V changes to a metronome (80–100 BPM). Focus on hitting exact 45° endpoints.

4. “Shoulders Down” Cue Drill

Coach places a palm lightly on athlete’s traps during motion. The goal: perform full V without rising into the hand.

5. Full-Team V Sync Challenge

Entire team hits alternating High V/Low V to 8-count music. Any misaligned athlete restarts the round. Reinforces collective accountability.

Elite programs like Top Gun All Stars Miami integrate these drills into daily practice. With nine World Championship titles for TGLC alone, their commitment to fundamental excellence in motions like the High V and Low V is evident in every performance.

Conditioning for V Endurance

Strong V positions require posterior-chain balance and shoulder stamina. Integrate:

* Reverse flys (3×12 at 8 lbs)

* Scapular retraction band pulls (3×15)

* Plank arm raises (3×10 each side)

* 30-second High V/Low V holds under fatigue conditions

Cue: “When your arms burn, hold the line – that’s your real V.”

Cheer Athletics Plano has partnered with Sports Academy to provide their Elite teams with specialized strength, flexibility, and conditioning programs for the 2025-2026 season. This type of targeted conditioning helps teams like Panthers (multiple World Champions) and Cheetahs maintain technical precision even under the physical demands of a full routine.

Celebrity Cheer York PA

Learning from the Best: What Championship Teams Do Differently

When analyzing the 2025 MAJORS and Cheerleading Worlds results, certain patterns emerge among champion teams:

  • Consistency Across All Athletes: Watch Cheer Extreme Raleigh SSX’s routines and you’ll see that every athlete – not just the strongest ones – demonstrates identical shoulder placement and angle precision in their V motions. This team consistency is what allowed them to score 164.85 with zero deductions at Worlds 2024.
  • Detail-Oriented Practice: GymTyme Illinois focuses on “every count” of their routines, according to their coaching staff. This attention to transitions and details extends to fundamental motions, ensuring that V positions are always sharp, never rushed or lazy.
  • Zero Tolerance for Technical Errors: The Stingray Allstars programs (with teams like Peach and Orange winning MAJORS divisions) maintain high standards for motion technique. A sloppy V is corrected immediately, reinforcing that fundamentals are never beneath any athlete’s attention.
  • Progressive Skill Development: Cheer Extreme Raleigh’s pathway from developmental teams to world-champion squads like SSX shows how building proper V technique from Level 2 creates athletes who can execute flawlessly at Level 6. They “track kids from one team to the next” to ensure proper technical foundation.

Teaching clean High V and Low V positions is about structural discipline, not brute force. The coach’s role is to train posture first, then angle precision, and finally tension control. Build awareness from the shoulders down, not the hands up.

The 2024-2025 season has shown us through teams like South Coast Cheer Fearless (three-peat champions), GymTyme Illinois Fever (back-to-back champions), Cheer Extreme Raleigh SSX (six-time champions), and Cheer Athletics Plano Cheetahs (MAJORS champions) that technical excellence in fundamentals is what separates good teams from championship programs. When you invest time in perfecting V motions, you’re not just fixing arm positions – you’re building a foundation for every elite skill that follows.

Steve Pawlyk Signature Full

IPP's Premade Mixes are USA Cheer Compliant and customizable!  Add Sound FX, swap songs, & more!  Add your Team Name to the mix for only $10! 

SLAM artwork
Full_Out_130 mp3 image
1 minute cheer mix
WAKE UP THE FIRE
SLAM artwork
WAKE UP THE FIRE
Full_Out_130 mp3 image
1 minute cheer mix

Teaching Perfect Arm Angles How to Correct Chicken Wings Dropped Elbows and Soft Wrists

Teaching Perfect Arm Angles How to Correct Chicken Wings Dropped Elbows and Soft Wrists

By Steve Pawlyk

Published November 7, 2025

In competitive All-Star cheerleading, sharp motions define the difference between a clean, high-scoring routine and one that looks unrefined. Teaching athletes how to execute crisp, dynamic arm movements with precision and body control is fundamental to building strong visuals and synchronicity across your team. This guide walks All-Star coaches through a technical, step-by-step process for teaching sharp motions effectively – from individual drills to full-team synchronization – while addressing common errors, timing issues, and body alignment problems that often hold athletes back.

Understanding the Mechanics of Sharp Motions

Definition:
A “sharp motion” is a quick, controlled movement that stops abruptly at a precise endpoint with visible muscle engagement. It requires correct arm path, shoulder alignment, and total-body engagement.

Core Elements of Sharpness:

  • Tension: Muscles are fully engaged without appearing rigid.
  • Accuracy: Arm placement hits exact angles (e.g., 45°, 90°).
  • Timing: Motion reaches its final position simultaneously across athletes.
  • Control: Movement stops cleanly, with no bounce or wobble.

Key Muscles Used:
Deltoids, trapezius, latissimus dorsi, biceps/triceps, and core stabilizers.

cheer arm angles

Step-by-Step: Teaching Sharp Motions One-on-One

Step 1: Establish Muscle Awareness

  • Drill: Have the athlete hold a High V for 10 seconds. Then cue:
    “Tighten your arms until they feel like steel – now breathe without letting the arms move.”
  • This develops static control and shoulder stability.

Step 2: Teach Arm Pathways

  • Use mirror feedback. Demonstrate a motion slowly, tracing the arm path.
  • Cue: “Travel through the air like you’re slicing – not floating.”
  • Have the athlete practice T → High V → Low V transitions at half-speed, then full-speed, maintaining tight paths and deliberate stops.

Step 3: Reinforce Visual Symmetry

  • Correct uneven elbows by cueing: “Both elbows should look like twins – same height, same line.”
  • Photograph or record the athlete mid-motion for visual correction.

Step 4: Add Controlled Speed

  • Once the athlete can execute cleanly at half-speed, use a metronome or counts.
  • Cue: “Hit, hold, snap back – no extra noise in between.”

One-on-One Focus: Keep feedback specific and immediate – correct after every rep. For developing athletes, emphasize “clean over fast.”

Teaching Small Groups: Building Consistency

When moving from individual correction to group work (3-5 athletes), the goal shifts from precision to uniformity.

Step 1: Synchronization Drills

  • Drill: Assign one athlete as the “lead” and have others match their timing and stop point.
  • Use 8-count tracks at 100 – 120 BPM for consistency.

Step 2: Peripheral Awareness

  • Cue athletes to use side vision to check alignment:
    “Your arms should land in the same line as your neighbor’s. If you see a hand out of place, match it.”

Step 3: Micro-Timing Adjustments

  • Record group motions in slow-motion.
  • Identify the athlete who hits early or late, then isolate and re-sync.
  • Use rhythmic clapping or verbal counts (“1-and-HIT”) to reinforce team timing.

Teaching Full-Team Precision

Step 1: Formations and Spacing

  • Sharp motions lose impact when spacing drifts. Tape lines on the floor to keep spacing exact (arms-length apart).
  • Cue: “Your visual space is part of the motion – protect your square.”

Step 2: Layered Instruction

  1. Start with silent run-throughs – no music, just visual hits.
  2. Progress to count-based: “5-6-7-8!”
  3. End with music-speed execution and pause drills between counts to check visuals.

Step 3: Visual Synchronization Drills

  • Use video playback and freeze frames at key motions (High V, T, Punch, etc.) to identify misalignments.
  • Assign “correction partners” – athletes who check each other’s arm levels and tension before full runs.
Need Competition Music Blue 1

Coaching Language That Works

The phrasing you use directly influences athlete response. Avoid abstract cues like “be sharp” or “hit harder.” Replace them with sensory and mechanical instructions.

Effective Coaching Phrases:

  • “Imagine your arms are blades cutting the air.”
  • “Snap into place like a magnet hitting metal.”
  • “Hold tension like you’re trying to flex your arms into the floor.”
  • “Freeze, don’t bounce.”
  • “Clean lines over fast arms.”

Common Athlete Errors and How to Correct Them

Error

Cause

Correction

Bent elbows

Weak triceps or poor tension awareness

“Lock but don’t lock out – think steel, not wood.” Drill with 3-lb dumbbells.

Uneven arms

Shoulder misalignment or hand dominance

Train both sides equally. Use mirror or laser alignment drills.

Wobbly stops

Lack of core engagement

Add plank and hollow hold conditioning. Cue: “Freeze from your ribs, not your wrists.”

Soft wrists

Weak tension through forearm

Incorporate “blade hand” drills – open palm tension holds for 8 counts.

Sloppy transitions

Rushed counts or overextension

Slow down, isolate each transition. “Every path is a punch, not a wave.”

Progressive Drills for Mastery

  1. Isolation Drill: Perform each motion slowly to counts – no transitions. Focus only on angle accuracy.
  2. Snap Drill: Hit T → High V → Low V → T in rhythm to a metronome, pausing between each to check angles.
  3. Mirror Match Drill: Two athletes face each other and mirror motions simultaneously. Immediate visual feedback reinforces synchronization.
  4. Resistance Band Drill: Attach light bands to wrists. Perform motions while maintaining band tension – builds strength and control.
  5. Full-Team Clean Hit Challenge: Every athlete must freeze at the end of each motion; any visible bounce or movement restarts the count.

Building Endurance for Sharp Motions

Sharp motions require not only precision but also endurance. Incorporate these conditioning elements:

  • Shoulder holds: 3 sets of 30-second High Vs with light dumbbells.
  • Core stabilization: Hollow holds and plank variations to reduce upper-body wobble.
  • Repetition drills: 50-count sets of full-out motions to simulate routine fatigue.

Cue during conditioning: “Your arms should look the same on count 1 as they do on count 50.”

chicken wings cheer

When an Athlete Struggles

Common Struggles:

  • Arms aren’t hitting sharp or fast enough:

    • Cause: Lack of muscle engagement or understanding of “motion lock.”

    • Fix: Have the athlete perform slow-motion hits against light resistance bands to feel the tension through shoulders, triceps, and wrists. Cue “lock from the shoulder, not the elbow.” Reinforce with short-count drills — e.g., “1–hit, 2–freeze.”

  • Elbows bend or wrists flop at the end of the motion:

    • Cause: Weak upper-arm engagement or fatigue during repetition.

    • Fix: Add static arm holds (10 seconds per motion) and isometric presses against a wall. Cue “squeeze through your arms like you’re cracking glass.”

  • Angles inconsistent between left and right sides:

    • Cause: Poor proprioception or shoulder imbalance.

    • Fix: Drill in front of a mirror or record video feedback. Have the athlete hit one motion at a time and freeze for visual alignment checks. Cue “match the mirror, not your memory.”

  • Athlete can’t find visual uniformity in team formations:

    • Cause: Over-focusing on personal execution instead of spatial awareness.

    • Fix: Use “mirror pairs” — partner the athlete beside your cleanest performer and run synchronized drills. Cue “your job is to disappear into the line.”

  • Timing late or early on counts:

    • Cause: Overthinking or reacting visually instead of audibly.

    • Fix: Practice hitting on a metronome beat or 8-count track. Cue “hit the sound, not the sight.”

Coach Tip:
When a particular athlete struggles to “feel” the sharpness, try tactile feedback. Have the athlete hold a lightweight resistance band across both wrists or a small towel between hands — this creates tangible tension through the arms and instantly teaches them what “tight” actually feels like. The goal isn’t punishment; it’s awareness. Once they feel it, they can replicate it without the tool.

Teaching sharp motions isn’t about speed — it’s about accuracy, control, and tension. Start slow, demand consistency, and build synchronization from the ground up. The payoff is visual cleanliness, team unity, and a routine that commands attention from judges the moment the first motion hits.

Stay tuned for more coaching tips from our Cheer How-To Series 

Steve Pawlyk Signature Full

IPP's Premade Mixes are USA Cheer Compliant and customizable!  Add Sound FX, swap songs, & more!  Add your Team Name to the mix for only $10! 

SLAM artwork
Full_Out_130 mp3 image
1 minute cheer mix
WAKE UP THE FIRE
SLAM artwork
WAKE UP THE FIRE
Full_Out_130 mp3 image
1 minute cheer mix

Why You Overrotate When Adding a Roundoff: The Real Deal on Standing vs Running Tumbling

Why You Overrotate When Adding a Roundoff The Real Deal on Standing vs Running Tumbling

By Steve Pawlyk

Published September 10, 2025

A few days ago, someone posted a video in r/cheerleading asking why they kept overrotating their kick fulls. I jumped in with this whole article about kick full technique. I was pretty proud of it, honestly. 😊 Then she dropped a very polite comment that showed how I kinda missed her point.

She basically said: “Cool article, but this isn’t just about kick fulls. This happens with literally any skill when I go from standing to running. Like, I can nail standing doubles on tumble track, but when I need a roundoff-BHS for triples, I overrotate onto my back every time.”

And you know what? She was 100% right. I’d completely missed the bigger picture. Her problem wasn’t about one specific skill. It was about something way more fundamental that affects pretty much every tumbler who’s leveling up. So I went back, did my homework, talked to a bunch of coaches, and wrote this completely new article that actually addresses what’s really going on.

To the athlete OP from r/cheerleading (u/Beginning_Army_9084): respect. This one’s for you.

standing vs running tumbling

⚠️ Real Talk: Safety First

Look, I need to be super clear here. Everything in this article is dangerous if you try it without proper coaching. I’m talking about:

  • You NEED a certified coach watching you
  • You NEED to be in a real gym with proper mats and equipment
  • You NEED to have the basics down first
  • You NEED someone spotting you until your coach says you’re good to go solo

Please don’t try this stuff in your backyard or basement. I’m serious. People get paralyzed or worse from tumbling wrong. This isn’t meant to scare you. It’s just reality.

The Problem Everyone Faces (But Nobody Explains Well)

So here’s the deal: You’ve got your standing doubles looking clean. You’re feeling good. Then you add a roundoff-back handspring and suddenly you’re rotating way too fast and landing on your back. Sound familiar?

One athlete described it perfectly: “I can do standing double fulls on tumble track just fine, but I can’t do standing triples, so I need to add a roundoff-BHS. But then I overrotate and land on my back.”

This isn’t just you being weird or doing something wrong. It’s a legit biomechanical thing (fancy word for how your body moves) that happens to basically everyone when they start combining standing and running skills.

Need Competition Music Blue 1

Why This Happens: The Science Stuff (Made Simple)

1. Your Roundoff Changes Everything

Here’s what research actually tells us: roundoffs literally turn your forward running speed into upward and backward power. When you add that to the technique you use for standing skills, you suddenly have way more rotation than you know what to do with.

Think of it this way: It’s like you’re used to driving 30mph and suddenly you’re going 60mph but still trying to brake at the same spot. Of course you’re gonna overshoot.

2. Your Muscles Fire Totally Differently

This is kinda wild. So scientists have studied this and found that your muscles actually work in a completely different order when you’re tumbling from a run versus standing still. Like, your calf muscles (gastrocnemius if you wanna get fancy) and your quads work together differently, and your hamstrings kick in at different times.

Real world translation: Imagine throwing a baseball while standing still versus throwing while running. Same arm motion, right? But your whole body has to adjust to handle the momentum. That’s exactly what’s happening with your tumbling.

cheerleading doubles progression

3. Your Brain is Playing Catch-Up

Your brain has basically memorized how to do your standing skills. It knows what to look for (visual cues), what your body position feels like (that’s the proprioceptive thing; basically your body’s GPS system), and when to fire which muscles. But when you suddenly add speed, your brain can’t adjust fast enough.

What this feels like: You know that weird feeling when you step on an escalator that’s broken and not moving? Your brain expects motion but gets stillness, and you feel all off-balance for a second? That’s basically what’s happening here, but in reverse. Your brain expects standing-speed but gets running-speed, and everything feels wrong.

cheer tumbling overrotation

The Real Issue: You’re Using the Wrong Technique for the Situation

Here’s the truth bomb: The technique that works perfectly for your standing skills just doesn’t work when you add running momentum. Research on tumbling shows that how you take off literally determines how much power and rotation you generate, and the technique for standing is totally different from running.

Think about it like this: You’re trying to use the same parking technique whether you’re going 5mph or 50mph. That’s obviously not gonna work.

Standing Skills (What You’re Used To):

  • You’re on the ground longer during takeoff
  • You have time to really set up your rotation
  • Your body stays pretty upright
  • All your power comes from your leg push
  • You control everything

Running Skills (What You Need to Learn):

  • You have to be way quicker off the ground
  • The roundoff already started your rotation for you
  • You’re dealing with forward momentum you have to redirect
  • Your power comes from legs PLUS all that running speed
  • There’s way more going on to manage

Easy comparison: Standing skills are like jumping straight up from a chair—controlled, predictable. Running skills are like jumping off a moving skateboard—everything’s faster and if you don’t adjust, you’re eating mat.

Before You Even Think About This Stuff: The Non-Negotiables

Real talk—if you can’t do these things, you’re not ready for what we’re talking about:

Strength Stuff You Need:

✓ Hold a handstand against the wall for a full minute (yes, 60 seconds, no cheating) ✓ Hold a free handstand for at least 5 seconds without walking around ✓ Bang out 10 solid handstand snap-downs ✓ Hold a bridge with your shoulders over your hands for 10-20 seconds ✓ Do hollow body rocks for 30 seconds, 5 times (and actually stay hollow) ✓ Jump backward onto something hip-height (box, mats, whatever)

Skills You Better Have First:

✓ A consistent standing back handspring (not just “I did it once”) ✓ A roundoff that actually rebounds (not just falls backward) ✓ Either a back walkover OR bridge kickover (shows you have the flexibility) ✓ The standing version of whatever skill you’re trying to add a roundoff to

If you’re reading this list thinking “uh, I can’t do half of this”—then stop here. Work on these first. Seriously.

Need Competition Music Blue 1

How to Actually Fix This (With Your Coach!)

Step 1: Figure Out What’s Actually Happening

Your coach needs to film you doing:

  1. Your standing skill (like a standing double)
  2. The same skill from a roundoff-back handspring
  3. Then you both need to look at the difference

Red flags to watch for:

  • You keep landing on your back or shoulders (bad news)
  • Your chest falls backward every time
  • You can’t control easier skills before trying harder ones
  • You’re scared of running passes but not standing ones
  • Your feet land way behind where they should
standing vs running power step 1 competitive cheerleading
acceleration patterns change step 2

Step 2: Get That Hollow Body on Lock

When you add speed, your body naturally wants to arch backward like crazy. Coaches call this “arch temptation” and it’s super real. You have to fight this with specific hollow body training.

What’s happening: When you go fast, your body wants to turn into a banana. It’s like when you’re in a car that accelerates hard and you lean back into the seat; except in tumbling, that’ll mess everything up.

Drills your coach will have you do:

  1. Hollow rocks with different arm positions – 30 seconds, 3 times
  2. Handstand snap-downs staying hollow – The key is keeping that shape even when going fast
  3. Roundoff to stick landing – Just land it, no extra skills
  4. Roundoff jump-backs – Jump backward onto raised mats, staying tight

Step 3: Relearn Your Timing (This is the Game-Changer)

Here’s what science tells us: your muscles have to work in a different pattern for running skills. While we can’t put an exact percentage on it, you definitely need to snap down earlier when you’re coming out of a roundoff.

Easier way to think about it: Standing skills give you time to really pull and snap. From a roundoff? Everything’s gotta happen faster. It’s like the difference between a casual high-five and trying to high-five someone when you’re both running—the timing is totally different.

The Main Drill (Always With a Spotter):

  1. Do your roundoff-back handspring
  2. But instead of your usual skill, just do a layout with ZERO twist
  3. Try to snap earlier than feels normal
  4. Land in control (not trying to stick it perfectly upright)
  5. Only add twisting when your coach says you’re ready
Mental Reference points lag Step 3
Build Power Control Step 4

Step 4: Learn Control, Not Maximum Power

How to Progress (Everyone’s Different on Timing):

Phase 1: Keep It Simple (At Least 2-3 Weeks)

  • Just do roundoff-back handspring-layouts (no twisting at all)
  • Focus on where your chest ends up when you land
  • Need to nail this at least 10 times before moving on

Phase 2: Add a Little Twist (Another 2-3 Weeks Minimum)

  • Try roundoff-back handspring-Arabians (that’s a half twist to your stomach)
  • This forces you to set right because you can’t cheat it
  • Has to be consistent before moving on

Phase 3: Bring Back Your Full Skill (This Takes Forever for Some People)

  • Don’t go full power right away
  • Film everything to review with your coach
  • Only add more power when you’re landing clean
  • Seriously, this can take months—that’s normal

Phase 4: Level Up (Only When Your Coach Says So)

  • Once doubles are boring and easy, maybe start thinking about triples
  • But if the easier skill isn’t automatic, you’re not ready for harder stuff

The Cues That Actually Help

What Your Coach Should Be Telling You:

  • “Set up before you twist” – The roundoff gives you spin, you just need to go UP
  • “Snap earlier” – Your legs need to move faster than in standing
  • “Same shapes, different timing” – Keep your technique, just adjust when stuff happens
  • “Up and a little forward, not back” – Fight that backward pull

What Your Coach is Looking For:

  • Your chest should be neutral or slightly forward at takeoff
  • Your eyes should see the ceiling, not the wall behind you
  • Your arms should punch up, not reach back
  • Your feet should land under you or slightly in front
Quick Reference Training Card for Coaches Step 7
Need Competition Music Blue 1
cheerleading triples training

Mistakes That Make Everything Worse

1. Taking a Huge Run-Up

More steps doesn’t mean more control. Research on sprinting shows people hit near-top speed in just a few steps. Your coach will tell you how many steps to take (usually like 2-3 power steps).

Why this matters: Taking a massive run-up just gives you more time to mess up. Keep it simple.

2. Jumping UP Into Your Roundoff

This kills your momentum. You want to hurdle forward, not up.

Think about it: Be a race car staying low and fast, not a pogo stick bouncing up and down. Every bit of upward bounce is wasted energy.

3. Skipping Steps in Training

Your brain needs time to adjust. Work with your coach to use the right progression for your gym. Don’t try to rush it just because your friend is doing harder stuff.

4. Those Weird Backward Steps

Okay, this is confusing. In cheerleading rules, if you go backward, it’s technically “standing tumbling” even if you take steps back. But from a how-your-body-works perspective, those steps create momentum so it’s not really “standing” anymore.

The issue: Taking backward steps before your “standing” skills creates this weird in-between technique that doesn’t work well for either real standing OR running skills. Work with your coach to keep your technique clean.

coaching cheer tumbling 1
coaching cheer tumbling

Let’s Talk About Mental Blocks (They’re Normal!)

What’s Really Going On

Mental blocks are legit psychological responses that sometimes need professional help. It’s not just “being scared”. It’s way more complex than that.

Here’s the deal: Your brain has multiple systems keeping track of what’s happening when you tumble:

  • What you see (visual)
  • Your balance system (vestibular: like your inner ear stuff)
  • Where your body parts are (proprioceptive: your body’s GPS)

When these systems get conflicting info at high speed, your brain can basically hit the emergency brake. That’s a mental block.

What might help (but only with your coach):

  1. Super slow progression – Like, way more reps at each level than you think
  2. Same routine every time – Same warm-up, same cues, same everything
  3. Watch yourself succeed – Video review can help reprogram your brain
  4. Get professional help – Sports psychologists are amazing for this stuff

Important: Mental blocks are NOT you being weak or a baby. They’re your brain trying to protect you. Never try to just “push through” without help.

When to STOP (This is Serious)

Your coach should stop you if:

  • You land on your neck or shoulders (even once)
  • You’re consistently scared and it’s not getting better
  • You feel lost in the air (don’t know where you are)
  • Anything hurts (back, neck, joints)
  • You can’t control what you’re currently working on
  • You’re too tired to keep good form

If any of this happens, stop. Rest. Maybe go back to easier stuff. This isn’t giving up. It’s being smart.

Everyone’s Different (And That’s Okay)

People progress at totally different speeds based on:

  • What training they’ve done before
  • Natural flexibility and strength
  • How they handle fear
  • How often they train and who coaches them
  • Their body type and proportions
  • How old they are

There’s no “normal” timeline. Some people get this in weeks, others take literally years. This doesn’t mean anything about how good you’ll eventually be; tons of elite athletes were “slow learners” at first.’

The Bottom Line: You Need Your Coach

The athlete who spotted this pattern was super smart, but being aware of the problem doesn’t fix it. You need:

  1. A legit coach who knows their stuff
  2. A real gym with proper equipment
  3. Patience to work through everything properly
  4. Consistent practice focusing on quality, not just throwing skills
  5. Good communication with your coach about what you’re feeling

The science shows that elite athletes have to train their bodies to work differently for different situations. In normal words, standing and running skills need different timing, and you have to train both. It’s not about being stronger; it’s about being smarter with your training.

Last Words to the Reddit Athlete

Your comment about this being a universal problem was spot-on. The fact that you could see the pattern, “I can do it standing but overrotate from a roundoff” and connect it across different skills shows you really understand what’s happening. That kind of awareness is huge.

This isn’t you doing something wrong. It’s a normal thing that happens when you’re getting better. The research backs this up—different tumbling situations literally require your muscles to work in different patterns.

Keep working with your coach, trust the process (even when it’s slow), and remember that every elite tumbler has dealt with this exact same thing. The difference between people who figure it out and people who don’t isn’t talent. It’s having good coaching and the patience to do things right.

You’ve got this. But please, take your time, stay safe, and always have qualified supervision.

Quick Checklist for Athletes

Daily Conditioning (Only if your coach approves)

  • Hollow body rocks – 3 sets of 30 seconds
  • Wall handstands – Work up to 60 seconds
  • Bridges – Hold for 10-20 seconds
  • Whatever core work your coach assigns

Remember

  • Everyone progresses at their own speed
  • Mental blocks are normal, not weakness
  • Never train this stuff without your coach
  • If it hurts, stop immediately
  • Being safe is way more important than any skill

Steve Pawlyk Signature Full

IPP's Premade Mixes are USA Cheer Compliant and customizable!  Add Sound FX, swap songs, & more!  Add your Team Name to the mix for only $10! 

SLAM artwork
Full_Out_130 mp3 image
1 minute cheer mix
WAKE UP THE FIRE
SLAM artwork
WAKE UP THE FIRE
Full_Out_130 mp3 image
1 minute cheer mix

Legal stuff: This article is just for education. The author and website aren’t responsible for any injuries from trying this stuff. Always work with qualified professionals. Seriously, we mean it.

Why Am I Overrotating My Kick Fulls? A Coach’s Guide (with Drills to Fix It)

Why Am I Overrotating My Kick Fulls A Coachs Guide with Drills to Fix It

By Steve Pawlyk

Published September 1, 2025

Cheer tumblers working on doubles often run into a frustrating problem: overrotation on their kick fulls. This issue shows up most often when athletes move from standing entries to roundoff entries, and it can make doubles feel impossible.

The good news? Overrotation isn’t a dead end — it’s actually a sign of power. With the right mechanics and drills, athletes can learn to control that power and use it as a foundation for doubles.

kick full overrotation

The Root Cause of Kick Full Overrotation

When an athlete goes from a standing kick full to a roundoff–back handspring–kick full, the entry changes everything:

  • Extra power and momentum: The roundoff + handspring produces more height and rotational energy than a standing kick, making the twist easier to over-rotate.
  • Delayed kickdown: Without snapping the legs down early enough, the layout rotation continues too long before the twist is complete.
  • Chest position at set: A chest that’s too open (arched) at takeoff almost always leads to excess flip rotation.

Why Roundoff Entries Make It Worse

  1. Stronger rebound: Roundoff + handspring creates more lift, giving more airtime and faster twisting.
  2. Different body position: From standing, athletes naturally kick legs under. From roundoff, snapdown is less pronounced, leaving the layout overextended.
  3. Overcompensation: Athletes pushing harder for doubles often throw the layout too aggressively before twisting.
Need Competition Music Blue 1

Fixing Kick Full Overrotation

Here are the core adjustments to stop overrotating:

  • Focus on the Kickdown: Snap the kick under earlier to cut off excess layout rotation.
  • Drill Hollow Body Shapes: Hollow = control. Arch = overrotation.
  • Control the Set: Set high before twisting; don’t throw back.
  • Use Progressions Before Doubles: Build clean, consistent fulls before adding difficulty.
  • Review on Video: Frame-by-frame shows chest angle and leg snap timing.

Kick Full Correction Drill Plan for Coaches

This progression gives athletes a clear path to stop overrotating kick fulls. Don’t move forward until the athlete can hit clean, controlled landings consistently.

Step 1: Re-Establish Hollow Control

Purpose: Break the arch habit that fuels overrotation.

Drills:

  • Hollow Holds (4 x 30s)
  • Hollow Jumps on Tramp
  • Layout Snapdowns with Stick Landings

Cues: “Flat back, no arch.” | “Snap feet under faster.”

cheer kick full technique step 1
cheer kick full technique step 2

Step 2: Layout Control Before Twist

Purpose: Build a consistent layout base.

Drills:

  • Roundoff–Back Handspring–Layout Stick
  • Standing Kick Layouts (snapdown timing)
  • Layout Rebounds (no backward roll)

Cues: “Land like it’s the end of a pass.” | “Stop the flip early.”

Step 3: Controlled Fulls With Snapdowns

Purpose: Add twist without letting layout rotation dominate.

Drills:

  • Standing Kick Fulls to Layout Finish
  • Roundoff–Kick Full to Soft Mat Stick
  • Half-Twist (Arabian) Snapdown Drills

Cues: “Kick under before twisting.” | “Finish twist with chest, not back.”

overrotated kick full step 3
cheerleading tumbling tips step 4

Step 4: Roundoff Entry Control Work

Purpose: Adapt to extra power from roundoff entries.

Drills:

  • Roundoff–Kick Full to Stick
  • Roundoff–Kick Full to Layout Drill
  • Roundoff–Back Handspring–Layout to Mats

Cues: “Set high, don’t throw back.” | “Twist later than you think.”

Step 5: Progression Toward Doubles

Purpose: Control the single full first, then move into doubles safely.

Drills:

  • Two Perfect Kick Fulls Rule (hit 2 in a row clean)
  • Kick Full + Layout Combo
  • Doubles Into Pit (focus on snapdown)

Cues: “Master the single before chasing doubles.” | “Your full is your foundation.”

ChatGPT Image Aug 30 2025 03_06_22 PM 1

Overrotation on kick fulls isn’t a flaw — it’s a sign of power. The challenge is controlling that energy with better snapdowns, hollow body control, and a disciplined set. Once athletes can consistently hit controlled fulls, doubles become safer, smoother, and much more attainable.

With the right cues and this drill progression, coaches can turn an athlete’s biggest frustration into their clearest path forward.

Steve Pawlyk Signature Full

IPP's Premade Mixes are USA Cheer Compliant and customizable!  Add Sound FX, swap songs, & more!  Add your Team Name to the mix for only $10! 

SLAM artwork
Full_Out_130 mp3 image
1 minute cheer mix
WAKE UP THE FIRE
SLAM artwork
WAKE UP THE FIRE
Full_Out_130 mp3 image
1 minute cheer mix

Teaching the Hurdler Jump: A Comprehensive Guide for Competitive Cheer Coaches

Teaching the Hurdler Jump A Comprehensive Guide for Competitive Cheer Coaches

By Steve Pawlyk

Published July 9, 2025

If you’ve been coaching cheerleading for any length of time, you know that certain skills just make or break a routine. The hurdler jump? It’s definitely one of those game-changers. After spending years in the trenches coaching everyone from tiny mini athletes to college competitors, I’ve learned that teaching this jump isn’t just about demonstrating and hoping for the best. It’s about understanding the science, breaking down the progression, and meeting each athlete where they are.

So grab your coffee (or protein shake – no judgment here!), and let’s dive deep into everything you need to know about teaching the hurdler jump to young competitive cheerleaders.

Understanding the Anatomy of a Hurdler Jump

Before we even step foot on the mat, let’s get crystal clear on what we’re teaching. I’ve seen too many coaches confuse variations or teach hybrid versions that end up hurting scores at competition.

The Front Hurdler

This is probably what you’ll teach most often. Picture this: your athlete is positioned at a 45-degree angle to the crowd (this angle is crucial – straight-on looks awkward, and full profile hides the back leg). The leg furthest from the crowd will come up straight in front as high as possible, while the other bends behind. Arms can be in a touchdown or in a high V.

The key here is that straight leg – it should be reaching for the sky, ideally getting close to the athlete’s nose level. The back leg? That’s where things get interesting. The knee should be bent with the foot pulled up toward the glutes, and the knee itself should be pointing down toward the ground. Think of a track hurdler clearing a hurdle – hence the name!

The Side Hurdler

Less common but equally impressive when done right. Here, one leg extends to the side, while the other bends toward the back with the knee facing out. Arms should be in a “T” motion. The main difference? That bent knee faces the crowd rather than the ground, and the whole body orientation is different.

The “Not-a-Hurdler” (aka The Herkie)

Quick story time: Named for Lawrence Herkimer, the founder of the National Cheerleaders Association, this jump is similar to a side-hurdler, except that instead of both arms being in a T-shaped motion, both arms are opposite of what the leg beneath them is doing. The legend goes that Herkie couldn’t quite nail the hurdler, so he created his own version. It’s different enough that judges will dock points if your athletes throw a Herkie when they’re supposed to hit a hurdler!

Prerequisites: Building the Foundation

Here’s where I might ruffle some feathers, but I’m going to say it anyway: if your athletes aren’t ready, pushing them into hurdlers is a recipe for injury and frustration. Let’s talk about what “ready” really means.

Flexibility Requirements

Flexibility is the first area a cheerleader should address. If a cheerleader is tight throughout her hamstrings, groin, or lower back they must stretch. Range of motion is the number one cause of injuries.

Here’s my flexibility checklist for hurdler-ready athletes:

Hamstring Flexibility Test:

  • Have the athlete lie on their back
  • Lift one straight leg up while keeping the other flat on the ground
  • They should reach at least 90 degrees without the bottom leg lifting
  • Less than that? Time for targeted stretching

Hip Flexor Mobility Test:

  • Lunge position with back knee on the ground
  • Push hips forward gently
  • If they feel extreme tightness or can’t keep their torso upright, those hip flexors need work

Dynamic Flexibility Check:

  • Standing leg swings forward and back (should reach at least hip height)
  • Standing kicks to the front (controlled, not ballistic)
  • If they’re struggling here, the jump will be a struggle too
Need Competition Music Blue 1

Strength Prerequisites

Flexibility without strength is like having a sports car with no engine. Here’s what your athletes need:

Core Strength: Can they hold a hollow body position for 30 seconds? If not, start there. The core is what keeps that chest up during the jump.

Leg Power: Single-leg squat test – can they do at least 5 on each leg with good form? This translates directly to jump height.

Hip Flexor Strength: Have them lie on their back and lift one straight leg up and down 10 times without touching the ground. If they’re shaking by rep 5, you’ve found a weakness to address.

The 12-Week Progressive Teaching Method

After years of trial and error (emphasis on the error in my early coaching days), I’ve developed this progression that actually works. The timeline can be compressed or extended based on your athletes’ abilities, but don’t skip steps!

Weeks 1-3: Flexibility and Strength Foundation

Week 1: Assessment and Flexibility Focus

Start every practice with what I call the “Hurdler Prep Circuit”:

  • 5 minutes of dynamic warm-up (high knees, butt kicks, leg swings)
  • 10 minutes of targeted stretching:
    • Pike stretch holds (30 seconds x 3)
    • Butterfly stretch for hip opening (30 seconds x 3)
    • Standing quad stretches (30 seconds each leg x 2)
    • Seated hurdler stretch (the actual position) – 30 seconds each side x 3

Ground position work:

  • Have athletes sit in the hurdler position on the floor
  • Focus on proper positioning: straight leg fully extended, bent leg tucked comfortably
  • Hold for 30 seconds, switch sides
  • Progress to lifting the arms to touchdown position while seated

Week 2: Building Specific Strength

Add resistance work:

  • Theraband kicks: 3 sets of 10 each leg (front and side)
  • Single-leg glute bridges: 3 sets of 10 each leg
  • Core work specific to jumps:
    • Hollow holds (work up to 45 seconds)
    • V-ups focusing on keeping chest high (3 sets of 10)
    • Russian twists with emphasis on tall posture (3 sets of 20)

Continue flexibility work and add:

  • Partner stretching for deeper range of motion
  • PNF stretching techniques (contract-relax method)

Week 3: Movement Patterns

Time to get moving:

  • Walking hurdlers: Literally walk across the floor hitting the position with each step
  • Hurdler holds against the wall: Kick up and hold the position for 5 seconds
  • Jump prep without the hurdler:
    • Straight jumps focusing on landing (3 sets of 5)
    • Tuck jumps for height (3 sets of 5)
  • Single-leg bounds for power (3 sets of 5 each leg)

Weeks 4-6: Introduction to the Jump

Week 4: Breaking Down the Prep

The prep is everything. After you count 5, 6, 7, 8, on the first 1, 2 bring your hands into a “clasp” right under your chin and hold them there for those two counts. On 3, 4, proceed to a “High-V” and hold that motion for those two counts.

Drill this until it’s automatic:

  • Prep practice: 50 reps of just the arm sequence
  • Add the knee bend on counts 3, 4
  • Practice the swing through without jumping
  • Mirror work: Athletes watch themselves to ensure chest stays high

Week 5: Adding the Jump

Start small:

  • Mini hurdlers: Jump just a few inches off the ground, focus on hitting the position
  • Use a prop: Have them jump and touch their knee to a coach’s hand held at appropriate height
  • Box jumps with hurdler position: Jump onto a small box (6-12 inches) landing in hurdler
  • Video review: Film each athlete and review together

Common issues at this stage:

  • Chest dropping (fix: “pretend there’s a string from your chest to the ceiling”)
  • Arms not hitting position (fix: practice arms separately 100 more times)
  • Bent leg not pulling up (fix: hamstring curls and targeted strength work)

Week 6: Height and Extension

Now we’re cooking:

  • Full jump attempts with focus on ONE aspect at a time:
    • Monday: Just focus on chest position
    • Tuesday: Just focus on straight leg height
    • Wednesday: Just focus on bent leg position
    • Thursday: Just focus on arms
    • Friday: Put it all together
  • Introduce combination work: Hurdler to immediate rebound

Weeks 7-9: Refinement Phase

Week 7: Technical Precision

Details matter in competitive cheer:

  • Toe point drills: Even in warm-ups, toes are pointed
  • Landing practice: Make sure to land properly with your feet together, toe to heel and with bent knees
  • Timing with music: Start incorporating counts and rhythm
  • Side-by-side comparisons: Athletes watch each other and provide feedback

Week 8: Power Development

Complete 6 to 8 reps of the hurdler with resistance bands while maintaining technique for maximal jump height and kick height:

  • Resistance band training (if appropriate for age/level)
  • Plyometric progressions:
    • Depth jumps from 6-inch box
    • Broad jumps focusing on explosive takeoff
    • Single-leg bounds with hurdler arms
  • Recovery focus: Teach proper stretching and foam rolling

Week 9: Consistency Building

The goal: 8 out of 10 perfect:

  • Set-based training: 5 sets of 3 jumps, rest between sets
  • Fatigue training: Hurdlers at the end of practice when tired
  • Pressure training: Perform for other teams or parents
  • Video analysis: Athletes self-assess using rubric

Weeks 10-12: Competition Ready

Week 10: Combinations and Connections

Real routines require connected skills:

  • Hurdler to toe touch combinations
  • Running tumbling into hurdler
  • Hurdler to immediate cradle prep (for younger teams)
  • Focus on maintaining height through fatigue

Week 11: Mental Preparation

The mental game is huge:

  • Visualization exercises: Athletes close eyes and see perfect hurdler
  • Positive self-talk training: Replace “I can’t” with “I’m learning”
  • Competition simulation: Full routine run-throughs
  • Individual goal setting: Each athlete sets personal best goals

Week 12: Polish and Peak

Time to shine:

  • Full routine integration
  • Focus on performance quality, not just technique
  • Team synchronization drills
  • Confidence building through success tracking
Need Competition Music Blue 1

Advanced Drills That Actually Make a Difference

Here are the drills I’ve collected over the years that really move the needle:

The Wall Series

Basic Wall Kicks:

  • Stand arm’s length from wall
  • 20 kicks straight up, trying to touch above head marker
  • Progress to faster tempo
  • Add ankle weights for advanced athletes (with caution)

Wall Hurdler Holds:

  • Back against wall
  • Jump and press back against wall in hurdler position
  • Hold for 3-5 seconds
  • Builds muscle memory and strength

Partner Drills

Assisted Hurdlers:

  • Partner holds athlete’s hands
  • Athlete jumps while partner provides slight upward assistance
  • Gradually reduce assistance
  • Great for building confidence

Resistance Partners:

  • Partners hold resistance bands attached to jumper’s waist
  • Provides resistance on the way up, assistance on the way down
  • Builds explosive power

Equipment-Based Progressions

Box Jump Variations:

  • Single leg box jumps (builds unilateral power)
  • Hurdler position box jumps
  • Depth jump to hurdler (advanced only)

Trampoline Work (if available):

  • Allows athletes to feel the position with more air time
  • Reduces impact during learning phase
  • Great for athletes afraid of the skill

Troubleshooting Common Problems

Let’s get real about the issues you’re going to see over and over:

Problem 1: The Dreaded Chest Drop

It’s important not to cut off the height of your jump by tilting your chest forward. This is THE most common issue.

Why it happens:

  • Lack of core strength
  • Trying to kick too high too soon
  • Poor spatial awareness

Fix it:

  • Wall sits with arms in touchdown (builds postural strength)
  • Video review from side angle
  • Verbal cue: “Show your number to the judges!”
  • Physical cue: Light tap on upper back during prep

Problem 2: The Lazy Back Leg

The tendency is to concentrate so hard on kicking your front leg, that you don’t realize that the back leg is still dangling around down there.

Why it happens:

  • All focus goes to the front leg
  • Lack of hamstring strength
  • Poor muscle activation patterns

Fix it:

  • Isolated back leg drills: Just practice the bent leg portion
  • Hamstring curls with resistance bands
  • Mental cue: “Kick your heel to your booty!”
  • Partner feedback: Have partner tap the heel when it’s in correct position

Problem 3: Sloppy Feet

Judges notice everything, and floppy feet scream “recreational team.”

Why it happens:

  • Never been properly trained
  • Lack of ankle strength
  • Poor habit formation

Fix it:

  • Releve walks across the floor
  • Theraband foot exercises
  • Point and flex drills during every water break
  • Make it non-negotiable: pointed toes from warm-up to cool-down

Problem 4: The Split Landing

Nothing ruins a beautiful hurdler like a sloppy landing.

Why it happens:

  • Uneven leg strength
  • Poor spatial awareness
  • Trying to land before ready

Fix it:

  • Landing drills separate from jumps
  • Single leg landing practice
  • Visual markers on the floor
  • Verbal cue: “Feet like magnets!”

Creating the Right Training Environment

Your gym’s culture makes or breaks skill development. Here’s how to optimize:

Space Considerations

Minimum requirements:

  • 8×8 feet per athlete for safe practice
  • Ceiling height of at least 12 feet
  • Spring floor or quality mats
  • Mirrors on at least one wall

Safety Protocols

Non-negotiables:

  • 10-minute dynamic warm-up (every. single. practice.)
  • Proper landing surface
  • Athlete-to-coach ratios (I recommend 8:1 maximum for jump training)
  • Clear progression requirements before moving to next level

Building Confidence

Remember: confidence builds skills as much as drills do.

Strategies that work:

  • Celebrate small wins publicly
  • Use positive correction: “I love your height! Now let’s add that toe point!”
  • Film progress videos monthly so athletes see improvement
  • Create skill-specific awards or recognition

Creating Buy-In From Athletes and Parents

Success requires everyone on board:

Athlete Buy-In

Make them partners:

  • Explain the “why” behind each drill
  • Let them track their own progress
  • Create peer mentorship opportunities
  • Connect skills to their goals

Parent Education

Informed parents = supportive parents:

  • Host a skills education night
  • Send home progress videos
  • Explain the progression timeline
  • Share the injury prevention focus

Final Thoughts: The Art and Science of Coaching

Teaching the hurdler jump is about so much more than just the mechanics. It’s about building confident, strong athletes who understand that excellence comes from consistent, focused effort. Every athlete will progress at their own pace, and that’s not just okay – it’s expected.

I’ve been fortunate to work with thousands of athletes over my years coaching, from tiny three-year-olds taking their first cheer class to Division 1 college competitors. The one constant? The athletes who master the fundamentals with patience and proper progression are the ones who excel long-term.

Remember, we’re not just teaching a jump. We’re teaching discipline, body awareness, goal setting, and the value of quality practice. These lessons extend far beyond the mat.

Your athletes don’t need to be perfect on day one, week one, or even month one. They need to be progressing, staying safe, and building confidence. Focus on the journey, not just the destination, and you’ll develop not just better cheerleaders, but better athletes and people.

Keep your energy high, your corrections positive, and your standards consistent. Before you know it, you’ll have a team throwing hurdlers that make the crowd go absolutely wild – and more importantly, you’ll have athletes who are proud of what they’ve accomplished through hard work and dedication.

Now get out there and start building those champion hurdlers! Your athletes are counting on you to guide them to success, and with this comprehensive approach, you’ve got everything you need to make it happen.

Stay passionate about the process,

P.S. – Remember to document the journey. Those “before” videos from week 1 compared to competition performances? Pure gold for showing athletes how far they’ve come. Plus, they make great material for end-of-year banquets!

Check out the conversation on our podcast “You Hit Zero”


Steve Pawlyk Signature Full

IPP's Premade Mixes are USA Cheer Compliant and customizable!  Add Sound FX, swap songs, & more!  Add your Team Name to the mix for only $10! 

SLAM artwork
Full_Out_130 mp3 image
1 minute cheer mix
WAKE UP THE FIRE
SLAM artwork
WAKE UP THE FIRE
Full_Out_130 mp3 image
1 minute cheer mix

First-Year Cheer Coach Survival Guide: Navigating Your Inaugural Season

First Year Cheer Coach Survival Guide

By Steve Pawlyk

Published May 30, 2025

First, Welcome to the Family!

Stepping into your first season as a cheer coach is exciting – and a little daunting. You’re not just teaching motions and stunts; you’re becoming a mentor, leader, and role model. This guide will help you survive and thrive in your inaugural year by covering three critical areas: building your confidence, establishing your authority, and fostering a supportive, effective coaching style. Along the way, we’ll share insights and quotes from well-known, successful cheer coaches at the high school, all-star, and college levels to illustrate what works. Remember, even the most decorated coaches had a “first year” – with the right mindset and strategies (and a few real-world examples), you can set the foundation for a rewarding coaching career.

1. Building Confidence as a New Coach

Own your role from Day One. Confidence isn’t about knowing everything – it’s about believing in yourself and your ability to learn and lead. Legendary Navarro College coach Monica Aldama emphasizes the importance of composure: no matter how nervous you feel inside, project calm confidence to your team.

I definitely have always told myself no matter what I’m feeling inside, I can’t let the team know… if they see me looking terrified or scared… all that work that we’ve done could go down the drain… I know they’re looking to me as their leader, and how I’m feeling is going to radiate out into them”.

In short, your emotions are contagious. A first-year coach who appears confident and positive will instill the same belief in the athletes.

Scenario: Imagine it’s the first practice and you’re running a complex stunt sequence. Inside, your stomach is doing flips of its own. One stunt group struggles and all eyes turn to you. Instead of panicking, you take a deep breath, smile, and break down the problem step-by-step. The team sees your steady demeanor and dives back in with renewed confidence. By practice end, the stunt hits – and your athletes learned that you won’t flinch under pressure.


Practical confidence-builders:

  • Prepare and plan: Walk into practice with a detailed plan. Preparation breeds confidence. If you know what you want to accomplish each day (from stretching, to drills, to full-outs), you’ll spend less time second-guessing and more time coaching.
  • Leverage your strengths and experience: Whether you were a collegiate cheerleader or a studio dancer, draw on what you know. “One of the biggest differences between my mom and I as coaches is that I have cheered and competed at the highest level… I think this allows me to be more black and white at times,” says University of Mississippi’s head coach, Ryan O’Connor. If you can still demonstrate a motion or flip, do it! Showing expertise (or even sharing stories of past challenges you overcame) earns respect and reassures you do know what you’re talking about.
  • Find a mentor and network: Don’t hesitate to reach out to other coaches for advice. Many veteran coaches remember their first-year struggles and are happy to help. “The more contacts you can make as a coach, the better. We can’t do this alone and most coaches are always happy to help!”. Watching experienced coaches or having an industry mentor gives you a safety net and a sounding board, boosting your confidence when facing new situations.
  • Adopt a growth mindset: Confidence for a new coach also means being okay with learning on the job. There will be days when a pep talk falls flat or a formation tweak doesn’t work – that’s normal. Take it from successful coaches who view setbacks as lessons. Monica Aldama, after a rare defeat, allows herself a short pity party then gets back to work: “I allowed myself to be sad… and as soon as I felt like I had, I was like, Okay, now we’re ready to go… you can’t ever stay in that moment”. Treat each challenge as a chance to improve.

By investing in preparation, projecting assurance, and embracing continuous learning, you’ll gradually turn that “imposter syndrome” into hard-earned confidence. And as your self-belief grows, so will your team’s trust in you.

Need Competition Music Blue 1

2. Establishing Authority and Earning Respect

Being a new coach often means walking a fine line – you want your team to like you, but you also need them to listen to you. Authority isn’t about being authoritarian; it’s about consistent leadership and respect. Monica Aldama describes it well: “I try to be very consistent so they know that when I’m serious, I’m serious, and that I do have rules and I expect them to follow them. But at the same time, I want them to know that they can come talk to me and that I am going to be empathetic.” In other words, set clear expectations early – and enforce them fairly – so athletes understand your standards. When you say practice starts at 5:00, start at 5:00. When you outline a code of conduct, follow through with appropriate consequences. Consistency shows you mean what you say, which earns respect over time.

Scenario: A few weeks into the season, you notice some of your athletes arriving late or giggling while you’re giving instructions. As a new, young coach, you worry about coming off too strict – but you also know this can’t slide. In the next team meeting, you calmly restate the attendance rule from your handbook and why it matters (“We can’t improve if we don’t all commit to being here on time”). You also pull aside the giggling group after practice, not to scold, but to let them know you value their energy – just not during important explanations. The result? The team refocuses, and even those initially testing boundaries realize you’re serious but fair.


Tips for establishing your authority:

  • Start with structure: In your first team meeting or parent meeting, outline how you will run the program. Discuss team rules, practice schedules, communication channels, and your coaching philosophy. A clear structure from day one signals that you’re organized and professional. According to Varsity’s new coach guide, “The key to a successful year is communication!” – be proactive in explaining your vision and expectations. It’s easier to be seen as an authority if everyone knows the playbook.
  • Be firm, not frazzled: Issues will arise – an athlete talks back, a parent questions your choreography, or the squad has an off-day. Stay calm and address each issue with a level head. Veteran high school coach Donna Martin (who led Dunbar HS to multiple national titles) learned through experience to pick her battles and give second chances when appropriate. “I have a little more experience with all kinds of situations. I feel like I probably give kids more chances where Ryan (my daughter coaching college) is more strict. Of course, kids are younger in high school… some situations may be more on the parent than the child,” Donna notes. Her advice underscores that authority can be flexible based on context – younger athletes sometimes need guidance more than punishment. You can enforce rules and show understanding.
  • Earn respect through expertise and effort: Especially if you’re a young coach or stepping into big shoes, you might feel you have to prove yourself. Focus on what you bring to the table. Maybe you have superior tumbling knowledge, fresh choreography ideas, or simply an infectious passion. Pour that into your coaching. Athletes respect coaches who make them better. For example, all-star gyms often use creative drills and technique focus to build credibility. “Always work with drills before they try the actual skill… If they can’t do the drill, don’t do the skill!” Showing that you prioritize proper technique and safety over showing off will earn athlete (and parent) trust. When your team sees that your methods lead to progress – that stunt finally hits or their jumps height improve – your authority grows naturally.
  • Set the tone with team leaders: If you have senior athletes or captains, enlist them as allies. Have a private talk with them early on – communicate your goals and ask for their support in setting an example. Winning over veteran cheerleaders can make or break a first-year coach. They can either become your biggest advocates or your biggest hurdles. By respecting their experience and empowering them (perhaps letting a captain run warm-ups or lead a bonding activity), you show you’re confident enough not to rule with an iron fist. In turn, they’re more likely to back you up when you enforce rules, creating a culture of peer accountability.

Finally, remember that respect is a two-way street. Treat your athletes with respect – listen to their concerns, acknowledge their hard work – and they will return it. A new coach who is consistent, fair, and caring will quickly dispel any notions of being a push-over. As college coach Ryan O’Connor famously reminded her team, “You need to sacrifice for this team, or this team will be the sacrifice…”. By establishing a standard of dedication and mutual respect, you lay the groundwork for a unified squad that’s ready to follow your lead.

3. Fostering a Supportive and Effective Coaching Style

Great coaches aren’t just loud cheerleaders on the sidelines – they are mentors who develop athletes both as performers and as people. Especially in cheer, where trust and teamwork are paramount (think about the literal trust fall of a stunt!), you’ll want to cultivate a positive, supportive atmosphere. A winning first season is not defined solely by trophies, but by the foundation of team culture you build. As Cheer Athletics all-star coach John Davenport Knowles puts it: “Make sure you are passionate about kids and people… Being passionate about how to teach life lessons is the most important part.” In your coaching debut, focus on people first. The skills and clean routines will follow.

Scenario: Mid-season, one of your cheerleaders, “Alyssa,” who was normally full of energy, seems withdrawn and is struggling with her tumbling. Rather than write her off as lazy, you pull her aside after practice. She confides that academic stress and a sprained wrist have her feeling low. You adjust her role for the upcoming game to ease the tumbling load and pair her with a buddy for homework sessions. Over the next few weeks, Alyssa regains her confidence – not just because her wrist healed, but because she knows her coach cares about her well-being. The whole team notices the support, and a culture of looking out for one another grows.

How to build a supportive, effective coaching style:

  • Get to know each athlete personally: Building personal relationships is not a waste of time; it’s the bedrock of effective coaching. The head coach of the legendary Cheer Extreme emphasizes, “Every individual is different and therefore needs a mix of personalized and general training.” Take time to learn your team members’ personalities, what motivates them, and what might be happening in their lives. Who thrives under pressure? Who needs a confidence boost after a mistake? Showing you care about them beyond just hitting a stunt creates trust. Athletes who feel valued will go the extra mile for you and the team.
  • Be approachable and empathetic: A common mistake for first-year coaches is trying to be too strict or distant in order to establish authority. In reality, you can be both respected and approachable. Monica Aldama balances these roles as a “friend” and “boss” simultaneously: “It is a friendship, but at the same time, it’s a respectful friendship, where you know that I’m still the person that’s going to be bossing you around… You also find that they’re all different; some want you to be tough with them and then if you use that same approach on someone else, it’ll just tear them down. I really try to figure everyone out.” The takeaway? Adjust your coaching style to the individual. If one flyer responds well to tough love but another shuts down, you’ll get better results by tailoring your feedback. Being empathetic doesn’t mean lowering standards; it means you deliver critiques in a way each athlete can absorb. For instance, after a fall, one cheerleader might need a fiery “get up, you’ve got this!” while another might need a gentle “shake it off, I believe in you.”
  • Positive reinforcement goes a long way: “Celebrate small and big achievements” – Triple Threat KC. Shout-outs, high-fives, and celebrating small victories can transform your team’s mindset. A culture that “celebrates small and big achievements” fosters confidence and self-assurance in athletes. Something as simple as ending practice with each team member sharing one thing they’re proud of that day can keep morale high. When mistakes happen (and they will), correct them, but also point out what is improving. For example: “The pyramid dip was off-count, but I love the height you’re getting – we’ll fix the timing next practice.” This tells athletes you see their effort, not just their errors.
  • Team building and unity: A supportive team is a connected team. Plan activities that bond your athletes. It could be as involved as a weekend team retreat, or as simple as a goofy game at practice warm-ups. Many top coaches insist that a close team is a team that will have a successful season. When your athletes trust each other, they catch tighter and cheer louder. You can facilitate this by creating a “big sister/little sister” buddy system, doing occasional fun practices (like swapping routines with the dance team for a day), or having a tradition where team members anonymously exchange uplifting notes before competitions. These efforts might seem extra, but they pay off in athletes who feel supported like family. And when issues like cliques or bullying arise, address them immediately – make it clear that your team succeeds and fails together.

Above all, lead with compassion and positivity. Cheer Extreme founder Courtney Smith-Pope built one of the most successful all-star programs by treating athletes like family. When asked about this, Courtney said “We’ve helped a lot of kids… and have been able to have a positive influence on athletes to help them achieve their goals and dreams… Our biggest dream is to pass on the boundless love we got from our mom and dad onto the kids we have the honor to coach,” In your first year, set the tone that you are there to lift athletes up. When they feel safe and inspired, they will reach new heights – literally and figuratively – and you’ll be known as both an effective coach and a trusted mentor.

4. Thriving Through Challenges: Advice from the Legends

No matter how prepared you are, your inaugural season will have its challenges – maybe an unexpected injury, a routine that isn’t scoring as hoped, or just the fatigue of a long season. Survival as a first-year coach isn’t about avoiding problems; it’s about tackling them with resilience and perspective. Here are a few final nuggets of wisdom from coaching legends to help you keep pushing when the going gets tough:

•  Stay patient and problem-solve:

“You MUST have patience and understanding. Everything is attainable, and all problems are solvable,”New Fairfield Falcons, Head Coach

When faced with a setback, take a breath and remember that with time and effort, you can work through it. Champion coaches approach challenges logically – if a pyramid consistently fails, they break it down into pieces, fix grips or timing, and build it back up. Adopting a “problems are solvable” attitude will help your team stay calm and focused on solutions, not mistakes.

  • Keep the big picture in mind: Early in your coaching journey, it’s easy to get tunnel vision on the next competition or the current stunt sequence. Don’t forget why you (and your athletes) are here: love of the sport and personal growth. If you lose a competition, use it as a learning experience rather than a confidence killer. If you’re exhausted mid-season, remember that the influence you’re having on these young people goes beyond a trophy. As John Davenport Knowles reminded coaches, we’re teaching life lessons – things like teamwork, perseverance, and leadership that will stick with your athletes far longer than any trophy polish.
  • Persevere and strive for excellence: Set the tone that your team will work hard and finish strong, no matter what. Monica Aldama’s hallmark motto from Navarro College is a great mantra to share with your team: “You keep going until you get it right, and then you keep going until you can’t get it wrong.”This champion mindset – practice, refine, perfect – shows your athletes that excellence comes from dedication. It will inspire them and you to push through rough practices because the end goal is worth it. However, also balance that drive with knowing when to rest. Sometimes the best thing you can do during a stressful week is call a practice early and do a team ice cream social to rebuild spirits. A fresh, recharged team will outperform a burned-out one every time.
  • Celebrate the journey: Finally, take time to acknowledge small wins and memorable moments. Your first pep rally as a coach, the first time the team sticks a routine full-out, or even the first time a shy athlete finds her voice to lead a cheer – these are huge milestones. Successful coaches are passionate, but also grateful. As you navigate your first year, keep a journal or log of things that went well. You’ll be amazed at how these reflections build your confidence for year two. Plus, showing enthusiasm and gratitude rubs off on the team. As the Stingray All-Stars like to say, “Confidence is contagious,” and so is passion. If you demonstrate love for the sport and for your team, they will mirror it right back to you.

Embrace the Challenge, Embrace the Fun

Your inaugural season as a cheer coach will be a whirlwind of long practice nights, last-minute routine changes, and a whole lotta pride in your team. You will grow just as much as your athletes do. By building your confidence (and faking it when you must), asserting your authority with consistency and care, and cultivating a supportive team culture, you set yourself up not just to survive but to succeed.

There will be tough days – but remember, every Hall of Fame coach started out exactly where you are. Lean on the advice of those who’ve walked this road: be patient, communicate clearly, stay passionate, and never stop learning. As you navigate the ups and downs, keep your love for the sport and your team at the forefront. Do that, and your first year of coaching will be the start of something truly amazing – a legacy of leadership and spirit that will impact lives for years to come. Go into this season with confidence and heart – you’ve got this, Coach!

Steve Pawlyk Signature Full

IPP's Premade Mixes are USA Cheer Compliant and customizable!  Add Sound FX, swap songs, & more!  Add your Team Name to the mix for only $10! 

SLAM artwork
Full_Out_130 mp3 image
1 minute cheer mix
WAKE UP THE FIRE
SLAM artwork
WAKE UP THE FIRE
Full_Out_130 mp3 image
1 minute cheer mix

Mastering the Pyramid: Techniques for Building Strong, Safe, and Creative Cheerleading Stunts

Mastering the Pyramid Techniques for Building Strong Safe and Creative Cheerleading Stunts

By Steve Pawlyk

Published August 15, 2024

Cheerleading pyramids are one of the most dynamic and visually stunning elements of a cheer routine. They not only showcase the strength and skill of the athletes but also the creativity and precision of the coach. However, building a successful pyramid requires more than just physical prowess; it demands a deep understanding of technique, safety, and teamwork. In this article, we’ll explore essential techniques for constructing strong and safe cheerleading pyramids, offer unique ideas to make your stunts stand out, and provide a step-by-step guide on “How to build a cheer pyramid?”

The Foundations of a Strong and Safe Cheerleading Pyramid

Before diving into the creative aspects of pyramid building, it’s crucial to understand the fundamentals that ensure both strength and safety. Here are some key techniques:

  1. Solid Bases: The Foundation of Success
    • Proper Stance: Bases should have a stable, shoulder-width stance with slightly bent knees to absorb the weight of the flyers. Their core should be engaged, and their back straight to maintain balance.
    • Grip and Hand Placement: Bases must have a firm grip on the flyers’ feet or ankles. Proper hand placement ensures that the flyers are secure and can be adjusted quickly if needed.
    • Communication: Clear and consistent communication between the bases and the flyers is essential. A simple cue like “ready” before lifting can make all the difference in timing and coordination.
  2. Flyer Technique: Lightness and Balance
    • Core Engagement: Flyers should keep their core tight and engage their muscles to maintain balance. A strong core allows flyers to stay light on their bases and reduces the risk of collapsing the pyramid.
    • Body Alignment: Flyers need to focus on keeping their body aligned, with hips over ankles and shoulders over hips. This alignment helps maintain stability and makes adjustments easier if the pyramid starts to wobble.
    • Trust and Confidence: Confidence is key for flyers. They must trust their bases and execute their moves with precision. Hesitation can lead to instability and increase the risk of falls.
  3. Spotters: The Unsung Heroes
    • Positioning: Spotters should always be in a position where they can quickly intervene if something goes wrong. They are responsible for the safety of the flyers and must be vigilant throughout the stunt.
    • Assistance, Not Interference: Spotters should provide assistance without interfering with the stunt. They can help guide the flyers’ feet or offer support when necessary, but they should not disrupt the balance of the pyramid.
Need Competition Music Blue 1

Unique Cheer Pyramid Ideas

Once you’ve mastered the basics, it’s time to get creative! Here are some unique pyramid ideas that can set your team apart at competitions:

  1. The Diamond Pyramid:
    • Description: The Diamond Pyramid involves creating a diamond shape with the flyers at different levels. One flyer stands at the top, with two more on either side at a slightly lower level, and a fourth flyer at the base level.
    • Why It Stands Out: The Diamond Pyramid is visually striking and adds depth to your routine. It allows for dynamic transitions, such as moving from a flat diamond to a vertical diamond by having the side flyers climb up or down.
  2. The Rolling Wave Pyramid:
    • Description: In this pyramid, flyers move in a wave-like motion, starting from one side and rolling across to the other. This can be achieved by having flyers at different levels perform synchronized movements that give the illusion of a wave.
    • Why It Stands Out: The Rolling Wave Pyramid adds fluidity and rhythm to your routine. It’s a great way to incorporate music and timing into your stunts, creating a memorable performance.
  3. The Starburst Pyramid:
    • Description: The Starburst Pyramid features flyers extending out from a central point, creating the shape of a star. This can be done with a central flyer at a higher level, with others branching out diagonally from them.
    • Why It Stands Out: The Starburst Pyramid is a crowd-pleaser due to its expansive and symmetrical design. It also allows for creative transitions, such as collapsing into a tighter formation or expanding into a larger star.

How to build a Pyramid in Cheerleading?

If you’re new to cheerleading or looking to refine your technique, learning how to do a cheer pyramid is a fundamental skill. Here’s a step-by-step guide:

  1. Assemble Your Team:
    • Start by assigning roles within your team. You’ll need a combination of strong, stable bases, agile and balanced flyers, and vigilant spotters.
  2. Set the Foundation:
    • The bases should stand shoulder-width apart, with their knees slightly bent. They should be ready to support the flyers by holding their feet securely.
  3. Position the Flyers:
    • Flyers should step onto the bases’ hands or shoulders, keeping their core engaged and maintaining proper alignment. It’s essential to communicate clearly during this process.
  4. Build Upwards:
    • Once the first level is secure, additional flyers can climb onto the backs or shoulders of the flyers below them. Each level should be added carefully, with spotters ready to assist if needed.
  5. Check Stability:
    • Before completing the pyramid, ensure that all levels are stable. Flyers should maintain their balance, and bases should be firmly planted. Any wobbling should be corrected immediately.
  6. Execute the Pyramid:
    • Once the pyramid is fully constructed, the team can hold the position for the required time, perform any additional movements or transitions, and then safely dismount.
  7. Dismount Safely:
    • To dismount, flyers should carefully step down or be assisted by the spotters. The bases should help guide the flyers down to avoid any falls or injuries.

By following these steps and practicing regularly, your team can build strong, safe, and visually stunning pyramids that will impress judges and audiences alike.

Mastering the art of cheerleading pyramids takes time, practice, and a deep understanding of technique and safety. By focusing on the fundamentals, getting creative with your pyramid designs, and following a step-by-step approach, you can lead your team to success. Remember, the key to a great pyramid is not just strength and skill but also trust, communication, and teamwork.

Steve Pawlyk Signature Full

IPP's Premade Mixes are USA Cheer Compliant and customizable!  Add Sound FX, swap songs, & more!  Add your Team Name to the mix for only $10! 

SLAM artwork
Full_Out_130 mp3 image
1 minute cheer mix
WAKE UP THE FIRE
SLAM artwork
WAKE UP THE FIRE
Full_Out_130 mp3 image
1 minute cheer mix

How to Prepare for Coed Cheer Tryouts: A Guide for Aspiring College Cheerleaders

How to Prepare for Coed Cheer Tryouts A Guide for Aspiring College Cheerleaders

By Steve Pawlyk

Published March 20, 2024

Preparing for college cheer tryouts, especially for a coed team, can be both an exciting and daunting experience. If you’re in a similar situation as the one shared by a user on the r/cheerleading subreddit—having experience primarily in basing and back-spotting, with no tumbling skills—fret not! There are steps you can take to enhance your chances of making the team, even at a competitive school like UCF. Here’s a comprehensive guide to help you navigate through this challenge and turn your dream into reality.

Understand the Team’s Requirements

Before you dive into preparations, it’s crucial to understand what the coed cheer team at your desired college looks for in its athletes. Coed teams often require a different set of skills compared to all-female teams, including stunting with male bases and potentially different tumbling and jump requirements. Reach out to the team’s coach or current members for specific tryout requirements and tailor your preparation accordingly.

Focus on Your Strengths and Improve Weaknesses

Emphasize Basing and Back Spotting Skills: Given your experience in basing and back-spotting, continue to hone these skills. Coed cheerleading places a significant emphasis on stunts, and having strong basing skills can be a substantial advantage.

Develop Tumbling Skills: While you mentioned having no tumbling skills, it’s never too late to start. Begin with basic tumbling classes and gradually progress to more complex skills. Many cheerleading gyms offer classes specifically for beginners or those looking to improve their tumbling. Remember, consistency and practice are key.

Cross-Training and Fitness

Enhance Your Physical Fitness: Coed cheerleading can be physically demanding. Engage in a fitness regime that includes strength training, flexibility exercises, and cardio. This will not only improve your overall fitness but also help with stunts and reduce the risk of injury.

Cross-Training: Participate in other sports or fitness activities that can complement your cheerleading skills. Activities like gymnastics, dance, or even yoga can improve your flexibility, body awareness, and performance quality.

Seek Feedback and Practice Relentlessly

Practice With Others: If possible, find a local cheer team or group you can practice with. This will provide you with the opportunity to work on stunting and tumbling in a supportive environment and receive feedback.

Record Yourself: Recording your practice sessions can be incredibly beneficial. It allows you to visually critique your form and progress, giving you a clear direction on what to work on next.

Enhance Your Cheer Tryouts with Customized Tryout Music

A crucial yet often overlooked element in orchestrating successful cheer tryouts is the selection of the right cheer music. Properly chosen music does more than just play in the background; it sets the stage for a high-energy, cohesive tryout experience. At IPP Music, we understand the unique needs of cheer tryouts, which is why we offer Customized Tryout Mixes designed specifically for this purpose. These aren’t your ordinary cheer mixes; they all come with the option to integrate your team’s name through a voiceover included, adding a personalized flair that can significantly lift the spirits and foster unity among tryout participants.

Implementing a high-quality, dynamic Tryout Mix can closely mimic the competitive cheerleading atmosphere, enabling coaches and gym owners to evaluate candidates in a setting that mirrors actual performances. This approach is particularly beneficial for fine-tuning jumps, tumbling sequences, and stunt routines.

Need Competition Music Blue 1

Mental Preparation

Stay Positive: Confidence and a positive attitude can greatly impact your performance. Visualize your success, and don’t let setbacks discourage you. Remember, every athlete has areas they can improve on.

Prepare for Tryouts: Familiarize yourself with the tryout process. This may include learning specific cheers, dances, or routines required for the audition. Practice these elements until you feel confident.

Explore Alternative Options

Consider the Club Team: You’ve already mentioned the option of joining the club team if you don’t make the coed team. This is an excellent opportunity to continue cheering while working on your skills. Club teams often offer a competitive environment that can prepare you for future tryouts.

Look for Workshops and Camps: Attend cheerleading camps or workshops. These can provide you with intensive training and expose you to higher levels of cheerleading, potentially offering feedback from experienced coaches.

Making a coed cheer team, especially at a prestigious college like UCF, is a challenge that requires dedication, hard work, and a strategic approach. By focusing on your strengths, diligently working on your weaknesses, and maintaining a positive mindset, you can significantly improve your chances of success. Remember, the journey to becoming a college cheerleader is as rewarding as the destination. Good luck!

Steve Pawlyk Signature Full

IPP's Premade Mixes are USA Cheer Compliant and customizable!  Add Sound FX, swap songs, & more!  Add your Team Name to the mix for only $10! 

SLAM artwork
Full_Out_130 mp3 image
1 minute cheer mix
WAKE UP THE FIRE
SLAM artwork
WAKE UP THE FIRE
Full_Out_130 mp3 image
1 minute cheer mix

Standing on Stunts: A comprehensive guide to Flyer Balance, Flexibility, and Strength

Standing on Stunts A comprehensive guide to Flyer Balance Flexibility and Strength

By Steve Pawlyk

Published March 18, 2024

I came across a post on the r/cheerleading subreddit yesterday from user u/zimzamzoom01. It illustrates how the role of a flyer is filled with challenges that require not just physical agility but a blend of mental fortitude, precise technique, and a supportive environment. Today let’s discuss how to equip flyers with strategies to enhance their skills, prevent injuries, and foster a supportive cheer program.

Foundation: Strength, Flexibility, and Balance

Hip Flexibility and Mobility: The agility of your hips plays a significant role in the execution of stunts, enabling smoother transitions into various positions. Exercises like dynamic stretches, hip openers, and controlled leg swings can significantly improve your range of motion. This increased flexibility aids in achieving higher kicks and splits, which are often required in complex stunts.

Leg Strength and Control: While core and ankle strengths are foundational, the power in your legs cannot be overstated. Strong legs contribute to explosive jumps and secure landings, essential elements in cheerleading. Squats, lunges, and plyometric exercises are effective in building this strength. Additionally, practicing techniques such as toe raises can enhance control during stunts, providing a firmer grip on your base’s hands or shoulders.

Mental Balance and Focus: The mental aspect of balance is just as important as the physical. A flyer must possess the ability to focus amidst the chaos of performances and competitions. Techniques such as meditation and visualization can train your mind to remain calm and centered. Focusing on breathing can also help maintain mental balance, allowing for better concentration and execution of stunts.

Proprioceptive Development: Beyond basic balance exercises, engaging in activities that challenge your proprioceptive abilities can lead to significant improvements in how you control your body in space. This can include more advanced yoga poses that require both concentration and physical prowess, or even activities like slacklining, which demand a high level of body awareness and control.

Incorporating Movement Patterns: Practice doesn’t just make perfect; it makes permanent. Incorporating movement patterns that mimic the dynamics of stunts into your training can enhance muscle memory. This includes drills that simulate the lifting, twisting, and holding phases of stunts, ensuring that your body is well-acquainted with the motions even before you take to the air.

Technique:

Engage Your Base: Ensure full foot contact with your bases’ hands. Engage your legs and distribute your weight evenly, providing a stable platform for your bases to support you.

Tighten and Elongate: Imagine pulling your body towards the sky, engaging every muscle from your core down to your toes. A tightened body is easier and safer to lift and hold.

Safety: Techniques & Trust

Balancing Techniques: Develop impeccable balance through exercises tailored for flyers. Practice on solid ground before taking these positions into the air, focusing on building muscle memory for positions like the liberty and arabesque​​.

Need Competition Music Blue 1

Nutrition, Recovery, and Mental Preparation

Nutritional Support: A balanced diet fuels your body for strength and recovery. Focus on proteins, carbohydrates, and healthy fats, alongside hydration to maintain peak performance.

Rest and Recovery: Incorporate rest days and recovery techniques into your training regimen. This not only prevents injuries but also ensures you’re always performing at your best.

Mental Strength and Visualization: Employ mindfulness and visualization techniques to enhance focus, reduce performance anxiety, and mentally prepare for routines.

Additional Safety Measures

Protective Gear: Utilize wrist guards, ankle braces, and mats during practice to minimize injury risks, ensuring a safer learning and practice environment.

Balancing Safety: When in the air, focus on techniques such as locking your knees and not attempting to balance yourself. Trust your bases to provide balance and concentrate on keeping your feet flat and stable​​.

Mental Resilience and Visualization

Mindfulness and Breathing: Practice mindfulness and breathing exercises to manage performance anxiety. This mental preparation can significantly improve focus and calmness during routines.

Communication and Trust

Build a Relationship with Your Bases: Effective communication is crucial. Trust and understanding between you and your bases can significantly improve performance and safety.

Stability Strategies

Focus Point: Choose a fixed point in the distance to maintain balance. This technique helps reduce distractions and enhances stability.

Progressive Learning: Start with simpler stunts and gradually progress to more complex ones. This approach ensures a solid mastery of fundamental skills.

Engaging the Community

Community Engagement: The cheerleading community is a valuable resource. Share experiences, seek advice, and engage in workshops or coaching sessions for continuous improvement.

Tailored Training and Professional Coaching: Regular feedback from experienced coaches and tailored exercises for your skill level are essential for refining technique and enhancing safety practices.

Tailored Training

Exercises by Skill Level: Tailor your training to match your experience level. Beginners should focus on foundational exercises, while advanced flyers can explore more complex training routines to refine their skills.

Persistence and Progress

Success Stories for Motivation: Read and share success stories of underdog teams like Ithaca College, Team Australia, and Bangkok University, which have made significant impacts on the world stage despite facing numerous challenges. These teams’ stories highlight resilience, creativity, and the power of teamwork, proving that with determination, any squad can achieve greatness. Their journeys from facing significant obstacles to emerging as champions are truly inspirational and serve as powerful reminders of what can be accomplished through hard work and unity. For more about their inspiring journeys, check out our article on underdog cheer teams that shocked the world.

So now you got all the tips and tricks you’ll need to nail your technique, stay safe, get your head in the game, and boost your confidence as a flyer 😊. Just remember, it’s all about keeping cool, staying patient, and keeping at it. Every time you practice, you’re one step closer to hitting zero.

Steve Pawlyk Signature Full

IPP's Premade Mixes are USA Cheer Compliant and customizable!  Add Sound FX, swap songs, & more!  Add your Team Name to the mix for only $10! 

SLAM artwork
Full_Out_130 mp3 image
1 minute cheer mix
WAKE UP THE FIRE
SLAM artwork
WAKE UP THE FIRE
Full_Out_130 mp3 image
1 minute cheer mix

The Throw: The Physics of Cheerleading Lifts and Practical Training Techniques

The Throw The Physics of Cheerleading Lifts and Practical Training Techniques tips

By Steve Pawlyk

Published November 17, 2023

The captivating moment when a cheerleader is launched into the air during a stunt is the result of a precise application of physics principles between the base and the flyer. Understanding the mechanics behind this can vastly improve technique, safety, and performance. This article dives deep into the physics of the cheerleading throw and offers practical methods for coaches to enhance the training of their athletes.

The Fundamentals of Physics in Cheer Throws

Before delving into the training methods, it’s crucial to comprehend the basic physics at play. The throw involves concepts of force, energy, momentum, and angular momentum. Here, we’ll break down these principles and explain how they work in unison to execute a flawless lift.

Optimizing Force and Energy Transfer

The success of a throw hinges on the efficient transfer of energy from the base to the flyer. We will discuss how bases can optimize their application of force to maximize the height and stability of the throw, focusing on the timing, angle, and the explosive power needed.

The Technique Behind Momentum

Momentum is the product of mass and velocity and is conserved in the closed system of a base and flyer. Coaches can use drills to teach bases how to effectively transfer linear momentum to the flyer, ensuring a vertical lift that makes for an impressive stunt.

The spectacle of a cheerleader soaring gracefully through the air is a testament to the strength, timing, and precision cultivated through rigorous training. Strength and conditioning, drill repetition, and the correct application of force are the pillars of an effective cheer throw. This article will expand on these components to provide a comprehensive guide for cheerleading coaches aiming to refine the explosive power and synchronicity of their squad’s lifts.

Building a Foundation with Strength and Conditioning

The prowess of a cheerleading base begins with a robust foundation of physical strength, particularly in the legs and core. This is crucial for two reasons: it provides the power needed for a strong lift-off and ensures the stability required to support and control the throw. Here are key exercises to incorporate into a cheerleader’s regimen:

Need Competition Music Blue 1
  • Squats and Deadlifts: These compound movements are excellent for building leg strength. They mimic the lifting action of a cheer throw, engaging the quadriceps, hamstrings, and gluteal muscles.
  • Plyometrics: Exercises like box jumps and jump squats train fast-twitch muscle fibers, essential for the explosive power needed in a lift-off.
  • Core Workouts: Planks, Russian twists, and hanging leg raises build the core stability that bases need to maintain balance and control during a throw.

Perfecting the Art through Drill Repetition

Drill repetition is about creating muscle memory so that each movement becomes second nature, allowing for flawless execution during the high pressure of performances. Repetitive practice drills that focus on timing and coordination are vital:

  • Simulated Throws: Practice the motion of throws without the flyer to perfect the base’s technique and build endurance.
  • Timing Drills: Use metronomes or music to cue bases on when to initiate and release the throw, training them to act in unison.
  • Coordination Exercises: Group exercises where bases lift objects in sync can improve the collective coordination needed for synchronized throws.

The Science of Force Application

Teaching bases how to uniformly and directionally apply force can make the difference between a mediocre and a spectacular stunt. The uniform application of force ensures the flyer’s safety and the stunt’s success. Here are strategies to enhance this skill:

  • Directional Drills: Use targeted exercises to train bases on applying force in a consistent direction, which is often vertical for maximum height.
  • Resistance Training: Implement resistance bands or light weights to simulate the resistance a base feels when lifting a flyer.
  • Consistent Practice with Flyers: There’s no substitute for the real thing. Regular practice with flyers allows bases to adjust their force application in real-time, attuning to the flyer’s weight and movement dynamics.

Integrating Training into Routine Workouts

Incorporating these elements into a routine workout can lead to significant improvements:

  • Circuit Training: Create a circuit that includes leg and core strength exercises, plyometrics, and drill repetitions for a comprehensive workout.
  • Progressive Overload: Gradually increase the intensity and complexity of exercises to continuously challenge the athletes and promote strength gains.
  • Recovery and Mobility: Incorporate adequate rest and mobility work to prevent injury and ensure that athletes can perform movements with full range of motion.

Safety First: Ensuring a Secure Practice Environment

No discussion of cheerleading technique would be complete without a strong emphasis on safety. This section will cover the essential safety measures coaches must enforce, from proper spotting to ensuring that all stunts are practiced with mats and in a suitable environment.

Cheerleading throws are a complex blend of artistry and physics. By applying these principles in a structured training regimen, coaches can elevate their athletes’ performance and safety. This article serves as a guide to the scientific and practical aspects of cheerleading throws, providing coaches with the knowledge and tools to refine their team’s stunts to perfection.

Steve Pawlyk Signature Full

IPP's Premade Mixes are USA Cheer Compliant and customizable!  Add Sound FX, swap songs, & more!  Add your Team Name to the mix for only $10! 

SLAM artwork
Full_Out_130 mp3 image
1 minute cheer mix
WAKE UP THE FIRE
SLAM artwork
WAKE UP THE FIRE
Full_Out_130 mp3 image
1 minute cheer mix

Guide to Syncing your Cheer Music with your Choreography: Tips for Cheer Coaches

By Steve Pawlyk

Published November 2, 2023

Music and choreography go hand in hand like peanut butter and jelly. However, seamlessly integrating the two can be a daunting task for many cheer coaches. So, what are the key elements to consider while aligning cheer music with choreography? How can one make the most of every beat, lyric, and musical transition? This comprehensive guide aims to answer these questions and more, making your life as a cheer coach just a little bit easier.

Understanding the Basics of Cheer Music: The Four Pillars

Mastering the art of synchronizing cheer music with choreography begins with understanding the underlying structure and nuances of the music itself. As a cheer coach, being well-versed in these fundamentals can significantly elevate your team’s performance. Let’s break down these core aspects one by one.

Musical Structure: The Backbone of Your Routine

In a typical cheer mix, you’ll usually find the following sections:

  • Intro: This section sets the tone for your entire performance. You can think of it as a hook that grabs the audience’s attention. Choreography in this section should be compelling but not give everything away just yet.
  • Cheer: This is the heart of your routine where you can incorporate most of your stunts, tumbles, and jumps. It’s the high-energy section that showcases your team’s athleticism and skill.
  • Dance: Here’s where you get to show off your team’s creativity and synchronization. Dance sections usually allow for artistic expression, so don’t shy away from experimenting with formations and styles.
  • Outro: This is your last impression on the judges and audience, so make it count. A well-thought-out outro can tie your entire performance together and leave a lasting impact.
Need Competition Music Blue 1

Understanding these sections helps in mapping out your choreography in a structured manner, ensuring that you maximize the impact of each part of your routine.

Beats and Counts: The Language of Precision

8-counts are to cheerleading what alphabets are to language. These are the building blocks that will guide your choreography. In an 8-count structure, each count corresponds to a particular movement, position, or transition.

  • Syncing with Music: Always ensure that your 8-count sheets are perfectly in sync with the music. For instance, a high-flying stunt could coincide with a climactic musical note for added dramatic effect.
  • Uniformity: Consistency in counts ensures that the entire team moves as a single unit. Even a half-count off can be noticeable and cost you valuable points.

Lyrics and Voiceovers: The Signposts of Your Routine

Customized cheer music often includes personalized lyrics and voiceovers that can serve as auditory cues for your team. For example, if your team name or a specific word is echoed, that could signal the beginning of a new formation or stunt.

  • Internal Cues: These voiceovers can serve as internal cues for your team, keeping everyone on track during the routine.
  • Audience Engagement: Clever use of voiceovers can also engage the audience and get them excited, especially if they’re designed to be interactive or catchy.

Genre and Mood: Matching the Vibe of Your Team

The genre and mood of the music should mirror the essence of your team and the message you want to convey. If your team excels in powerful, high-energy routines, a fast-paced pop or electronic song could be ideal. Alternatively, if your routine has a storyline or a thematic element, a slower, more dramatic piece might be more suitable.

RELATED ARTICLES

The Do’s and Don’ts of the 8-Count Sheet

Learn how to effortlessly create, fill out, and complete an 8-Count Sheet for a winning [Read More...]

How to Match Cheer Music with Your Team’s Skill Level

Discover how to elevate your cheerleading routine by matching the perfect IPP Music mix to [Read More...]

Choosing the Right Theme with Our Premade Cheer Music Mixes: Elevate Your Team’s Routine

Explore the power of themed premade cheer music mixes to elevate your team's routine, with [Read More...]

  • Audience Resonance: Choose a genre that not only suits your team but also resonates with your target audience. Sometimes, familiarity with the genre can evoke emotional engagement, adding another layer of impact to your performance.
  • Mood Transitions: If your routine includes different moods or narratives, consider using a multi-genre mix that transitions smoothly to tell your story effectively.

By mastering these four pillars of cheer music—Musical Structure, Beats and Counts, Lyrics and Voiceovers, and Genre and Mood—you’ll be well-equipped to design a routine that’s not just synchronized but also sensational.

Know Your Team’s Skill Level

Evaluating your team’s skill level is paramount when syncing music with choreography. Here’s how to go about it:

  • Identify Strengths and Weaknesses: Is your team excellent at tumbles but not so great at stunts? Use this information to highlight their strengths in the routine.
  • Complexity vs Simplicity: For novice teams, sticking to simpler choreography and musical elements is advised. Advanced teams can experiment with complex transitions and tricks.
  • Customization: Many services, like IPP Music, offer customized cheer music tailored to your team’s capabilities, ensuring a perfect match between music and moves.

Choosing the Right Tempo

A significant aspect to consider is the tempo of your cheer music. This will highly influence the pace and energy of your choreography.

  • Fast Tempo: Ideal for routines that require high energy and rapid movements.
  • Medium Tempo: Great for a balanced routine with a mix of stunts, jumps, and dance elements.
  • Slow Tempo: Suitable for dramatic, story-telling routines with intricate moves and stunts.

Mapping Out Your Routine

Once you have the basics down, you’ll want to start mapping out your routine, including:

  • Sequence Planning: Decide the order in which elements like tumbles, jumps, and stunts will appear in your routine.
  • Transitions: Plan transitions carefully. Good transitions are as important as the stunts or tumbles themselves.
  • Musical Cues: Make use of the built-in cues in your music to signal the start or end of specific elements.

Key Choreography Tips

  • Musicality: Aim to make your moves flow naturally with the music. Each beat, rhythm, and lyric should have a corresponding move or emotion.
  • Timing: Ensure that your team can execute moves within the timeframe of the music segments. Practicing with a metronome can be beneficial.
  • Variety: Add a mix of elements to keep the audience engaged. Variety is the spice of a winning routine!

How to Practice Effectively

Effective practice is the key to a flawless performance. Here are some tips:

  • Start Slow: Begin by practicing individual elements separately before combining them.
  • Record and Review: Record your practice sessions to identify areas of improvement.
  • Repetition: Consistency is key. The more your team practices, the more muscle memory they’ll build, making it easier to sync with the music.

Integrating cheer music and choreography is not just an art but also a science that requires meticulous planning and practice. By understanding the basics of cheer music, assessing your team’s skill level, choosing an appropriate tempo, and employing smart choreography tips, you can create a performance that is not just synchronized but also sensational.

I hope this guide has been helpful in answering some of the common questions cheer coaches have regarding cheer music and choreography. For customized cheer music to match your choreography needs, consider IPP Music  :)

Steve Pawlyk Signature Full

IPP's Premade Mixes are USA Cheer Compliant and customizable!  Add Sound FX, swap songs, & more!  Add your Team Name to the mix for only $10! 

SLAM artwork
Full_Out_130 mp3 image
1 minute cheer mix
WAKE UP THE FIRE
SLAM artwork
WAKE UP THE FIRE
Full_Out_130 mp3 image
1 minute cheer mix

Creating a Legacy: How to Build a Long-Lasting Cheer Program

Creating-a-Legacy--How-to-Build-a-Long-Lasting-Cheer-Program

By Steve Pawlyk

Published October 24, 2023

In cheer, fleeting moments of victory are not enough. What distinguishes an extraordinary cheer program from an average one is the legacy it leaves behind. This legacy is built on a combination of consistent excellence, impactful leadership, and a well-rounded approach to all aspects of the sport and community. In this comprehensive guide, we’ll explore key elements that go into establishing and maintaining a long-lasting cheer program that will be talked about for generations to come.

Laying the Foundation

Craft a Mission Statement

The importance of a well-crafted mission statement cannot be overstated. It serves as the philosophical backbone of your cheer program, highlighting your core values, goals, and visions. Involve your coaching staff, athletes, and even parents in this process to get diverse input. For example, your mission statement might read, “To empower young athletes to achieve excellence in sport and character, fostering a lifelong love for cheerleading.” Once created, make sure this statement is visible in your gym, on your website, and in any printed materials to continually remind everyone involved of your program’s core aims.

Build a Strong Team Culture

A team’s culture can make or break a cheer program. You need to establish a culture that celebrates each athlete’s unique strengths while fostering a sense of community and shared purpose. Host team-building activities regularly, whether it’s a weekend training camp or simple ice-breaker games during practice. Also, make time to celebrate birthdays, academic achievements, and other life milestones to show that you care about your athletes’ lives outside of the gym. This kind of nurturing environment is key for long-term retention and success.

Need Competition Music Blue 1

Setting Clear Objectives

Short-term Goals

Short-term goals offer immediate targets that keep everyone engaged and focused. These could range from perfecting a specific routine for an upcoming competition to improving the squad’s average jump height over a semester. Keep these goals SMART—Specific, Measurable, Achievable, Relevant, and Time-bound. Track these metrics diligently and celebrate when they are achieved to keep morale high.

Long-term Goals

These are your legacy-building milestones. It could be winning a national championship within the next five years or perhaps getting your program recognized as a breeding ground for college-level talent. Once set, break these long-term objectives down into smaller, achievable steps and assign them deadlines. This makes the journey less overwhelming and more manageable.

Effective Coaching

Credentials and Training

Your coaching staff should not only have the relevant qualifications and experience but also a commitment to ongoing education. Consider investing in regular workshops or training sessions on the latest cheer techniques, sports psychology, and even first aid. Moreover, having a coaching staff that is well-versed in contemporary cheerleading dynamics adds significant credibility to your program.

Communication

Establishing open lines of communication is crucial for a successful cheer program. Use multiple channels like emails, group chats, and face-to-face meetings to keep everyone in the loop. Keep parents informed about practice schedules, competition dates, and any updates or changes. The key is to be transparent and accessible, which fosters a culture of trust.

Recruitment and Retention

Scouting Talent

Talent is the lifeblood of any cheer program. Utilize local competitions, school events, and social media platforms to scout promising athletes. Consider hosting an annual open house where potential recruits can visit your facilities, meet the coaching staff, and even participate in a mini training session.

Retaining Athletes

To keep your talented athletes committed to your program, provide them with the resources they need to succeed, both in and out of competitions. This could include scholarships, advanced training facilities, or even academic support. Conduct regular check-ins with your athletes to understand their needs and concerns, and be prepared to adapt your approach accordingly.

Financial Stability

Fundraising and Sponsorships

Finances can be a major stumbling block for long-term success. Host regular fundraising events like car washes, bake sales, or even cheer clinics where community members pay a small fee for a short cheerleading lesson. Furthermore, don’t hesitate to approach local businesses for sponsorships; offer to promote their business at your events or on your uniforms as a quid pro quo.

Budget Management

Managing your budget wisely is critical. Designate funds for essential activities like training, uniforms, travel, and equipment maintenance, and always have a contingency fund. Utilize financial software or hire an accountant who specializes in sports programs to keep your finances in check.

Community Involvement

Host Events

Hosting events, from small community gatherings to large-scale competitions, will raise your program’s profile. These events not only provide additional fundraising opportunities but also help in building a strong network within the cheerleading community.

cheer-program-mission-statement

Volunteer Work

Community service is not just for show; it helps your athletes develop a well-rounded character. Whether it’s visiting local hospitals in your cheer uniforms to bring some joy to patients or participating in community clean-up projects, these activities instill a sense of responsibility and belonging among your athletes.

Alumni Engagement

Networking

Engage with your alumni regularly. They can offer invaluable mentorship opportunities for your current athletes and can even help in job placements post-graduation. Create an alumni newsletter to keep them updated about the program and invite them to special events.

Fundraising

Alumni are often willing to contribute to their alma mater’s continued success. Regularly share your program’s achievements and milestones with them, and don’t hesitate to set up an alumni donation fund. Even small contributions can add up and make a significant difference.

Need Competition Music Blue 1

Staying Updated

Techniques and Trends

Cheerleading is an evolving sport. Attend coaching seminars, subscribe to relevant publications, and watch popular cheer shows or competitions to stay up-to-date. Updating your techniques not only keeps your program competitive but also keeps your athletes engaged and excited to learn.

Equipment and Safety

Regularly assess and update your equipment. Your athletes’ safety is paramount, and using outdated or faulty equipment is a risk that no program can afford to take. Keep up with safety protocols and ensure your coaching staff is well-versed in them as well.

Building a legacy with a long-lasting cheer program requires a deep-rooted commitment to excellence in every aspect—be it coaching, athlete development, or community engagement. Remember, the path to a lasting legacy is a marathon, not a sprint. With the right strategies and unwavering dedication, you can transform your cheer program into a name that will be remembered for years to come. Are you up for the challenge? Your legacy starts today.

Steve Pawlyk Signature Full

IPP's Premade Mixes are USA Cheer Compliant and customizable!  Add Sound FX, swap songs, & more!  Add your Team Name to the mix for only $10! 

SLAM artwork
Full_Out_130 mp3 image
1 minute cheer mix
WAKE UP THE FIRE
SLAM artwork
WAKE UP THE FIRE
Full_Out_130 mp3 image
1 minute cheer mix

The Comprehensive Guide to Stunt Progressions for Cheer Coaches

The Comprehensive Guide to Stunt Progressions for Cheer Coaches

By Steve Pawlyk

Published October 18, 2023

Today we’ll delve into the science of stunting, the psychology of team dynamics, and the art of performance, offering you actionable insights to elevate your squad to unparalleled heights.

Why Stunt Progressions Are Not Just for Rookies

While it’s easy to associate stunt progressions with beginner levels, even the most accomplished teams can benefit from revisiting these foundational building blocks. However, for the advanced team, the approach shouldn’t be repetitive but rather analytical. Here’s why:

  • Risk Mitigation: A nuanced understanding of each progression allows coaches to pinpoint minor, often overlooked errors that could spell disaster in complex stunts.
  • Skill Specialization: Mastering the nuances of each progression enables athletes to specialize in their roles, which in turn significantly improves individual and team performance.
  • Performance Metrics: Leveraging tools like video analysis and biomechanics software allows coaches to optimize each movement, timing, and force, lending a scientific rigor to the art of cheerleading.

The Roles Re-Examined: More than Just Titles

In competitive cheerleading, roles are not just labels but encapsulate specific skill sets, expectations, and responsibilities that each team member must fulfill.

Need Competition Music Blue 1
  • Flyer: At advanced levels, training should include vestibular exercises to improve body awareness, control, and mid-air adjustment skills. Psychological coaching can also be beneficial for managing performance anxiety.
  • Base: Specialized strength training regimes like plyometrics or isometric exercises can hone specific muscle groups that are vital for bases. Additionally, drills focusing on adaptive grip techniques can improve stunt stability.
  • Spotter: Rather than being passive overseers, spotters should engage in active problem-solving during stunts. Communication drills can help them deliver effective, real-time feedback and corrections.

Mastering the Nuances: Beyond Basic Skills

While basic stunts form the foundation of all cheerleading routines, mastering their intricacies can yield exponential performance improvements.

Prep-Level Stunts:

  • Thigh Stand with Core Activation: Incorporating core-engagement techniques can offer more stable thigh stands and can also improve the bases’ ability to adjust and adapt to movement variations from the flyer.

Extension-Level Stunts:

  • Full Extension with Synchronized Breathing: Introduce meditative breathing exercises to help your team focus. Synchronized breathing between the bases and the flyer can add an additional layer of stability and control.

Intermediate Skills: The Untold Tricks

These transitional stunts require a blend of solid foundational skills and advanced techniques, making them critical stepping stones for aspiring champions.

  • Bow and Arrow with Momentum Control: Emphasize the importance of core stability and dynamic balance to control momentum effectively. Advanced squads can also incorporate angular momentum calculations to improve performance.
  • Basket Toss with Aerial Awareness: Introduce visualization and spatial awareness drills that flyers can employ mid-air to adjust their body position for a safer and more precise landing.

Elite Stunt Techniques: The Next Frontier

For squads ready to break barriers and defy gravity, these high-difficulty stunts provide the ultimate test of skill, teamwork, and courage.

  • Rewind with Pre-Lift Cues: Employ auditory or tactile cues to ensure the entire team is mentally and physically prepared to execute a rewind flawlessly.
  • Double Down with Angular Momentum Conservation: Advanced squads can use biomechanical analysis tools to evaluate the optimum rotational speed and body posture for executing a flawless Double Down.

Unseen Pitfalls Even Pros Should Avoid

Even seasoned coaches and elite athletes are susceptible to pitfalls. These are often due to overconfidence or complacency.

  • Overconfidence: Assuming that a mastery of the basics negates the need for revisiting them can be a grave mistake.
  • Technique Stagnation: The world of cheerleading is dynamic and rapidly evolving. Refusing to update and adapt your techniques to new standards and best practices can lead to performance plateaus.

Safety Measures for the Advanced

Even with advanced skills, safety remains paramount. From regular biomechanical assessments to sophisticated technologies like pressure-sensitive mats and motion capture, advanced safety measures are an investment in your team’s longevity and success.

Excellence in cheerleading stunting doesn’t come from mere repetition but from deep, insightful understanding and continuous innovation. This Advanced Guide to Stunt Progressions aims to catalyze your journey towards technical mastery, optimized performance, and world-class excellence.

Steve Pawlyk Signature Full

IPP's Premade Mixes are USA Cheer Compliant and customizable!  Add Sound FX, swap songs, & more!  Add your Team Name to the mix for only $10! 

SLAM artwork
Full_Out_130 mp3 image
1 minute cheer mix
WAKE UP THE FIRE
SLAM artwork
WAKE UP THE FIRE
Full_Out_130 mp3 image
1 minute cheer mix

Decoding Cheer Terminology: A Comprehensive Guide for Beginners and Parents

Decoding-Cheer-Terminology--A-Comprehensive-Guide-for-Beginners-and-Parents

By Steve Pawlyk

Published October 11, 2023

The world of cheer can be somewhat challenging, especially for those new to the scene. From unique terms, moves, and phrases, cheerleading, as a sport and art form, is replete with its own specialized language. In this comprehensive guide, we aim to break down and demystify this jargon for parents, beginners, and the curious.

1. The Origins of Cheerleading and its Jargon

Cheerleading originated in the late 19th century as an all-male activity. Over the years, it evolved and incorporated more gymnastic elements, leading to the creation of specific terms to describe stunts, moves, and formations. As the sport grew in complexity and popularity, so did its lexicon.

2. Basics: Core Terms Every Cheer Enthusiast Should Know

Flyer: The essence of acrobatic elegance in cheerleading. Being a flyer requires not only physical strength but also immense trust in the team. Elevating or being tossed into the air demands a blend of balance, confidence, and precision. The flyer’s role, though breathtaking, requires hours of practice to ensure every move exudes grace and poise.

Base: Often unsung heroes of cheerleading, bases are the foundation of most stunts. These individuals, usually with exceptional strength and stability, are tasked with the crucial job of supporting or elevating the flyer. The synchronization between bases ensures fluidity in routines and, more importantly, the safety of the flyer.

Spotter: The guardians of the cheer world. Their primary role is to ensure that no harm comes to the flyer. By being vigilant and having a keen eye for potential hazards, spotters play an instrumental role in preventing injuries and ensuring that routines are executed safely.

Routine: More than just a series of moves, a routine is a story told through synchronized dance, tumbling, stunts, and jumps. Choreographing a routine requires understanding the strengths of each team member and ensuring every movement complements the next, creating a seamless visual spectacle.

Need Competition Music Blue 1

3. Deciphering Stunts and Moves

Liberty (Lib): A testament to balance and strength. This stunt demands that the flyer showcases their stability by maintaining a pose on one foot, elevated by the base. The aesthetics of the Lib are amplified by the free leg’s positioning, making it a favorite in many routines.

Basket Toss: A combination of trust and thrill. The bases use their collective strength to propel the flyer into the air. While airborne, the flyer has a brief moment to exhibit a series of tricks, spins, or poses before descending into the secure embrace of their team.

Full: An embodiment of rotational elegance. Executing a full requires the cheerleader to harness momentum and perform a complete 360-degree twist in the air. Mastery of this move is a testament to a cheerleader’s tumbling prowess.

Tick-Tock: A transition that requires impeccable timing. As the flyer switches their weight from one foot to the other, the bases and spotters must adjust in perfect harmony. The beauty of the Tick-Tock lies in its fluidity and synchronization.

4. Navigating the Competitive Arena

Zero Deductions: Every cheerleader’s dream. Achieving zero deductions signifies a routine executed to perfection. It’s a reflection of countless hours of practice, team synchronization, and flawless execution.

Full Out: The climax of preparation. In the final rehearsals leading up to a competition, athletes push their boundaries, performing routines with unmatched energy and intensity. This not only prepares them for the main event but also helps iron out any remaining imperfections.

Mat: More than just a surface. The mat is a testament to the evolution of cheerleading. Designed to aid athletes in maximizing their performance while ensuring safety, its spring-loaded mechanism is pivotal in enhancing jumps and cushioning falls.

5. Delving Deeper: Cheer Slang and Insider Lingo

Cupie: A picturesque pose that showcases the synergy between a flyer and their base. Achieving the Cupie requires the base to display immense strength and stability, allowing the flyer to strike a balanced pose on one foot high in the air.

Crisping: The art of refinement. As teams approach competition day, every gesture, move, and formation is reviewed and refined. This process ensures that routines are not just technically sound, but also aesthetically pleasing.

Choreo: The heart and soul of any routine. Choreography sessions are a blend of creativity and athleticism. It’s during these sessions that routines come to life, with every move meticulously planned to ensure visual appeal and team synchronization.

6. Essential Tips for Parents and Newbies

a. Immerse Yourself: The world of cheerleading is vast and vibrant. To truly understand its intricacies, one must dive deep. Engaging with dedicated platforms, such as this blog, provides insights, stories, and experiences that will help you understand the cheer world.

b. Active Observation: There’s a difference between watching and observing. By actively analyzing routines, newbies can begin to understand the technicalities of moves, the importance of synchronization, and the sheer effort that goes into every performance.

c. Network: The cheer community is vast and usually very supportive. By connecting with seasoned parents, experienced cheerleaders, and dedicated coaches, newcomers can gain invaluable insights, tips, and advice that can help navigate the initial stages of their cheer journey. Look for facebook groups centered around the gym you or your child is in or groups that are just cheer focused.  You can glean a lot from just viewing discussions between seasoned cheer people who know what they’re talking about.

Understanding the language is the first step in appreciating the dedication and passion of cheer. Every jump, tumble, and stunt is a story waiting to be told. So, immerse yourself, observe, learn, and above all, keep reaching for zero!

Steve Pawlyk Signature Full

IPP's Premade Mixes are USA Cheer Compliant and customizable!  Add Sound FX, swap songs, & more!  Add your Team Name to the mix for only $10! 

SLAM artwork
Full_Out_130 mp3 image
1 minute cheer mix
WAKE UP THE FIRE
SLAM artwork
WAKE UP THE FIRE
Full_Out_130 mp3 image
1 minute cheer mix

How to Deal with Difficult Parents: A Coach’s Guide

how-to-deal-with-difficult-parents-cheerleading-coaching

By Steve Pawlyk

Published September 21, 2023

Coaches often have to juggle more than just routines, athletes, and competitions. One of the most challenging aspects can be dealing with difficult parents. Whether they’re over-involved, overly critical, or simply not supportive, difficult parents can create stress and obstacles for any cheer coach. In this comprehensive guide, we’ll explore effective strategies for managing and improving your relationship with challenging parents, ensuring a smoother and more fulfilling coaching experience for everyone involved.

Understanding the Types of Difficult Parents

Before tackling the issue, it’s essential to understand the different types of difficult parents you might encounter.


The Overzealous Parent

The Overzealous Parent is a fixture at cheerleading practices, events, and even social gatherings related to the team. They are highly invested in their child’s cheer career, sometimes to the point where it seems like they’re reliving their own athletic aspirations through their kids. This type of parent is often well-meaning but can become a distraction or even a source of stress for you or your athletes. They might scrutinize your coaching techniques, question your decisions, and even offer unsolicited advice on how to run practices or routines.

Potential Issues

  • Micromanagement: Overzealous parents may try to dictate how practices should be conducted or criticize your coaching methods.
  • Undermining Authority: Their constant presence and vocal opinions can undermine your authority as a coach, causing confusion among the athletes.
  • Creating Unnecessary Pressure: Their high expectations can translate into undue pressure on their child and, by extension, the whole team.

How to Deal with the Overzealous Parent

Handling an Overzealous Parent requires a delicate balance of assertiveness, diplomacy, and professionalism. Here’s how:

1. Set Clear Boundaries Early On

During your initial parent meeting, make it clear what your role is as a coach and what you expect from parents. You might say something like, “While we appreciate your enthusiasm and support, it’s crucial to remember that during practices and events, I am responsible for coaching the athletes.”


2. Maintain Professionalism

Always maintain a professional demeanor when interacting with these parents. If they offer unsolicited advice during a practice, politely thank them for their input and say, “I appreciate your perspective. I have a specific plan for the team, and it’s important that we stick to it to ensure everyone’s success.”

3. Private Conversations

If the parent continues to overstep, consider pulling them aside for a private conversation. Be honest but tactful, explaining that while you appreciate their interest and passion, their behavior is becoming disruptive. You might say, “I understand you have your child’s best interest at heart, but it’s important for me to be able to coach the team without outside interference.”

4. Enforce Rules Consistently

If the behavior continues, you may need to enforce stricter boundaries, like limiting parental observation during practices or asking them to refrain from approaching you during practice hours.

5. Seek Support from Program Administration

In extreme cases, it may be necessary to involve higher-ups like the athletic director or program coordinator. Having a neutral third party can sometimes help mediate the situation and bring about a resolution.

While the Overzealous Parent may pose challenges, remember that their passion comes from a place of wanting the best for their child. By setting clear boundaries, maintaining professionalism, and fostering open communication, you can turn this potentially difficult relationship into a more manageable, and even constructive, one.

 
Need Competition Music Blue 1

The Critic

The Critic is a type of parent who seems to find fault in almost everything—from your coaching methods to the team’s performance, and sometimes even the cheerleading program as a whole. While criticism can sometimes be constructive, these parents often present their opinions in a way that can be demoralizing or disruptive. They might openly question your decisions, compare your coaching unfavorably to others, or make their criticisms known to other parents or even the athletes themselves.

Potential Issues

  • Eroding Confidence: The constant criticism can undermine your authority and erode the confidence of both you and your athletes.
  • Disrupting Team Dynamics: If not managed carefully, their negative comments can create a toxic environment, affecting the team’s morale and cohesiveness.
  • Miscommunication: Critics often base their judgments on their own perceptions, which might be uninformed or biased, leading to misunderstandings and conflicts.

How to Deal with The Critic

Managing a parent who is a Critic requires a thick skin, diplomacy, and a focus on constructive dialogue. Here’s how:

1. Don’t Take It Personally

The first step in dealing with a Critic is to understand that the criticism is often not about you. It may stem from the parent’s own insecurities, past experiences, or high expectations for their child. Take their comments as feedback, not as an attack on your competence.

2. Acknowledge and Redirect

When faced with criticism, acknowledge the parent’s concerns without agreeing or disagreeing. You might say, “I understand you have concerns about [specific issue]. I’m committed to doing what’s best for all the athletes on the team.”

3. Keep the Focus on the Athletes

Remind the parent that your primary concern is the development and well-being of all the athletes on the team. Emphasize that you have a strategy and plan in place aimed at achieving this.

4. Seek to Understand

Sometimes criticism arises from misunderstandings or lack of information. Ask the parent to elaborate on their concerns and provide your perspective to clear up any misconceptions.

5. Set Boundaries for Feedback

Establish a formal channel and appropriate times for parents to provide feedback, like scheduled meetings or designated office hours. This helps prevent disruptive confrontations during practices or events.

6. Consult with Other Coaches or Administration

If the criticism becomes excessive or starts affecting your ability to coach, it may be helpful to consult with other coaches or higher-ups in your program. They can offer additional perspectives and may even mediate if necessary.

In Summary

While dealing with a Critic can be challenging, it’s important to remember that their criticisms often come from a place of wanting their child to succeed. By maintaining professionalism, acknowledging their concerns, and setting appropriate boundaries, you can manage these difficult interactions more effectively. Ultimately, open communication and a focus on the athletes’ well-being can often diffuse tension and lead to a more constructive relationship with even the most critical of parents.


The Uninvolved Parent

The Uninvolved Parent is generally passive in their approach to their child’s cheerleading journey. They fulfill the basic responsibilities like paying for classes and providing transportation to events, but their engagement usually stops there. They are rarely seen at practices, seldom volunteer for team activities, and may not show much interest in the team’s progress or their child’s development in the sport.

Potential Issues

  • Lack of Support: The absence of parental involvement can sometimes translate into a lack of emotional or moral support for the athlete.
  • Missed Opportunities: These parents are often unaware of the full range of experiences and benefits that active involvement in cheerleading can offer to both them and their children.
  • Limited Communication: Their limited involvement can make it difficult to keep them informed about important updates, leading to misunderstandings or missed commitments.

How to Deal with The Uninvolved Parent

Engaging an Uninvolved Parent can be a subtle art that requires persistence, tact, and a focus on highlighting the positive impacts of greater involvement. Here’s how:

1. Open Channels of Communication

Take the initiative to keep these parents informed. Regularly send out newsletters or updates that highlight not just team achievements but also individual accomplishments, including those of their child.

2. Personalize the Engagement

Whenever possible, provide personalized updates on their child’s progress. This could be through periodic one-on-one meetings or even simple notes that point out improvements, milestones reached, or commendable efforts during practices or competitions.

3. Offer Inclusive Opportunities

Create opportunities for all parents to be part of the team’s activities, even if in small ways. This could be as simple as inviting them to a team celebration or asking for volunteers for less demanding tasks.

4. Highlight the Benefits

Sometimes parents are uninvolved because they are unaware of the benefits of active participation. Make it a point to share stories or testimonials from other parents who have found great value in becoming more involved in their child’s cheerleading experience.

5. Be Patient and Consistent

Change rarely happens overnight. Continue your efforts to involve them and recognize any steps, however small, they take toward becoming more engaged.

6. Assess and Adapt

Keep track of your engagement efforts and their outcomes. If you find that certain strategies are more effective than others, adapt your approach accordingly.

In Summary

While it may be challenging to engage an Uninvolved Parent, it’s worth the effort for the sake of the athlete and the team as a whole. Through consistent communication, personalized engagement, and a bit of patience, you can help them become more active participants in their child’s cheerleading journey. In doing so, you not only enhance the experience for their child but also contribute to a more cohesive and supportive team environment.

Dealing with difficult parents is a challenge that almost every cheer coach will face at some point. By understanding the types of difficult parents, setting boundaries, communicating effectively, and employing conflict resolution strategies, you can create a more harmonious and successful cheerleading program.


Steve Pawlyk Signature Full

IPP's Premade Mixes are USA Cheer Compliant and customizable!  Add Sound FX, swap songs, & more!  Add your Team Name to the mix for only $10! 

SLAM artwork
Full_Out_130 mp3 image
1 minute cheer mix
WAKE UP THE FIRE
SLAM artwork
WAKE UP THE FIRE
Full_Out_130 mp3 image
1 minute cheer mix

How to Match Cheer Music with Your Team’s Skill Level

How-to-Match-Cheer-Music-with-Your-Team's-Skill-Level

By Steve Pawlyk

Published September 20, 2023

When it comes to creating the perfect cheerleading routine, the choice of music plays a pivotal role. The right music can uplift your team’s performance, energize the crowd, and even impress the judges. But one size doesn’t fit all. Matching the music to your team’s skill level is crucial for a harmonious and impactful routine. So, how do you go about it?

In this guide, we’ll delve into how you can select the best cheer music for your team by assessing various factors and considering the different options available. Specifically, we’ll focus on the offerings from IPP Music, a leader in the cheer music industry, to guide you through the decision-making process.

Assessing Your Team’s Skill Level

Before you even think about music, it’s essential to assess your team’s skill level accurately. Consider these factors:

  • Skill Range: Is your team made up of beginners, intermediates, or advanced athletes?
  • Routine Complexity: Are you aiming for simple routines or complex formations and stunts?
  • Competition Level: Are you competing locally, or do you have your eyes set on national or global championships?
Need Competition Music Blue 1

Why IPP Music?

IPP Music offers two primary categories of mixes—Premade and Custom. These options make it easier to tailor your music to match your team’s abilities and aspirations.

Premade Mixes: For Convenience and Affordability

PREMADE MIXES

Premade mixes are less expensive and can be easily customized with various add-ons. They are a fantastic option for entry-level and intermediate teams. Here’s how you can customize a Premade Mix:

  • Voiceovers: Add your team’s name or other basic phrases. Packages range from “Team Name Only” at $10 to “Unlimited” at $99.
  • Sound FX: Add impactful sound effects for $99.
  • Cheer Breaks: Insert cheer breaks into the mix for $5 each.
  • Tempo Adjustments: Modify the tempo to match your routine’s pace for $25.
  • Mix Splitting: Split the mix into two separate files at any point for $25.
  • Song Swapping: Swap songs within the IPP Music library for $25.

Custom Mixes: For Uniqueness and Complexity

CUSTOM MIX PRICING

If you’re an advanced team aiming for high-level competitions, Custom Mixes are worth considering. IPP Music offers five tiers of Custom Mixes:

  • Standard: Ideal for entry-level teams, costs start at $875.
  • Advanced: Suited for teams competing at a higher level, with prices starting at $1028.
  • Elite: Designed for competitive all-star teams, starting at $1185.
  • Semi-Custom: Perfect for Worlds and Summit teams, priced from $2420.
  • Full Custom: Completely original compositions for top-tier teams, starting at $3399.

Each tier offers various levels of voiceovers, raps, and sound effects tailored to your needs. Also, all custom mix packages come with free edits, making it easier to adjust your mix as your routine evolves.

Making the Right Choice: A Step-by-Step Guide

  • Identify Needs and Budget: Begin by understanding your team’s requirements and how much you’re willing to spend.
  • Consider the Skill Level: Use the skill assessment to narrow down whether a Premade or Custom Mix is more appropriate.
  • Choose the Type:
    • For lower budgets and simpler routines, a Premade Mix with essential add-ons can suffice.
    • For advanced teams, consider the various Custom Mix tiers based on your specific needs.
  • Customize: Once you’ve chosen the type, utilize the various add-ons or tiers to tailor the mix to your liking.
  • Review and Edit: IPP Music allows free edits for Custom Mixes and offers various add-ons for Premade Mixes to fine-tune your selection.
  • Test the Music: Before finalizing, practice your routine with the music to ensure it complements your team’s skill level and choreography.

Whether you’re coaching a beginner squad or a championship-level team, the right music can make all the difference. By thoughtfully considering your team’s skill level and taking advantage of IPP Music’s flexible and high-quality offerings, you can find the perfect match that helps your athletes shine.

So, are you ready to take your team’s performance to the next level? When the season begins, make sure you’re down with IPP!

Steve Pawlyk Signature Full

IPP's Premade Mixes are USA Cheer Compliant and customizable!  Add Sound FX, swap songs, & more!  Add your Team Name to the mix for only $10! 

SLAM artwork
Full_Out_130 mp3 image
1 minute cheer mix
WAKE UP THE FIRE
SLAM artwork
WAKE UP THE FIRE
Full_Out_130 mp3 image
1 minute cheer mix

Mastering Cheerleading Extensions: A Guide for Flyers with Troublesome Extensions

mastering-extensions-in-cheerleading-tutorial-tips

By Steve Pawlyk

Published September 15, 2023

If you’re a cheerleader struggling with extensions, especially as a flyer, you’re not alone. It’s an area that many flyers find challenging, but it’s crucial for nailing your routine and impressing the judges. Today we’re gonna go over how to improve your extensions, with specific reference to a Reddit post that highlights challenges such as balance issues and hypermobility. Let’s jump right in.

The Problem with Extensions

A Reddit user recently highlighted a common issue among flyers — difficulty in maintaining balance during two-leg extensions. Whether it’s wobbling, falling forward, or not being able to keep your feet together, these issues can throw off your entire routine.

The Role of Joint Hypermobility

If you, like the original poster, have excessive joint hypermobility, it’s essential to adapt your technique accordingly. This could mean avoiding locking your knees too tightly, as hyperextension can contribute to imbalance.

Need Competition Music Blue 1

Tips for Flyers Struggling with Extensions

  • Find the Sweet Spot: Balance is about weight distribution. Try to find that perfect balance between your heels and toes.
  • Engage Your Core: This is more than just “squeezing”. Your core muscles are essential for stability.
  • Alignment: Ensure that your hips are stacked over your knees and your knees over your ankles.
  • Feedback from Bases: Communication with your bases can offer vital feedback for improving your form.
  • Practice Low: Try practicing the extension at a lower height to build confidence and fine-tune your form.
  • Foot Position: Experiment with keeping your feet at hip-width versus together to see which offers better stability, gradually moving to the desired position.
  • Consult a Specialist: If hypermobility is a concern, consult a physiotherapist familiar with cheerleading injuries.

Takeaway for Coaches

Coaches, if you’re primarily experienced as a base, it may be beneficial to bring in an experienced flyer to provide specific tips to your team. The simple directive to “just squeeze” might not cut it for everyone.

Extensions are a vital part of any cheerleading routine, but they can pose challenges, especially for those new to flying or those with hypermobility. With the right techniques and a bit of focused practice, you can turn your troublesome extensions into a showcase skill. And remember, communication with your team and coach is vital for identifying problems and implementing solutions.

Steve Pawlyk Signature Full

IPP's Premade Mixes are USA Cheer Compliant and customizable!  Add Sound FX, swap songs, & more!  Add your Team Name to the mix for only $10! 

SLAM artwork
Full_Out_130 mp3 image
1 minute cheer mix
WAKE UP THE FIRE
SLAM artwork
WAKE UP THE FIRE
Full_Out_130 mp3 image
1 minute cheer mix

Mastering the Art of Spotting: A Coach’s Guide

Mastering-the-Art-of-Spotting-Coach's-Guide

By Steve Pawlyk

Published September 12, 2023

Cheerleading is a sport that demands not just energy and enthusiasm but also a high level of precision and skill. As a coach, your role is pivotal in ensuring that your athletes are well-equipped to excel. One of the critical skills that often gets overlooked is spotting. In this comprehensive guide, we’ll delve into the various facets of spotting, from drills and video analysis to essential safety tips. Let’s dive in!

1. Spotting Drills: Building Strength and Trust

What It Is:
Spotting drills serve as the cornerstone for developing the strength, skills, and confidence required for effective spotting. These exercises can be tailored to meet the specific needs of any athlete or squad.

Detailed Example:
Partner drills are excellent for fostering trust between athletes and enhancing their spotting techniques. During these drills, athletes should stand close to the flyer and bend at the knees. They should place their arm around the flyer’s mid-section, ensuring shoulder contact. This helps in mastering various positions, such as jumps or intricate stunts.

2. Video Analysis: A Tool for Precision

What It Is:
Video analysis is an invaluable resource for dissecting and refining a routine. It helps identify areas needing additional spotting assistance and highlights what is already being done correctly.

Detailed Example:
Recording your routine and reviewing it in slow motion allows you to scrutinize whether athletes are effectively spotting each other. It’s crucial to watch the flyer closely and call out stunts audibly enough for everyone to hear.

3. Visualization Techniques: The Power of the Mind

What It Is:

Visualization is a potent tool that can help athletes internalize how to spot each other correctly by imagining themselves executing the moves flawlessly.

Detailed Example:

Encourage your athletes to sit comfortably and visualize themselves performing the stunts. They should focus on details like proper arm and leg positions and imagine the spotter assisting them in landing safely.

Need Competition Music Blue 1

4. Spotting Apps: Technology to the Rescue

What It Is:

Spotting apps offer a convenient way for athletes to hone their spotting skills during their personal time. These apps allow you to record your athletes and then view an analysis of accuracy, time, and progression.

Detailed Example:

Skill Shark is an excellent app that includes a range of resources for improving spotting skills. It’s perfect for coaches who want to practice hands-on spotting and get a granular analysis of their progression while learning a new skill.

5. Spotting Harness: Safety First

What It Is:
Spotting harnesses are invaluable for practicing advanced stunts safely. They eliminate the fear of injury, allowing athletes to focus solely on improving their skills.

Detailed Example:
Spotting harnesses come with adjustable straps and padding, ensuring a secure and comfortable fit. They’re ideal for practicing catching the flyer’s head and neck first if they fall and catching them at the highest point possible to slow their descent.

Spotting is an essential skill for any cheerleading team, and mastering it requires dedication and practice. With the right tools, techniques, and resources, you can help your athletes improve their skills and safely achieve their goals.

Steve Pawlyk Signature Full

IPP's Premade Mixes are USA Cheer Compliant and customizable!  Add Sound FX, swap songs, & more!  Add your Team Name to the mix for only $10! 

SLAM artwork
Full_Out_130 mp3 image
1 minute cheer mix
WAKE UP THE FIRE
SLAM artwork
WAKE UP THE FIRE
Full_Out_130 mp3 image
1 minute cheer mix

The Art of Retention: How to Keep Cheer Athletes Coming Back to Your Gym

The-Art-of-Retention--How-to-Keep-Cheer-Athletes-Coming-Back-to-Your-Gym

By Steve Pawlyk

Published August 24, 2023

Attracting new athletes to your gym is only half the battle. The true challenge lies in retaining those athletes, nurturing their growth, and building a loyal community that feels like family. Retention is more than a business strategy; it’s an art form that requires understanding, creativity, and a genuine passion for the sport and the individuals who dedicate themselves to it. How do you keep cheer athletes coming back to your gym, season after season? How do you transform a cheer gym into a home where athletes grow, thrive, and succeed?

This comprehensive guide delves into the art of retention, offering practical strategies, examples, and ideas to foster loyalty and keep cheer athletes engaged in your program. Whether you’re a seasoned cheer coach or a gym owner looking to enhance your retention efforts, these insights will empower you to create a cheerleading environment that resonates with athletes and their families, setting your gym apart in a competitive market.

1. Provide Exceptional Coaching

  • Invest in Professional Development: Encourage coaches to attend workshops like the USASF National Meeting, ensuring they stay current with industry best practices.
  • Offer Personalized Attention: Implement small group sessions to focus on individual needs, such as specialized tumbling classes for those struggling with specific skills.
  • Foster a Positive Environment: Create a “Shout Out” board where athletes can publicly praise each other’s achievements, fostering a supportive atmosphere.

2. Develop a Strong Community

  • Encourage Team Bonding: Organize team sleepovers or outings to amusement parks, fostering camaraderie and friendship.
  • Engage Families: Host family potluck dinners or parent-child practice sessions to create a sense of community.
  • Celebrate Successes: Create a “Wall of Fame” to display team trophies and individual achievements, fostering pride and recognition.

3. Offer Competitive and Flexible Pricing

  • Provide Value: Bundle coaching sessions with gym merchandise or competition entry fees to enhance perceived value.
  • Offer Flexible Payment Options: Implement a monthly payment plan or sibling discounts to accommodate various financial situations.
  • Create Loyalty Programs: Offer a “Refer a Friend” program that provides discounts for both the referring athlete and the new recruit.
Need Competition Music Blue 1

4. Maintain Top-notch Facilities and Equipment

  • Invest in Quality Equipment: Regularly update mats and safety gear, ensuring the highest standards of safety.
  • Create a Welcoming Environment: Design lounge areas with comfortable seating for athletes and parents, creating a home-away-from-home feel.
  • Prioritize Safety: Conduct monthly safety drills and maintain clear safety guidelines posted throughout the gym.

5. Communicate Effectively

  • Keep Athletes and Families Informed: Utilize a gym app that sends push notifications for schedule updates, announcements, and achievements.
  • Solicit Feedback: Implement a suggestion box or regular surveys to gather feedback and demonstrate that opinions matter.
  • Provide Clear Expectations: Create a handbook outlining policies, expectations, and goals, ensuring clarity and transparency.

6. Offer Diverse and Engaging Programs

  • Provide Varied Training Opportunities: Offer themed workshops like “Stunt Fest” or “Tumble Mania” to cater to various interests.
  • Create Opportunities for Competition: Participate in both local showcases and national championships, providing varied competitive experiences.
  • Implement Off-season Activities: Organize summer cheer camps or specialized clinics with guest coaches to keep athletes engaged during the off-season.

Retention is an art that requires creativity, commitment, and a keen understanding of what makes athletes and their families feel valued. By implementing these strategies, you can create a cheer gym that not only attracts athletes but keeps them coming back, building a loyal and thriving community in a competitive market.

Steve Pawlyk Signature Full

IPP's Premade Mixes are USA Cheer Compliant and customizable!  Add Sound FX, swap songs, & more!  Add your Team Name to the mix for only $10! 

SLAM artwork
Full_Out_130 mp3 image
1 minute cheer mix
WAKE UP THE FIRE
SLAM artwork
WAKE UP THE FIRE
Full_Out_130 mp3 image
1 minute cheer mix

Mastering Toss Hands

mastering-toss-hands cheerleading

By Steve Pawlyk

Published August 14, 2023

Male cheerleaders around the world may face unique challenges, particularly when it comes to performing toss hands. If you are in your early years of cheerleading and struggling with getting the right height on your toss, but seem to have no problem with shoulder sits, you are not alone.

Understand the Role of Strength Training

Lift More Weights: Building strength is key. Focus on the big 3 lifts – deadlifts, squats, and cleans.

  • Deadlifts and Squats: These exercises target the muscles needed for tosses and can significantly enhance your power.
  • Cleans: This is useful for developing explosive strength, but it requires proper technique to be effective.

While coaches often emphasize technique over strength, having more strength to tap into will never be detrimental. It can, in fact, provide an edge in your performance.

Deadlifts

Deadlifts are great for building overall strength, targeting muscles in your legs, back, and core. Here’s a step-by-step guide:

1. Starting Position:

  • Stand with feet hip-width apart.
  • Place the barbell over the middle of your feet.
  • Bend at the hips and knees to lower your body to the bar.
  • Grip the bar with both hands, either overhand or mixed grip.
  • Keep your back flat, chest up, and shoulders slightly in front of the bar.

2. Lifting Phase:

  • Engage your core and push through your heels.
  • Extend your hips and knees simultaneously to lift the bar.
  • Keep the bar close to your body, traveling in a straight line.
  • Fully extend your hips at the top, standing tall.

3. Lowering Phase:

  • Reverse the movement, pushing hips back first.
  • Lower the bar by bending the hips and knees.
  • Return to the starting position with control.

4. Key Tips:

  • Maintain a neutral spine throughout the movement.
  • Focus on engaging your glutes and hamstrings.
  • Avoid rounding your back.

Squats

Squats are a cornerstone exercise for building leg and core strength. Follow these steps:

1. Starting Position:

  • Stand with feet shoulder-width apart.
  • Hold a barbell across your upper back or place hands on hips for bodyweight squats.
  • Keep your chest up, shoulders back, and eyes forward.

2. Descending Phase:

  • Begin by pushing your hips back.
  • Bend your knees while keeping them in line with your feet.
  • Lower your body until thighs are at least parallel to the ground.
  • Keep your chest up and back straight throughout the movement.

3. Ascending Phase:

  • Push through your heels to stand back up.
  • Extend hips and knees simultaneously.
  • Return to the starting position, maintaining good posture.

4. Key Tips:

  • Keep your knees from caving in or going past your toes.
  • Engage your core throughout the movement.
  • Focus on controlled, smooth motions.

5. Variations:

  • Goblet Squat with a dumbbell or kettlebell.
  • Front Squat with the barbell in front of your shoulders.

Both Deadlifts and Squats are powerful exercises that require attention to form and technique. It may be wise to consult with a fitness professional or coach to ensure proper execution, especially if you are new to these movements.

Need Competition Music Blue 1

Cleans:

The Clean is a complex and powerful exercise often used by athletes to develop explosive strength. It can be particularly beneficial for cheerleaders who need to enhance their toss ability. Here’s a detailed, step-by-step guide to performing the Clean exercise:

1. Starting Position:

  • Stand with feet shoulder-width apart.
  • Grip the barbell with a hook grip, hands slightly wider than shoulder-width.
  • Position the bar over the mid-foot.
  • Lower yourself by bending at the knees and hips, keeping the chest up.
  • Engage your core and ensure that your back is straight.

2. First Pull:

  • Begin by driving through your heels to lift the bar off the floor.
  • Maintain a flat back and keep the bar close to your body.
  • Extend your legs while keeping your shoulders over the bar.

3. Second Pull (Explosive Phase):

  • As the bar reaches knee height, explosively extend your hips and knees.
  • Shrug your shoulders and pull the bar upward with your arms.
  • Think of “jumping” the bar upwards rather than just lifting it.

4. Catch Phase:

  • Quickly drop under the bar by pulling yourself into a squat position.
  • Rotate your elbows forward to catch the bar on your front shoulders.
  • The bar should rest on your fingertips or the heel of your hand, not the palm.
  • Your thighs should be at least parallel to the ground in the catch position.

5. Recovery Phase:

  • Stand up by pushing through your heels, fully extending your hips and knees.
  • Maintain a straight back and keep the bar in front of your shoulders.

6. Return:

  • Safely lower the barbell back to the starting position or drop it to the floor if using bumper plates.

7. Key Tips:

  • Focus on powerful hip extension rather than pulling with the arms.
  • Keep the bar close to your body throughout the movement.
  • Ensure a smooth transition from the pull to the catch.
  • Practice with lighter weights or a PVC pipe to master the technique before adding weight

Safety Considerations

Given the complexity of the Clean, it may be beneficial to break down the movement into its constituent parts and practice them individually. Working with a certified coach or trainer who understands the biomechanics of the exercise can also help you develop proper form and technique.

Cleans are an advanced lifting technique that requires coordination, timing, and power. They can be a valuable addition to a cheerleader’s training program, helping develop the explosive strength needed for various cheer maneuvers.

Repetition and Understanding Your Flyer

The Reddit user also highlighted the importance of repetition and knowing your flyer’s timing.

  • Repetition: Practicing your toss hands again and again will eventually lead to mastery. Don’t shy away from dedicating time to consistent practice.
  • Understanding Your Flyer: Building synergy with your flyer can make a world of difference. If you understand each other’s timing and movements, you’ll find that executing toss hands becomes much more fluid.

If you’re grappling with toss hands, the combination of targeted weight lifting, repetitive practice, and cultivating a strong understanding with your flyer could be the solution you need.

There’s no one-size-fits-all answer, but these tried and tested methods have proven to be effective for many. With dedication and focus, you too can overcome this challenge and take your skills to new heights.

Steve Pawlyk Signature Full

IPP's Premade Mixes are USA Cheer Compliant and customizable!  Add Sound FX, swap songs, & more!  Add your Team Name to the mix for only $10! 

SLAM artwork
Full_Out_130 mp3 image
1 minute cheer mix
WAKE UP THE FIRE
SLAM artwork
WAKE UP THE FIRE
Full_Out_130 mp3 image
1 minute cheer mix

Improve Stability and Grip Strength for One-Handed Cheerleading Stunts

Improve Stability and Grip Strength for One-Handed Cheerleading Stunts

By Steve Pawlyk

Published August 8, 2023

For cheerleaders tasked with executing stunts, especially one-hand stunts, maintaining stability is essential. However, it’s not uncommon for cheerleaders to experience shaky hands during these challenging maneuvers. This article will delve into the reasons behind the instability and offer solutions to help you enhance your grip strength and overall performance.

Understanding the Issue

Performing one-handed stunts often requires cheerleaders to hold a flyer overhead with just one arm. This kind of stunt puts a lot of pressure on the wrists, grip, and smaller muscles of the hand, leading to instability and shaking. The root cause is usually a combination of underdeveloped strength and a lack of endurance in these areas.

Solutions to Improve Stability and Grip Strength

Solution 1: Wrist and Grip Strengthening Exercises

To reduce shakiness and increase stability, focusing on exercises that strengthen your wrists and grip can be incredibly beneficial. One exercise, as recommended by a cheerleader on r/cheerleading, is the dead hang. To do a dead hang, you simply grab onto a playground bar and hang for as long as you can. This not only works on your grip strength, but also helps to build endurance in your forearms. Implementing dead hangs into your regular workout routine for a few weeks can bring noticeable improvements to your performance.

Solution 2: Kettlebell Exercise

Another exercise recommended on the r/cheerleading subreddit is the overhead kettlebell walk. This exercise engages your grip strength and activates smaller muscles, which are often neglected in traditional weightlifting exercises. Start by gripping a kettlebell upside down (so the weight is above your hand) and holding it above your head. Make sure to choose a light kettlebell to begin with. As you become more comfortable and your grip strength improves, you can increase the weight of the kettlebell. Walking while holding the kettlebell overhead not only improves grip strength but also enhances overall body stability and core strength.

 
Need Competition Music Blue 1

Strategy 3: Incorporate Wrist Curls

Wrist curls can be a fantastic exercise for enhancing wrist strength and stability. To perform this exercise, sit on a chair with your forearm resting on your thigh, palm facing upwards, and a dumbbell in your hand. Then, curl your wrist upwards, hold for a second, and then lower it. Do a few sets of 10-12 reps, and as you get stronger, you can gradually increase the weight.

Strategy 4: Practice Farmer’s Walk

The Farmer’s Walk is another exercise that can improve grip strength and stability. This exercise involves holding a heavy weight (such as a dumbbell or kettlebell) in each hand and walking a certain distance. Start with a manageable weight and gradually increase it as your strength improves. This exercise not only works on your grip but also enhances your core stability and total body strength.

Performing one-handed stunts as a cheerleader requires a combination of strength, stability, and endurance, particularly in the hands and wrists. With specific exercises like dead hangs, wrist curls, Farmer’s Walks, & overhead kettlebell walks, you can effectively tackle the issue of shaky hands. Remember, it’s essential to start slow and gradually increase the intensity of these exercises to avoid injury. With consistency and dedication, you’ll see a big improvement in your one-handed stunts.

Steve Pawlyk Signature Full

IPP's Premade Mixes are USA Cheer Compliant and customizable!  Add Sound FX, swap songs, & more!  Add your Team Name to the mix for only $10! 

SLAM artwork
Full_Out_130 mp3 image
1 minute cheer mix
WAKE UP THE FIRE
SLAM artwork
WAKE UP THE FIRE
Full_Out_130 mp3 image
1 minute cheer mix

Overcoming the Challenge of Sickling and Toeing in Stunts: A Comprehensive Guide for Cheer Flyers

Overcoming the Challenge of Sickling and Toeing in Stunts: A Comprehensive Guide for Cheer Flyers

By Steve Pawlyk

Published August 4, 2023

Every cheerleader knows that mastery is more than just stunning performances or perfect timing. It often includes overcoming personal challenges and mastering the minor details that significantly affect the success of stunts. One such challenge, particularly for flyers, is sickled feet or toeing in stunts. As a first-year flyer who experiences this difficulty, there are practical strategies you can adopt to rectify this issue. Here, we’ll cover what sickling is, why it’s detrimental, and, more importantly, how to fix it.


What is Sickling?

Sickling is a term from ballet that has made its way into cheerleading. It describes the condition when a cheerleader’s feet turn inward from the ankle, causing the toes to point towards each other. This form is not aesthetically pleasing, but more than that, it can impact the balance and stability of stunts.

The Impact of Sickling in Cheerleading

Flyers are the epitome of grace and balance in cheerleading. But when a flyer sickles their feet, it can compromise the stability of stunts. In addition to affecting the flyer’s balance, it can cause discomfort or even injury to bases and spotters.

Fixing Sickled Feet

The good news is that sickling is not an insurmountable challenge. With persistence, correct training, and the right mindset, you can improve your foot position, even when you’re practicing at home.

  • Awareness and Visualization: Firstly, it’s essential to be aware of when you’re sickling your feet. Visualization can also help. Picture your feet as straight extensions of your legs.
  • Foot and Ankle Strengthening Exercises: Exercises like toe curls, calf raises, ankle rolls, and resistance band workouts can strengthen your foot and ankle muscles. As your strength improves, so will your ability to maintain the correct foot position.
  • Ballet Training: Ballet dancers have impeccable foot control, and their training can be beneficial for cheerleaders. By practicing ballet positions and exercises, you can improve your foot positioning, balance, and overall gracefulness.
  • Practicing Barefoot: At home, try to practice stunts barefoot on a soft surface. This way, you can see and feel your foot position better.
Need Competition Music Blue 1

Drills for At-Home Practice

While we all wish for more hours at the gym, at-home practices can be just as effective in rectifying the issue of sickling.

  • Balance Training: Balance training on one foot can help improve your control. Stand on one foot while keeping your standing leg straight and pulling your other leg in a bent position towards your chest.
  • Releve Exercises: This ballet exercise involves rising onto your toes (in relevé) and lowering yourself down slowly. It’s an effective way to improve ankle strength and control.
  • Theraband Exercises: Using a Theraband, you can perform various foot and ankle exercises to build strength and flexibility.
  • Wall Stretch: Stand with your back flat against a wall, extend one foot straight out in front of you, keeping your heel on the ground. Flex your foot, pointing your toes up and then pointing them down. This stretch will help you gain control over your foot’s movement.

Sickling is a common issue that many cheerleaders face. But remember, with a dedicated routine, the right exercises, and a positive mindset, you can overcome this hurdle. As you progress in your cheerleading journey, these small victories will add up to make you a stronger and more confident flyer.

Steve Pawlyk Signature Full

IPP's Premade Mixes are USA Cheer Compliant and customizable!  Add Sound FX, swap songs, & more!  Add your Team Name to the mix for only $10! 

SLAM artwork
Full_Out_130 mp3 image
1 minute cheer mix
WAKE UP THE FIRE
SLAM artwork
WAKE UP THE FIRE
Full_Out_130 mp3 image
1 minute cheer mix

A Coaches Guide to Holding Tryouts

A Coaches Guide to Holding Cheerleading Tryouts

By Steve Pawlyk

Published July 28, 2023

With the a new school year drawing near, cheer coaches are on the brink of the exhilarating phase of gathering their new squad and deciding on the captivating uniforms. If you’ve been visualizing your team’s trajectory, it’s time to deeply consider the qualities and skills your cheerleaders must possess to turn those dreams into reality. The selection process might seem daunting, but fear not. We’ve compiled an extensive guide encompassing 8 vital factors that are often overlooked but crucial during tryouts. Paying attention to these elements will streamline your journey towards a successful cheerleading season.

What to Look For:

What to Look For:

1. Skill Level and Technical Mastery:

At the onset of tryouts, prioritize the level of expertise and technical know-how. It’s a given that not every aspirant will be a veteran cheerleader, and there may be a few newcomers needing more guidance than others. Regardless, the collective proficiency of your team plays a pivotal role in dictating your overall performance throughout the season.

  • Gymnastic Ability: This includes cartwheels, round-offs, backbends, back handsprings, tucks, layouts, and fulls. Not every cheerleader needs to be an expert gymnast, but a basic understanding of gymnastics can provide a solid foundation.
  • Stunting Skills: A cheerleader’s ability to either base or fly effectively is crucial. They should demonstrate strength, balance, and timing, whether they’re hoisting a teammate into the air, holding a formation steady, or executing precise moves in the air.
  • Dance Technique: Dance is a fundamental aspect of cheerleading routines. Cheerleaders should exhibit understanding of rhythm, coordination, and the ability to follow choreography. They should be able to perform steps with precision and grace.
  • Cheer Motions: The technical execution of cheer motions, such as High-Vs, T-motions, Low-Vs, Daggers, and Clasps, to name a few, should be sharp, tight, and accurate. Coaches often look for straight arms, correct angles, and symmetrical placement of arms in relation to the body.
  • Tumbling: Tumbling is a spectacular display of a cheerleader’s skill level. From forward rolls and handstands for beginners to advanced moves like back handsprings, tucks, and aerials, tumbling adds a dynamic element to routines.
  • Jumps: This encompasses toe touches, hurdlers, pikes, and other cheer-specific jumps. Coaches look for height, pointed toes, correct arm placements, and proper timing when assessing jumps.
  • Understanding of Cheerleading Terminology: Being able to comprehend and respond correctly to cheerleading lingo is essential. This includes understanding different stunt names, jump types, and formation terminology.
Need Competition Music Blue 1

Remember, a cheerleader does not need to master every skill to be a valuable member of the team. It’s about the balance of these skills and the cheerleader’s willingness to learn and improve that make them an asset to the squad.

For those coaches hesitant about entirely removing someone based on skill level, creating a junior varsity team to help less seasoned athletes refine their skills could be a thoughtful approach, especially for teams with a large number of senior participants.

If the departure of your senior members raises concerns about the future trajectory of your program, nurturing a junior varsity team can be a strategic move for continuous talent cultivation.

2. Precision in Execution:

Although precision may seem tricky to teach, its presence is highly distinguishable. A cheerleader who can demonstrate sharp, neat movements is a gem, even if their stunt performance needs further refinement. Over time, you’ll find polishing other aspects of your cheerleaders’ performances becomes simpler when they’re adept at the fundamental motions.

3. Elevation and Form in Jumps:

When assessing a tryout, my evaluation of jumps goes beyond mere height. I look for the degree of extension, referring not to how high a cheerleader leaps, but how elevated their legs are. Another critical factor is maintaining pointed toes during a jump. The habit of flexing toes during a jump can detract from a well-executed high jump with excellent extension, causing it to appear sloppy.

4. Infectious Energy:

Even a technically perfect cheerleader can become a dampener on the competition floor or the sidelines without genuine enthusiasm. Make sure each cheerleader understands the value of exuding high energy levels and cheering passionately for the school’s teams. This enthusiasm should contribute significantly to their tryout scores. Consider dedicating a section on the score sheet for evaluating a cheerleader’s spirit and zeal.

5. Confidence and Poise:

The importance of confidence cannot be understated for a cheerleading team’s success. A squad can radiate brilliance even with less challenging stunts and basic motions, provided they exude the right level of self-assurance. Reiterate to the tryout participants that a small mistake or a missed move will not necessarily sideline them from the team. Instead, the ability to recover quickly and confidently from a slip-up, all while wearing a smile, is equally important as nailing the correct moves.

6. Adaptability:

A vital yet often overlooked aspect is adaptability. Your cheerleaders must be able to adjust to sudden changes in routines or positions within the team. They should also exhibit flexibility in learning and performing different roles. This attribute will not only aid in routine practices but also in last-minute adjustments during competitions.

7. Teamwork and Attitude:

Beyond individual skills, assess each participant’s attitude towards teamwork. The spirit of unity and camaraderie can elevate a team’s performance and create a supportive atmosphere. Watch out for cheerleaders who display great listening skills, respect for others, and a willingness to help teammates, as they often make the strongest contributors.

8. Physical Fitness and Stamina:

Cheerleading is physically demanding, requiring strength, flexibility, and stamina. Evaluating these physical aspects ensures your team’s ability to perform energetic routines without easily succumbing to fatigue.

What NOT to get hung up on:

Tryouts are crucial for assessing potential cheerleaders’ skills and determining their compatibility with the team’s dynamics, but there are also certain elements that cheer coaches should not give excessive importance to. It’s essential to understand that a well-rounded cheerleading squad isn’t only about technical prowess but also about team spirit, resilience, and willingness to learn.

So here are a few things cheer coaches should avoid getting overly focused on:

1. Prior Cheerleading Experience: While previous experience can be beneficial, it’s not everything. Passion, willingness to learn, and natural athletic ability can often outweigh experience. Coaches shouldn’t disregard newcomers who show potential.

2. Perfection in Execution: While it’s essential to evaluate skill levels and techniques, remember that tryouts are a stressful environment, and even the most seasoned cheerleaders can make mistakes. Look for resilience and the ability to recover gracefully from errors.

3. Body Type or Physical Appearance: Cheerleading is for everyone, regardless of body shape or size. Coaches should focus on athletic ability, skill level, and potential rather than physical appearance. Team spirit and performance know no size or body type.

4. Social Popularity: A cheerleader’s popularity in school or community should not impact their evaluation. The cheerleading team is not a popularity contest; it’s about teamwork, spirit, and athletic ability.

5. Immediate Mastery of Advanced Skills: Not all cheerleaders will come in with advanced tumbling or stunt skills, and that’s okay. Coaches should focus on the potential for improvement and the cheerleader’s willingness to learn.

6. Uniform Fitting: The way a cheerleader looks in the current team’s uniform should not be a decisive factor. Uniforms can be altered, and everyone has a different body type that should be celebrated.

7. Personal Biases: Coaches should be aware of their biases and ensure they don’t influence their decisions. This could include favoring students from specific clubs, groups, or previous teams. Tryouts should be an equal opportunity for all.

Building a successful cheerleading team is about more than just skill—it’s about fostering a group of athletes who are passionate, dedicated, and work well together.

Tryouts are inherently stressful for both the coach and cheerleaders. But armed with knowledge of what to look for and what not to get hung on, assembling your new cheer team will go perfectly as a zero performance!

Steve Pawlyk Signature Full

IPP's Premade Mixes are USA Cheer Compliant and customizable!  Add Sound FX, swap songs, & more!  Add your Team Name to the mix for only $10! 

SLAM artwork
Full_Out_130 mp3 image
1 minute cheer mix
WAKE UP THE FIRE
SLAM artwork
WAKE UP THE FIRE
Full_Out_130 mp3 image
1 minute cheer mix

Mastering Walk-ins and Tosses

Mastering-Walkins-and-Tosses

By Steve Pawlyk

Published July 27, 2023

Today, we’re delving into a post that popped up in the r/cheerleading subreddit, one that touches on an aspect of cheerleading often overlooked: How does one’s body type influence their ability to perform different cheerleading skills? This intriguing question came from a tall, slim redditor, who’s still quite new to cheerleading but has been practicing diligently.

His post states that he has noticed an interesting contrast in his cheer experience—he finds it easier to toss his flyer rather than performing a walk-in. But here’s where it gets even more interesting: his friend, who has a similar weight but a shorter, stockier build, has the opposite experience. This naturally raises the question: does our physique significantly impact which cheerleading skills we find easier to execute?

If you’ve found yourself nodding along to this predicament, read on. We’ll explore how body types can influence stunting techniques in cheerleading and share some tips to help you ace those walk-ins. No matter your body type, remember that cheerleading is about strength, agility, coordination, and most importantly, the spirit of teamwork and determination. So, let’s go! 🙌

The Impact of Body Types in Cheerleading

In cheerleading, your body type can affect your experience with certain stunts. For example, our reader’s experience with tossing vs. walk-ins. A flyer’s weight and your own weight can also influence how you execute stunts.

As mentioned in his post, he is tall and slim, and can toss a flyer who is lighter than him with relative ease. Tossing a flyer involves a sudden burst of energy, primarily from your leg and arm muscles. Being tall can provide more leverage and allow for a better upward thrust when tossing a flyer. Additionally, being slim could mean that your body has less weight to move, making it easier to generate the necessary force to toss the flyer.

In contrast, the reader’s friend, who is of a shorter and stockier build, finds walk-ins easier. Walk-ins require more sustained strength, balance, and coordination, which may be better suited to those with a stockier build.

Need Competition Music Blue 1

Advancing in Walk-ins

If you’re having trouble with walk-ins, here are a few tips that may help, regardless of your body type:

  • Strengthen Your Core: A strong core is the key to better stability and control. To improve your core strength, try adding exercises such as planks and sit-ups to your routine. For planks, start by holding the position for 30 seconds and gradually increase your time as your strength improves. For sit-ups, focus on form over quantity—ensure your spine is aligned and you’re using your abs, not your neck or back, to lift your body.
  • Work on Your Balance: Balance exercises can help you maintain control during walk-ins. Practice standing on one foot, gradually increasing the time you can maintain the stance. You can also try balance board exercises, which are excellent for challenging your stability. For example, try standing on the board with one foot in the center, shifting your weight back and forth and side to side, and even performing squats.
  • Enhance Your Flexibility: Regular stretching can help improve your flexibility, allowing you to adapt to the flyer’s movements during walk-ins. Aim for a comprehensive stretching routine that includes all major muscle groups. Some effective stretches include hamstring stretches, calf stretches, shoulder stretches, and hip flexor stretches. Remember to hold each stretch for 15-30 seconds, avoiding bouncing or any sudden movements.
  • Perfect Your Timing: Walk-ins are not just about strength—they require precise timing. Practice with your flyer to improve your synchronization. Try starting with simpler stunts, gradually increasing the complexity as you get more comfortable and in sync with each other.
  • Gradual Strength Training: While increasing your overall strength can make stunting easier, it’s important to remember that how you apply that strength is crucial. Incorporate strength training exercises into your routine, focusing on both your upper and lower body. Compound movements like squats, deadlifts, and bench presses can help develop overall strength. These exercises engage multiple muscle groups, providing a balanced workout. Start with weights you’re comfortable with, gradually increasing as your strength improves. Remember, form and control are key

Advancing in Tosses

Tossing may come naturally to some cheerleaders, but mastery demands diligent practice and focused training. Here are some steps and exercises, detailed for better understanding, that can help you perfect your toss:

  • Boost Explosive Power: Tossing involves a rapid, explosive movement. Plyometric exercises like box jumps or power skips are ideal for building this type of power. For box jumps, stand in front of a sturdy box or platform, bend into a squat, and then explode upward onto the box. Ensure to land softly and step back down carefully. Power skips, on the other hand, are performed by skipping as high as you can, driving the knee up, and extending the opposite arm, similar to a sprinter’s motion.
  • Build Upper Body Strength: Strengthening your arms, shoulders, and back is crucial for an effective toss. Push-ups, pull-ups, and overhead presses are excellent exercises. For push-ups, remember to keep your body aligned and avoid dropping your hips. Pull-ups can be done using an overhand grip on a bar, pulling your body up until your chin is over the bar. Overhead presses can be done with dumbbells or a barbell, pressing the weight above your head and then lowering it back down with control.
  • Strengthen Your Grip: Your grip is pivotal for maintaining a secure hold on your flyer. Farmer’s walks, which involve carrying heavy weights in each hand while walking, can enhance your grip strength. Another helpful exercise is a dead hang, where you simply hang from a pull-up bar for as long as possible, which strengthens not only your grip but also your forearm muscles.
  • Focus on Leg Strength: Your legs provide the initial force in a toss. Squats, lunges, and calf raises are vital exercises. While squatting, keep your back straight and push your hips back as if sitting in a chair. For lunges, step forward with one foot and lower your body until both knees are at about a 90-degree angle. Calf raises involve standing on your toes on an elevated surface and then lowering your heels below the surface level.
  • Refine Your Timing: Timing is key in a successful toss. Practice with your flyer to improve your coordination. Start with a low toss and gradually increase the height as your timing and trust improve.
  • Enhance Stability and Core Strength: Strengthening your core helps maintain stability during the toss. For planks, hold your body in the top position of a push-up. Bicycle crunches involve lying on your back, bringing one knee towards your chest while moving the opposite elbow towards the knee. Russian twists are performed by sitting on the floor, leaning back slightly, and twisting from side to side with or without a weight

Body type can influence what skills you might find easier or harder in cheerleading. However, it doesn’t limit what you can achieve. With consistent practice, targeted strength training, and teamwork, any cheerleader can master a wide range of stunts, regardless of their physique.

Remember, everyone has their strengths and weaknesses. Don’t get discouraged if you’re finding a certain skill challenging. Instead, use it as motivation to work harder and improve. In cheerleading, as in life, persistence is key!

Steve Pawlyk Signature Full

IPP's Premade Mixes are USA Cheer Compliant and customizable!  Add Sound FX, swap songs, & more!  Add your Team Name to the mix for only $10! 

SLAM artwork
Full_Out_130 mp3 image
1 minute cheer mix
WAKE UP THE FIRE
SLAM artwork
WAKE UP THE FIRE
Full_Out_130 mp3 image
1 minute cheer mix

The Art of Balance in Cheerleading: A Closer Look at the Flyer Position

The Art of Balance in Cheerleading: A Closer Look at the Flyer Position

By Steve Pawlyk

Published July 19, 2023

Balance, a fundamental concept in cheerleading, is often misunderstood, particularly in the role of the Flyer. The position’s nuances are vast, and while balance is indeed an integral part of it, the way flyers approach balance may surprise you. Today we’re gonna debunk some common misconceptions about flyers and their role in the balancing act that makes up an eye-catching stunt.

Redefining Balance

Let’s start by redefining balance in the context of cheerleading, particularly when it comes to flyers. While walking a tightrope or riding a bike, balance is primarily about the person’s ability to maintain their center of gravity. They can move their arms, legs, bend their hips, and do just about anything to keep themselves from falling. But for a flyer, it’s a different story.

The Flyer’s Role

A flyer’s job isn’t to perform 100% of the balancing act. They have bases beneath them to support their balance. So, if a flyer focuses solely on keeping themselves upright, it can result in too much movement, disrupting the base’s stability and potentially leading to a fall.

Instead, flyers should concentrate on drawing up to the center, contracting muscles in the right areas, and maintaining correct body lines. By doing so, the bases can more effectively perform their balancing tasks. Therefore, although a flyer’s role involves balance, it is a different kind of balance – a cooperative balance.

Balancing Practice for Flyers

A useful drill for developing this kind of cooperative balance involves body position holds with eyes closed. The goal is to keep the body still, maintaining perfect alignment. If the arms move away from the body or the line is broken, the exercise fails. With this practice, flyers focus on feeling the right muscle engagement and learn to move less to balance more effectively. The closed-eye aspect of the drill adds extra focus on bodily awareness, as the usual visual cues used for balancing are taken away.

This method helps flyers develop a more intuitive understanding of their body positioning and how it affects their balance in the air. It also facilitates communication and trust between the flyer and the bases.

The Coach’s Perspective

Coaches often overlook the unique balance demands of the flyer position. They may encourage flyers to maintain their balance independently, much like one would balance a broomstick on one’s hand. But the real challenge lies in harnessing the flyer’s potential to aid the balancing process.

Consider this analogy: a broomstick that maintains its straightness but adds a pull towards the center would be far easier to balance than a broomstick moving randomly. Flyers can be thought of similarly; they should participate in the balancing process but without causing unnecessary movements.

So, when we talk about balance in the context of a flyer in cheerleading, it’s not just about the flyer’s ability to stay upright. It’s about the flyer’s capability to hold their body lines, engage the right muscles, and contribute to a cooperative balance that allows their bases to support them effectively.

Understanding this distinction can make a world of difference in the execution of stunts and the overall safety of the team. It’s an art, a subtle dance of pulling, squeezing, and holding that, when done right, creates the breathtaking spectacle that is cheerleading.

Steve Pawlyk Signature Full

IPP's Premade Mixes are USA Cheer Compliant and customizable!  Add Sound FX, swap songs, & more!  Add your Team Name to the mix for only $10! 

SLAM artwork
Full_Out_130 mp3 image
1 minute cheer mix
WAKE UP THE FIRE
SLAM artwork
WAKE UP THE FIRE
Full_Out_130 mp3 image
1 minute cheer mix

Mastering the Perfect Cartwheel: A Guide for JV Cheerleaders

Mastering the Perfect Cartwheel: A Guide for JV Cheerleaders

By Steve Pawlyk

Published July 16, 2023

If you’re a Junior Varsity (JV) cheerleader, you may be facing some challenges in perfecting your techniques, especially if you come from a gymnastics background. One of the more common issues is executing a straight cartwheel. But don’t worry, you’re not alone! Many athletes struggle with this, and we’re here to help you overcome this hurdle.

Understanding the Cartwheel

Before we delve into the solution, it’s essential to understand what a cartwheel is and why it’s crucial in cheerleading and gymnastics. A cartwheel is a basic gymnastic move where you rotate your body sideways in a wheel-like motion. It’s a fundamental skill that forms the foundation for more complex gymnastic moves. In cheerleading, a flawless cartwheel can add a wow factor to your routine, making it more dynamic and engaging.

Common Mistakes in Performing a Cartwheel

One common issue that many gymnasts and cheerleaders face is twisting to the side during a cartwheel. This issue often arises due to a lack of body alignment or incorrect hand placement. Here are some common mistakes that might be causing your cartwheel to go off course:

  • Incorrect Hand Placement: Your hands play a crucial role in maintaining the direction of your cartwheel. If your hands are not placed correctly, it can cause your body to twist.
  • Poor Body Alignment: If your body is not aligned properly, it can lead to a twisted cartwheel. Your body should form a straight line from your hands to your feet.
  • Insufficient Momentum: A lack of momentum can cause your body to fall to the side, resulting in a twisted cartwheel.

Tips to Perfect Your Cartwheel

Now that we’ve identified the possible issues, let’s look at some tips to help you perfect your cartwheel:

  • Proper Hand Placement: When you start your cartwheel, your hands should be parallel to each other. As you kick your legs up, your hands should turn so that your fingers point towards the direction you’re coming from.
  • Maintain Body Alignment: Imagine a straight line running from your hands to your feet. Your body should follow this line throughout the cartwheel. Practicing in front of a mirror or recording your cartwheel can help you see if you’re maintaining proper alignment.
  • Generate Enough Momentum: A good run-up can help generate the momentum needed for a straight cartwheel. Practice your run-up to ensure you’re getting enough speed.
  • Practice with a Spotter: Having a spotter can be incredibly helpful when you’re trying to perfect your cartwheel. They can provide real-time feedback and help correct your form.

Remember, practice makes perfect. Keep working on your cartwheel, and don’t get discouraged if you don’t get it right immediately. With time and practice, you’ll be able to perform a flawless cartwheel that will add sparkle to your cheerleading routine.

A cartwheel might seem like a simple move, but it requires proper technique and practice. By focusing on your hand placement, body alignment, and momentum, you can perfect your cartwheel and enhance your cheerleading performance. So, keep practicing, stay positive, and you’ll soon master the perfect cartwheel!

Steve Pawlyk Signature Full

IPP's Premade Mixes are USA Cheer Compliant and customizable!  Add Sound FX, swap songs, & more!  Add your Team Name to the mix for only $10! 

SLAM artwork
Full_Out_130 mp3 image
1 minute cheer mix
WAKE UP THE FIRE
SLAM artwork
WAKE UP THE FIRE
Full_Out_130 mp3 image
1 minute cheer mix
SHARE YOUR CART