Tag Archives: Cheerleading Skills

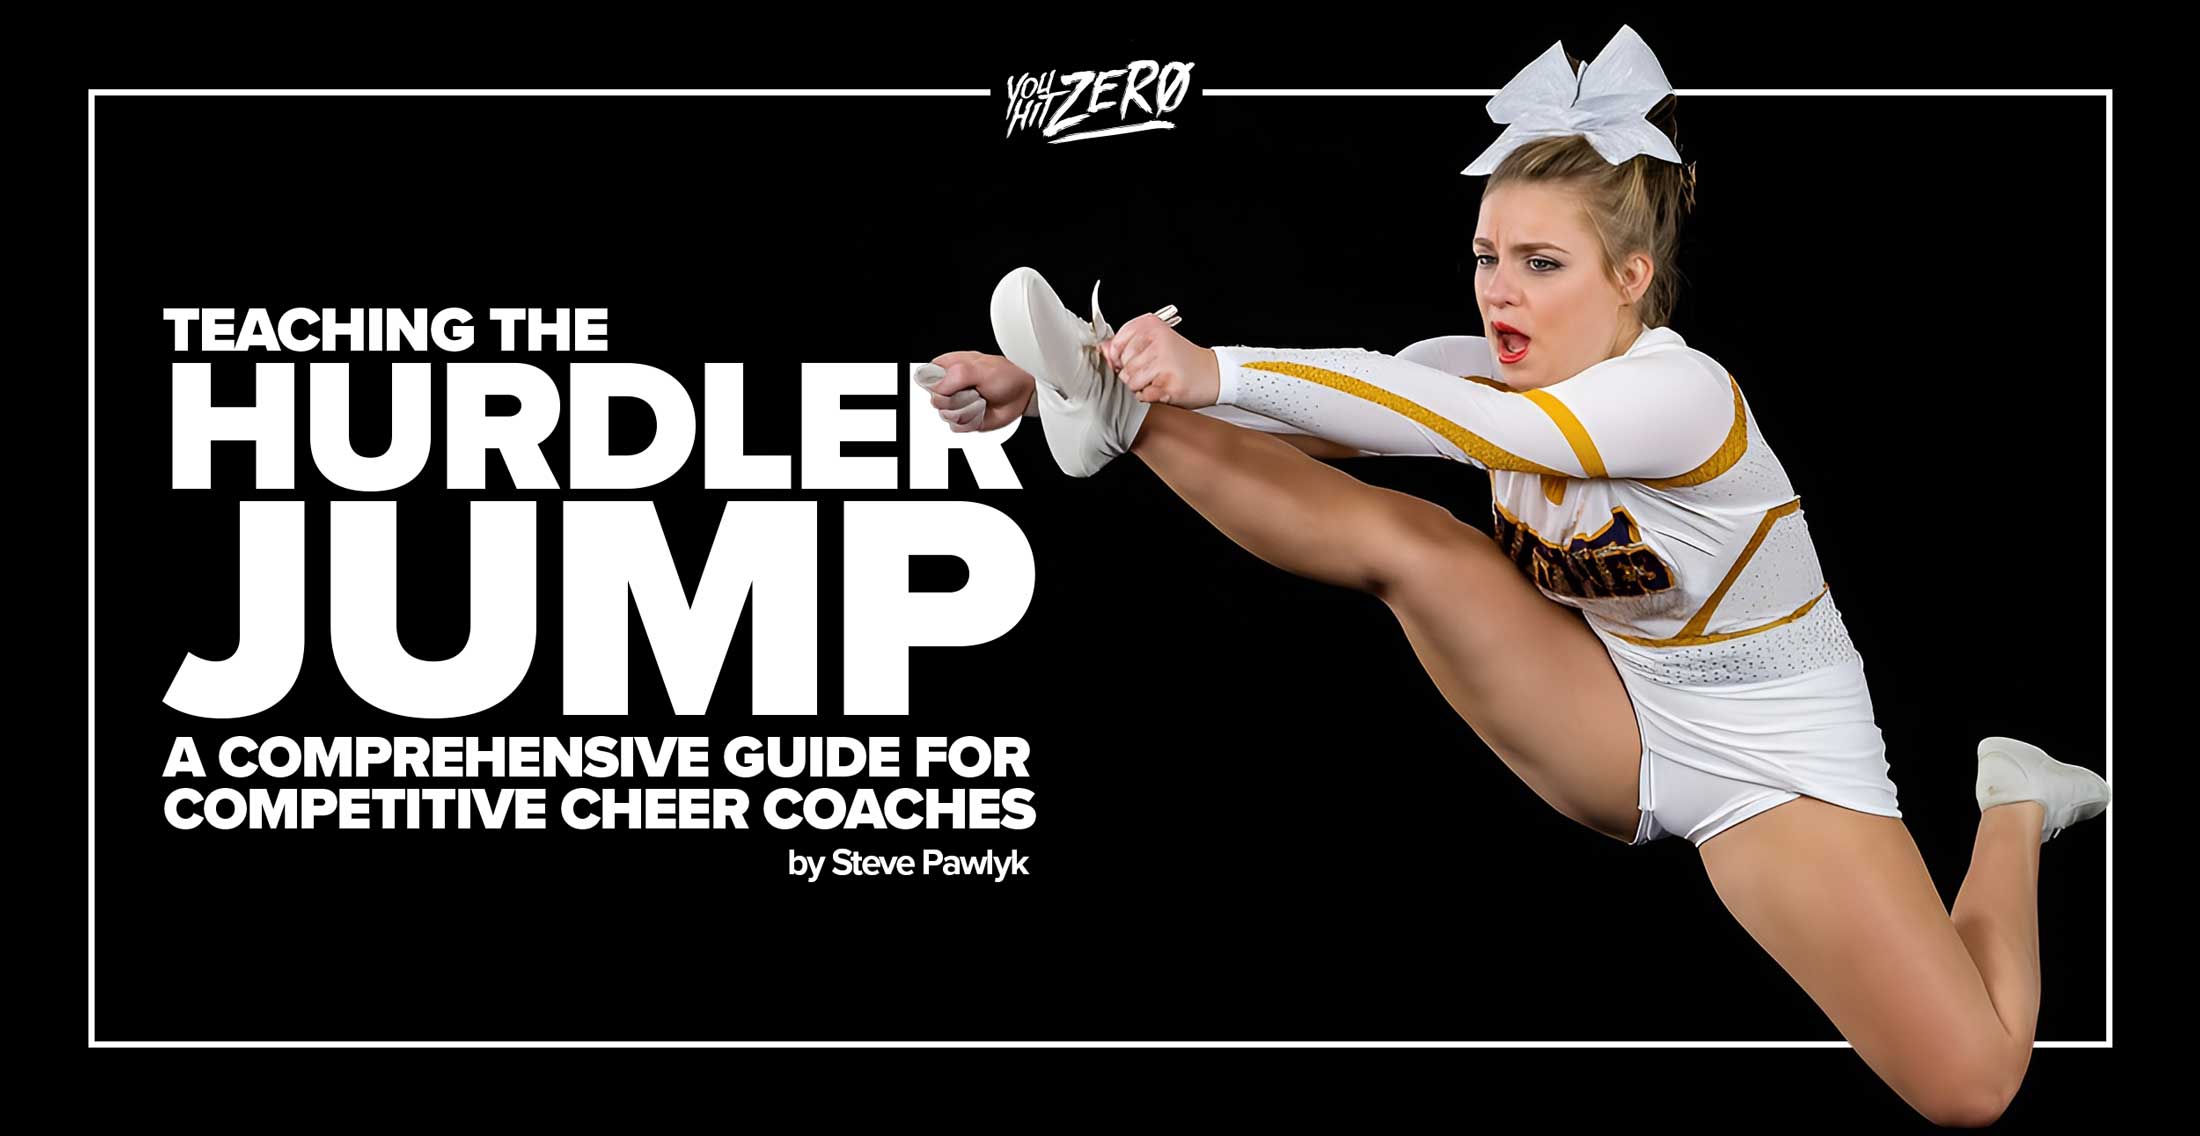
Teaching the Hurdler Jump: A Comprehensive Guide for Competitive Cheer Coaches

Teaching the Hurdler Jump A Comprehensive Guide for Competitive Cheer Coaches

By Steve Pawlyk

Published July 9, 2025

If you’ve been coaching cheerleading for any length of time, you know that certain skills just make or break a routine. The hurdler jump? It’s definitely one of those game-changers. After spending years in the trenches coaching everyone from tiny mini athletes to college competitors, I’ve learned that teaching this jump isn’t just about demonstrating and hoping for the best. It’s about understanding the science, breaking down the progression, and meeting each athlete where they are.

So grab your coffee (or protein shake – no judgment here!), and let’s dive deep into everything you need to know about teaching the hurdler jump to young competitive cheerleaders.

Understanding the Anatomy of a Hurdler Jump

Before we even step foot on the mat, let’s get crystal clear on what we’re teaching. I’ve seen too many coaches confuse variations or teach hybrid versions that end up hurting scores at competition.

The Front Hurdler

This is probably what you’ll teach most often. Picture this: your athlete is positioned at a 45-degree angle to the crowd (this angle is crucial – straight-on looks awkward, and full profile hides the back leg). The leg furthest from the crowd will come up straight in front as high as possible, while the other bends behind. Arms can be in a touchdown or in a high V.

The key here is that straight leg – it should be reaching for the sky, ideally getting close to the athlete’s nose level. The back leg? That’s where things get interesting. The knee should be bent with the foot pulled up toward the glutes, and the knee itself should be pointing down toward the ground. Think of a track hurdler clearing a hurdle – hence the name!

The Side Hurdler

Less common but equally impressive when done right. Here, one leg extends to the side, while the other bends toward the back with the knee facing out. Arms should be in a “T” motion. The main difference? That bent knee faces the crowd rather than the ground, and the whole body orientation is different.

The “Not-a-Hurdler” (aka The Herkie)

Quick story time: Named for Lawrence Herkimer, the founder of the National Cheerleaders Association, this jump is similar to a side-hurdler, except that instead of both arms being in a T-shaped motion, both arms are opposite of what the leg beneath them is doing. The legend goes that Herkie couldn’t quite nail the hurdler, so he created his own version. It’s different enough that judges will dock points if your athletes throw a Herkie when they’re supposed to hit a hurdler!

Prerequisites: Building the Foundation

Here’s where I might ruffle some feathers, but I’m going to say it anyway: if your athletes aren’t ready, pushing them into hurdlers is a recipe for injury and frustration. Let’s talk about what “ready” really means.

Flexibility Requirements

Flexibility is the first area a cheerleader should address. If a cheerleader is tight throughout her hamstrings, groin, or lower back they must stretch. Range of motion is the number one cause of injuries.

Here’s my flexibility checklist for hurdler-ready athletes:

Hamstring Flexibility Test:

  • Have the athlete lie on their back
  • Lift one straight leg up while keeping the other flat on the ground
  • They should reach at least 90 degrees without the bottom leg lifting
  • Less than that? Time for targeted stretching

Hip Flexor Mobility Test:

  • Lunge position with back knee on the ground
  • Push hips forward gently
  • If they feel extreme tightness or can’t keep their torso upright, those hip flexors need work

Dynamic Flexibility Check:

  • Standing leg swings forward and back (should reach at least hip height)
  • Standing kicks to the front (controlled, not ballistic)
  • If they’re struggling here, the jump will be a struggle too
Need Competition Music Blue 1

Strength Prerequisites

Flexibility without strength is like having a sports car with no engine. Here’s what your athletes need:

Core Strength: Can they hold a hollow body position for 30 seconds? If not, start there. The core is what keeps that chest up during the jump.

Leg Power: Single-leg squat test – can they do at least 5 on each leg with good form? This translates directly to jump height.

Hip Flexor Strength: Have them lie on their back and lift one straight leg up and down 10 times without touching the ground. If they’re shaking by rep 5, you’ve found a weakness to address.

The 12-Week Progressive Teaching Method

After years of trial and error (emphasis on the error in my early coaching days), I’ve developed this progression that actually works. The timeline can be compressed or extended based on your athletes’ abilities, but don’t skip steps!

Weeks 1-3: Flexibility and Strength Foundation

Week 1: Assessment and Flexibility Focus

Start every practice with what I call the “Hurdler Prep Circuit”:

  • 5 minutes of dynamic warm-up (high knees, butt kicks, leg swings)
  • 10 minutes of targeted stretching:
    • Pike stretch holds (30 seconds x 3)
    • Butterfly stretch for hip opening (30 seconds x 3)
    • Standing quad stretches (30 seconds each leg x 2)
    • Seated hurdler stretch (the actual position) – 30 seconds each side x 3

Ground position work:

  • Have athletes sit in the hurdler position on the floor
  • Focus on proper positioning: straight leg fully extended, bent leg tucked comfortably
  • Hold for 30 seconds, switch sides
  • Progress to lifting the arms to touchdown position while seated

Week 2: Building Specific Strength

Add resistance work:

  • Theraband kicks: 3 sets of 10 each leg (front and side)
  • Single-leg glute bridges: 3 sets of 10 each leg
  • Core work specific to jumps:
    • Hollow holds (work up to 45 seconds)
    • V-ups focusing on keeping chest high (3 sets of 10)
    • Russian twists with emphasis on tall posture (3 sets of 20)

Continue flexibility work and add:

  • Partner stretching for deeper range of motion
  • PNF stretching techniques (contract-relax method)

Week 3: Movement Patterns

Time to get moving:

  • Walking hurdlers: Literally walk across the floor hitting the position with each step
  • Hurdler holds against the wall: Kick up and hold the position for 5 seconds
  • Jump prep without the hurdler:
    • Straight jumps focusing on landing (3 sets of 5)
    • Tuck jumps for height (3 sets of 5)
  • Single-leg bounds for power (3 sets of 5 each leg)

Weeks 4-6: Introduction to the Jump

Week 4: Breaking Down the Prep

The prep is everything. After you count 5, 6, 7, 8, on the first 1, 2 bring your hands into a “clasp” right under your chin and hold them there for those two counts. On 3, 4, proceed to a “High-V” and hold that motion for those two counts.

Drill this until it’s automatic:

  • Prep practice: 50 reps of just the arm sequence
  • Add the knee bend on counts 3, 4
  • Practice the swing through without jumping
  • Mirror work: Athletes watch themselves to ensure chest stays high

Week 5: Adding the Jump

Start small:

  • Mini hurdlers: Jump just a few inches off the ground, focus on hitting the position
  • Use a prop: Have them jump and touch their knee to a coach’s hand held at appropriate height
  • Box jumps with hurdler position: Jump onto a small box (6-12 inches) landing in hurdler
  • Video review: Film each athlete and review together

Common issues at this stage:

  • Chest dropping (fix: “pretend there’s a string from your chest to the ceiling”)
  • Arms not hitting position (fix: practice arms separately 100 more times)
  • Bent leg not pulling up (fix: hamstring curls and targeted strength work)

Week 6: Height and Extension

Now we’re cooking:

  • Full jump attempts with focus on ONE aspect at a time:
    • Monday: Just focus on chest position
    • Tuesday: Just focus on straight leg height
    • Wednesday: Just focus on bent leg position
    • Thursday: Just focus on arms
    • Friday: Put it all together
  • Introduce combination work: Hurdler to immediate rebound

Weeks 7-9: Refinement Phase

Week 7: Technical Precision

Details matter in competitive cheer:

  • Toe point drills: Even in warm-ups, toes are pointed
  • Landing practice: Make sure to land properly with your feet together, toe to heel and with bent knees
  • Timing with music: Start incorporating counts and rhythm
  • Side-by-side comparisons: Athletes watch each other and provide feedback

Week 8: Power Development

Complete 6 to 8 reps of the hurdler with resistance bands while maintaining technique for maximal jump height and kick height:

  • Resistance band training (if appropriate for age/level)
  • Plyometric progressions:
    • Depth jumps from 6-inch box
    • Broad jumps focusing on explosive takeoff
    • Single-leg bounds with hurdler arms
  • Recovery focus: Teach proper stretching and foam rolling

Week 9: Consistency Building

The goal: 8 out of 10 perfect:

  • Set-based training: 5 sets of 3 jumps, rest between sets
  • Fatigue training: Hurdlers at the end of practice when tired
  • Pressure training: Perform for other teams or parents
  • Video analysis: Athletes self-assess using rubric

Weeks 10-12: Competition Ready

Week 10: Combinations and Connections

Real routines require connected skills:

  • Hurdler to toe touch combinations
  • Running tumbling into hurdler
  • Hurdler to immediate cradle prep (for younger teams)
  • Focus on maintaining height through fatigue

Week 11: Mental Preparation

The mental game is huge:

  • Visualization exercises: Athletes close eyes and see perfect hurdler
  • Positive self-talk training: Replace “I can’t” with “I’m learning”
  • Competition simulation: Full routine run-throughs
  • Individual goal setting: Each athlete sets personal best goals

Week 12: Polish and Peak

Time to shine:

  • Full routine integration
  • Focus on performance quality, not just technique
  • Team synchronization drills
  • Confidence building through success tracking
Need Competition Music Blue 1

Advanced Drills That Actually Make a Difference

Here are the drills I’ve collected over the years that really move the needle:

The Wall Series

Basic Wall Kicks:

  • Stand arm’s length from wall
  • 20 kicks straight up, trying to touch above head marker
  • Progress to faster tempo
  • Add ankle weights for advanced athletes (with caution)

Wall Hurdler Holds:

  • Back against wall
  • Jump and press back against wall in hurdler position
  • Hold for 3-5 seconds
  • Builds muscle memory and strength

Partner Drills

Assisted Hurdlers:

  • Partner holds athlete’s hands
  • Athlete jumps while partner provides slight upward assistance
  • Gradually reduce assistance
  • Great for building confidence

Resistance Partners:

  • Partners hold resistance bands attached to jumper’s waist
  • Provides resistance on the way up, assistance on the way down
  • Builds explosive power

Equipment-Based Progressions

Box Jump Variations:

  • Single leg box jumps (builds unilateral power)
  • Hurdler position box jumps
  • Depth jump to hurdler (advanced only)

Trampoline Work (if available):

  • Allows athletes to feel the position with more air time
  • Reduces impact during learning phase
  • Great for athletes afraid of the skill

Troubleshooting Common Problems

Let’s get real about the issues you’re going to see over and over:

Problem 1: The Dreaded Chest Drop

It’s important not to cut off the height of your jump by tilting your chest forward. This is THE most common issue.

Why it happens:

  • Lack of core strength
  • Trying to kick too high too soon
  • Poor spatial awareness

Fix it:

  • Wall sits with arms in touchdown (builds postural strength)
  • Video review from side angle
  • Verbal cue: “Show your number to the judges!”
  • Physical cue: Light tap on upper back during prep

Problem 2: The Lazy Back Leg

The tendency is to concentrate so hard on kicking your front leg, that you don’t realize that the back leg is still dangling around down there.

Why it happens:

  • All focus goes to the front leg
  • Lack of hamstring strength
  • Poor muscle activation patterns

Fix it:

  • Isolated back leg drills: Just practice the bent leg portion
  • Hamstring curls with resistance bands
  • Mental cue: “Kick your heel to your booty!”
  • Partner feedback: Have partner tap the heel when it’s in correct position

Problem 3: Sloppy Feet

Judges notice everything, and floppy feet scream “recreational team.”

Why it happens:

  • Never been properly trained
  • Lack of ankle strength
  • Poor habit formation

Fix it:

  • Releve walks across the floor
  • Theraband foot exercises
  • Point and flex drills during every water break
  • Make it non-negotiable: pointed toes from warm-up to cool-down

Problem 4: The Split Landing

Nothing ruins a beautiful hurdler like a sloppy landing.

Why it happens:

  • Uneven leg strength
  • Poor spatial awareness
  • Trying to land before ready

Fix it:

  • Landing drills separate from jumps
  • Single leg landing practice
  • Visual markers on the floor
  • Verbal cue: “Feet like magnets!”

Creating the Right Training Environment

Your gym’s culture makes or breaks skill development. Here’s how to optimize:

Space Considerations

Minimum requirements:

  • 8×8 feet per athlete for safe practice
  • Ceiling height of at least 12 feet
  • Spring floor or quality mats
  • Mirrors on at least one wall

Safety Protocols

Non-negotiables:

  • 10-minute dynamic warm-up (every. single. practice.)
  • Proper landing surface
  • Athlete-to-coach ratios (I recommend 8:1 maximum for jump training)
  • Clear progression requirements before moving to next level

Building Confidence

Remember: confidence builds skills as much as drills do.

Strategies that work:

  • Celebrate small wins publicly
  • Use positive correction: “I love your height! Now let’s add that toe point!”
  • Film progress videos monthly so athletes see improvement
  • Create skill-specific awards or recognition

Creating Buy-In From Athletes and Parents

Success requires everyone on board:

Athlete Buy-In

Make them partners:

  • Explain the “why” behind each drill
  • Let them track their own progress
  • Create peer mentorship opportunities
  • Connect skills to their goals

Parent Education

Informed parents = supportive parents:

  • Host a skills education night
  • Send home progress videos
  • Explain the progression timeline
  • Share the injury prevention focus

Final Thoughts: The Art and Science of Coaching

Teaching the hurdler jump is about so much more than just the mechanics. It’s about building confident, strong athletes who understand that excellence comes from consistent, focused effort. Every athlete will progress at their own pace, and that’s not just okay – it’s expected.

I’ve been fortunate to work with thousands of athletes over my years coaching, from tiny three-year-olds taking their first cheer class to Division 1 college competitors. The one constant? The athletes who master the fundamentals with patience and proper progression are the ones who excel long-term.

Remember, we’re not just teaching a jump. We’re teaching discipline, body awareness, goal setting, and the value of quality practice. These lessons extend far beyond the mat.

Your athletes don’t need to be perfect on day one, week one, or even month one. They need to be progressing, staying safe, and building confidence. Focus on the journey, not just the destination, and you’ll develop not just better cheerleaders, but better athletes and people.

Keep your energy high, your corrections positive, and your standards consistent. Before you know it, you’ll have a team throwing hurdlers that make the crowd go absolutely wild – and more importantly, you’ll have athletes who are proud of what they’ve accomplished through hard work and dedication.

Now get out there and start building those champion hurdlers! Your athletes are counting on you to guide them to success, and with this comprehensive approach, you’ve got everything you need to make it happen.

Stay passionate about the process,

P.S. – Remember to document the journey. Those “before” videos from week 1 compared to competition performances? Pure gold for showing athletes how far they’ve come. Plus, they make great material for end-of-year banquets!

Check out the conversation on our podcast “You Hit Zero”


Steve Pawlyk Signature Full

IPP's Premade Mixes are USA Cheer Compliant and customizable!  Add Sound FX, swap songs, & more!  Add your Team Name to the mix for only $10! 

SLAM artwork
Full_Out_130 mp3 image
1 minute cheer mix
WAKE UP THE FIRE
SLAM artwork
WAKE UP THE FIRE
Full_Out_130 mp3 image
1 minute cheer mix

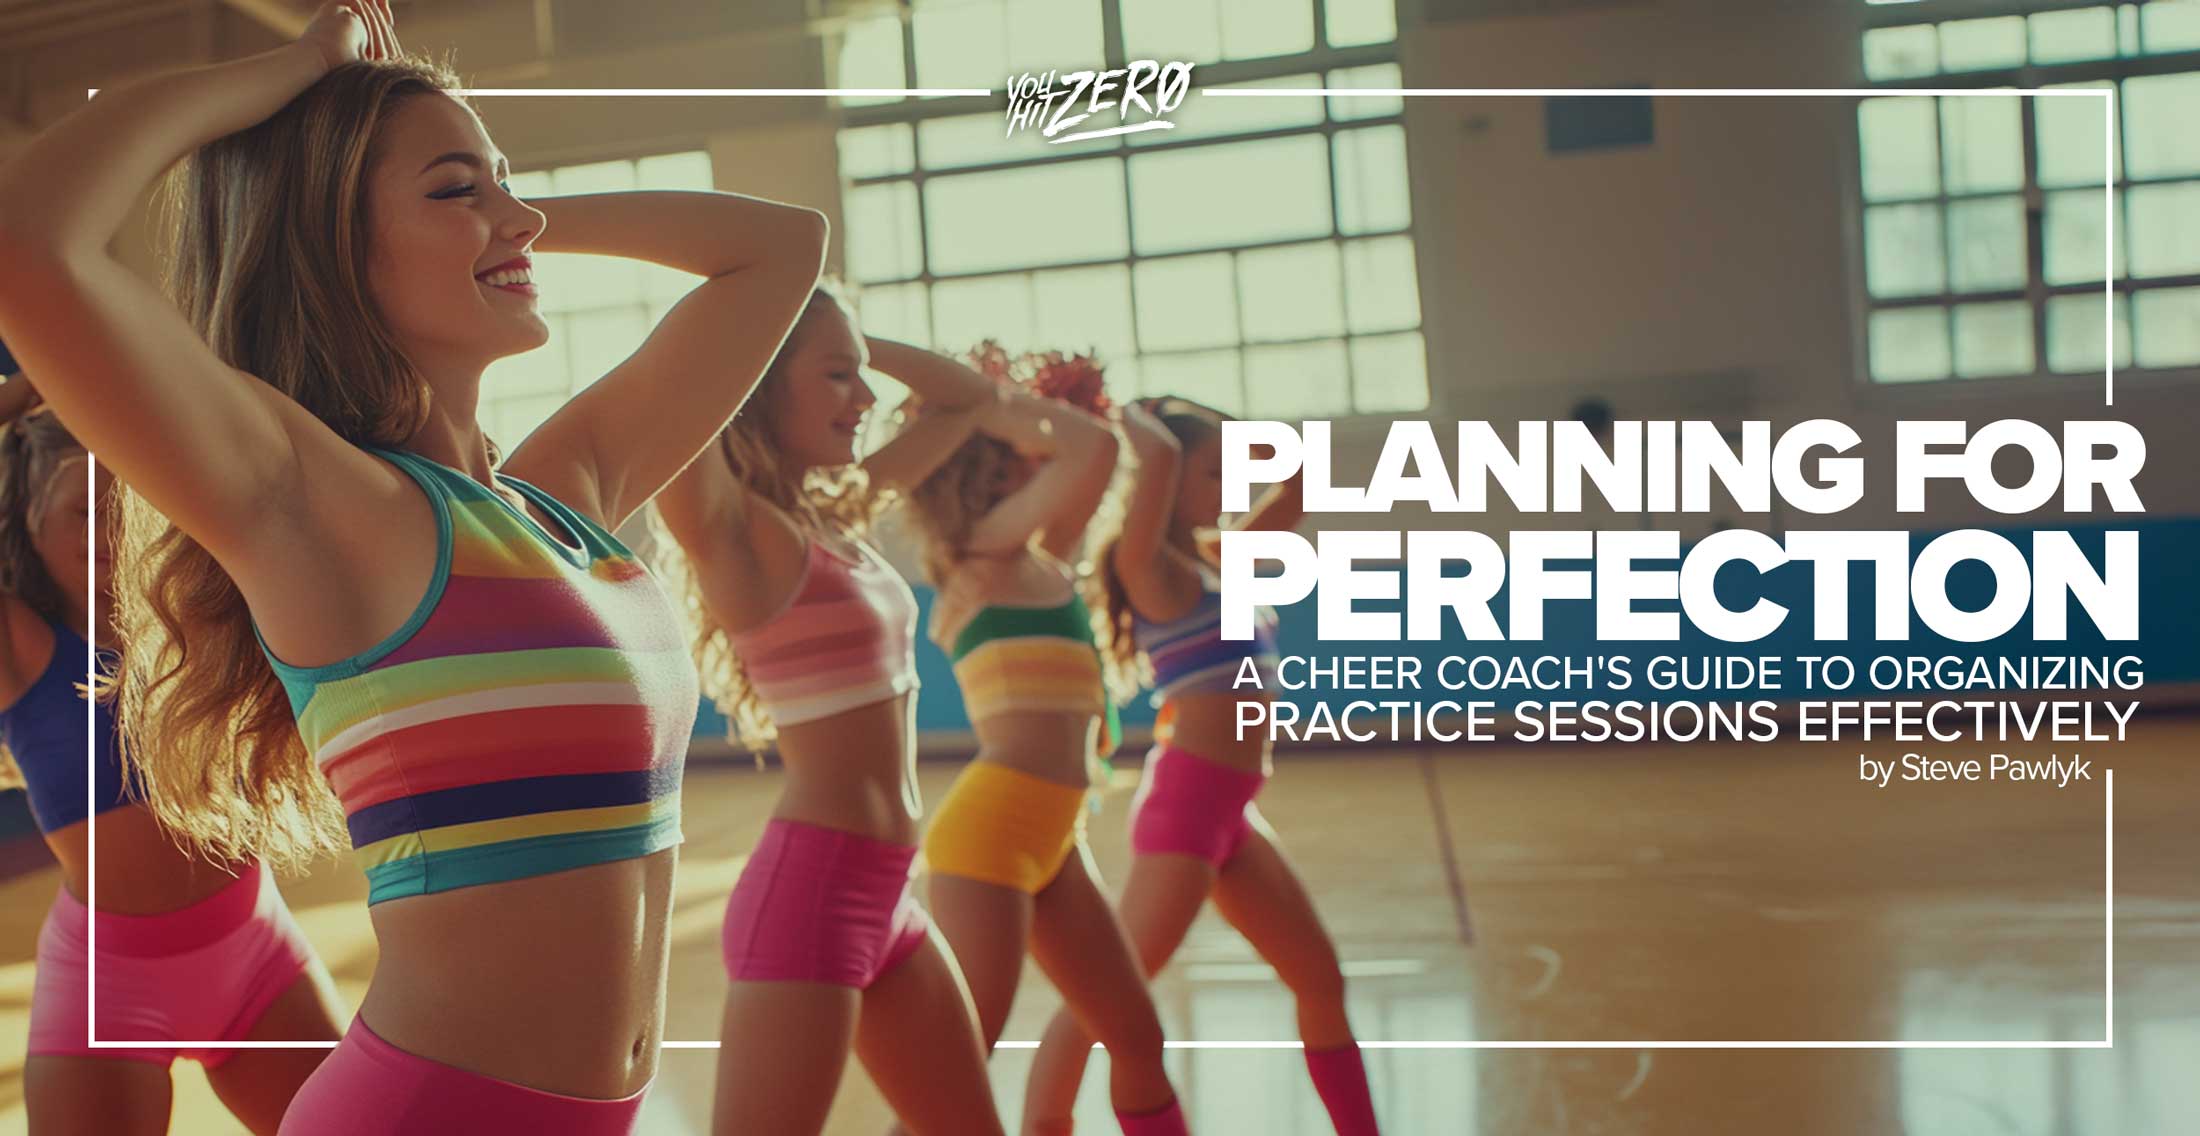
Planning for Perfection: A Cheer Coach’s Guide to Organizing Practice Sessions Effectively

Cheer Coachs Guide to Organizing Practice Sessions Effectively

By Steve Pawlyk

Published November 5, 2024

Organizing a productive cheer practice requires careful planning to ensure every minute is used to advance the team’s skills, conditioning, and confidence. With the right structure, coaches can help their teams not only perform at their best but also keep athletes motivated and engaged. Below is a step-by-step guide to planning an efficient cheer practice session from start to finish, complete with practical examples.

Step 1: Pre-Practice Preparation

Set Clear Objectives: Before practice even begins, define specific goals for the session. These can range from mastering a specific stunt sequence to improving synchronization in a dance routine. For example, if today’s focus is perfecting a pyramid, make that your main objective and communicate it to your athletes. Clarity ensures everyone is on the same page and working towards the same goal.

Create a Detailed Practice Plan: Write down the agenda and break the practice into blocks of time. Having a clear plan minimizes wasted time and helps you stay on track. Consider using a whiteboard or a shared document app (like Google Docs) that both coaches and athletes can access, ensuring everyone knows what to expect. Here’s an example:

  • Warm-Up: 10 minutes
  • Stretching and Conditioning: 15 minutes
  • Tumbling Drills: 20 minutes
  • Stunt Rehearsal: 30 minutes
  • Routine Run-Throughs: 20 minutes
  • Cool-Down: 5 minutes

Being flexible is also key—having a 2-3 minute buffer for each section will help adapt if needed.

Step 2: Start with Warm-Ups (10-15 minutes)

Dynamic Warm-Up: Start with a warm-up that not only prepares athletes physically but also keeps them engaged. Consider incorporating games like relay races or “Follow the Leader” to make it interactive and fun.

Example Warm-Up Routine:

  • High Knees: 1 minute
  • Butt Kicks: 1 minute
  • Arm Circles and Swings: 1 minute
  • Relay Race: 2 minutes

Adding these elements makes the warm-up less repetitive and helps build team spirit, which is essential for a strong group dynamic.

Step 3: Stretching and Conditioning (15 minutes)

Stretching: Flexibility is crucial in cheerleading. Utilize a progression approach to stretching:

  • Beginner Stretch: Start with hamstring stretches while seated on the floor.
  • Advanced Stretch: Move on to partner-assisted splits to push flexibility further.

Conditioning: Conditioning builds the strength needed for stunts and tumbling. To make conditioning more fun, turn it into a game. For instance, do “Last Athlete Standing” for wall sits, where athletes challenge each other to hold the wall sit as long as possible. Example conditioning exercises include:

  • Progressive Planks: Start with regular planks, then progress to shoulder tap planks or one-arm planks.
  • Wall Sits: Turn them into a friendly competition to motivate everyone.
Need Competition Music Blue 1

Step 4: Skill Drills (20-30 minutes)

Tumbling Drills: Break down tumbling into manageable progressions and set up multiple stations. For example:

  • Station 1: Spotted drills for back handsprings.
  • Station 2: Flexibility practice using resistance bands.
  • Station 3: Tumbling passes on mats.

Stunt Drills: Focus on the key components of each stunt. Break it down into entry, execution, and dismount:

  • Entry Practice: Use colored markers on the floor to indicate where each base and flyer should stand, making entries quick and precise.
  • Execution Practice: Ensure flyers hit sharp positions and bases maintain stability.
  • Dismount Practice: Focus on cradle drills to develop timing and proper catching technique.

Rotating through stations keeps athletes engaged and helps minimize downtime.

Step 5: Routine Run-Throughs (20 minutes)

Sectional Practices: Instead of running the entire routine repeatedly, focus on breaking it into sections and practice each part separately. Start at half-speed, then progress to full speed to ensure every athlete understands the timing and flow.

Full Routine Run-Through: After sectional work, conduct a full routine run-through with music. Assign one athlete as the “spotlight” for each run-through, rotating this role to ensure everyone gets personalized feedback. Recording these run-throughs for later analysis helps athletes visualize where improvements are needed.

Step 6: Cool-Down (5-10 minutes)

Static Stretching: Use static stretches to relax muscles, prevent soreness, and improve flexibility. Hold each stretch for at least 30 seconds, focusing on key muscle groups used throughout practice.

Team Reflection: Use this time to reflect on the practice. Highlight successes, identify areas for improvement, and encourage athletes to share their thoughts. This helps build communication and keeps everyone motivated.

Step 7: Post-Practice Review

Coach’s Notes: After practice, jot down observations to tailor future sessions. For instance:

  • Goal Achieved: The pyramid sequence was performed with clean transitions.
  • Focus for Next Practice: Spend more time on tumbling synchronization and flyer body control during stunts.

Keeping these notes will help you adjust and create effective practices in the future.

Practical Tips for Maximizing Practice Efficiency

  1. Use Timers: Keep a timer handy to stick to your schedule and maintain efficiency. Set a timer for each drill to prevent overspending time on one activity.
  2. Station Work: Set up stations for different drills—like tumbling, flexibility, and stunting—so that athletes can rotate every 10 minutes. This reduces waiting time and keeps everyone engaged.
  3. Assistant Coaches or Leaders: Utilize assistant coaches or experienced athletes as small group leaders. This allows for more individual attention and faster progression.
  4. Adapt Based on Energy Levels: If the team seems fatigued, spend more time on stretching or less intense skills to prevent injury and maintain morale.

Sample Practice Schedule

  • 5:00 – 5:10 PM: Warm-Up (Dynamic stretches and cardio)
  • 5:10 – 5:25 PM: Stretching and Conditioning (Static stretches, planks, wall sits)
  • 5:25 – 5:55 PM: Skill Drills (Tumbling and Stunt Progressions)
  • 5:55 – 6:15 PM: Routine Sectional Practice (Focus on transitions and timing)
  • 6:15 – 6:35 PM: Full Routine Run-Through and Video Review
  • 6:35 – 6:45 PM: Cool-Down and Team Reflection

Effective cheer practice planning is all about making sure each minute is used with purpose. By setting clear objectives, breaking down skills, utilizing drills, and ensuring proper pacing, coaches can help their athletes progress efficiently throughout the season. Remember that every practice builds towards competition day, so a well-structured practice plan can be the difference between a good routine and a great one. With the strategies above, your team will be ready to shine on the mat.

Steve Pawlyk Signature Full

IPP's Premade Mixes are USA Cheer Compliant and customizable!  Add Sound FX, swap songs, & more!  Add your Team Name to the mix for only $10! 

SLAM artwork
Full_Out_130 mp3 image
1 minute cheer mix
WAKE UP THE FIRE
SLAM artwork
WAKE UP THE FIRE
Full_Out_130 mp3 image
1 minute cheer mix

2024 UCA National High School Cheerleading Championship Results (searchable)

2024 UCA National High School Cheerleading Championship Results

By Steve Pawlyk

Published February 14, 2024

The electricity in the air at the 2024 UCA National High School Cheerleading Championship last weekend was palpable, as top cheerleading teams from across the nation gathered at the ESPN Wide World of Sports Complex at The Walt Disney World Resort® to showcase their incredible talent, dedication, and spirit. With a record-breaking 1,183 teams from 34 states competing, this year’s championship was not just a competition; it was a celebration of cheerleading excellence, athleticism, and the relentless pursuit of perfection. The air buzzed with excitement as these teams, having qualified at regional competitions throughout 2023, took to the floor to perform routines that were the culmination of countless hours of practice, all under the watchful eyes of the cheerleading world.

This championship, a significant event in the cheerleading calendar, has evolved since its inception in 1980 into a prestigious showcase featured on ESPN, bringing together the best high school cheerleaders to compete in categories that test every aspect of their skills, from stunting and tumbling to crowd-leading and overall performance. The anticipation was high as teams like Live Oak High School, Mater Dei High School, and Dutchtown took center stage, each aiming to leave an indelible mark on the judges and the audience.

The results were nothing short of spectacular, with Live Oak High School dazzling in the Large Varsity Division I with a score of 97.4, and Mater Dei High School’s Monarchs reigning supreme in the Small Varsity DI, capturing the title with a score of 96.1, closely followed by the impressive Owasso High School. The level of competition and the sheer talent displayed were a testament to the hard work, passion, and spirit of all the athletes and their coaches, making the 2024 UCA National High School Cheerleading Championship a memorable event that celebrated the very essence of cheerleading.

Need Competition Music Blue 1

Steve Pawlyk Signature Full

IPP's Premade Mixes are USA Cheer Compliant and customizable!  Add Sound FX, swap songs, & more!  Add your Team Name to the mix for only $10! 

SLAM artwork
Full_Out_130 mp3 image
1 minute cheer mix
WAKE UP THE FIRE
SLAM artwork
WAKE UP THE FIRE
Full_Out_130 mp3 image
1 minute cheer mix

2024 Spirit Cheer Super Nationals Results (Searchable)

2024 Spirit Cheer Super Nationals

By Steve Pawlyk

Published January 9, 2024

(updated january 31)


As the lights dimmed in the Atlantic City Convention Center, the stage set for the Spirit Cheer Super Nationals 2024, an air of anticipation was palpable. The crowd held its breath, ready to be dazzled by the spectacular display of cheerleading prowess. What unfolded was nothing short of a theatrical spectacle – a blend of athleticism, artistry, and sheer determination, as teams from across the nation vied for the top spot. This prestigious competition, streamed live on Varsity TV, was an opportunity for teams to earn points for The League by Varsity All Star and secure bids for various end-of-season championships.


While dozens of teams showcased their skill and passion, certain performances stood out as the epitome of cheer excellence. These remarkable teams captivated the audience with a blend of flawless execution, innovative choreography, and unwavering team spirit. So today let’s go through some of the highlights of the event, spotlighting these outstanding teams and their performances. Let’s go! 🙌

East Celebrity Elite – Bombshells

The head-turners this year was East Celebrity Elite’s Bombshells in the  Small Senior 6 category. Lead by Coach Steve Belanger, the Bombshells performance was a mesmerizing blend of tight floor work and pinpoint stunts. Executed flawlessly with unique musically timed choreography that gave a sense of perfect symmetry throughout the routine. They captivated the audience and judges alike, earning them a final score of 97.7333 and zero deductions. It was a routine that spoke volumes of the expertise and quality of ECE’s program; only made more evident by ECE’s Bomb Squad’s zero deductions, 96.8292 performance in Small Senior Coed 6.

South Jersey Storm – Celsius

Not to be outdone, South Jersey Storm’s Celsius excelled in the Small Senior Coed category with a final score of 97.2208, hitting zero and earning them a Full Paid Bid. Their high-energy routine, marked by precision tumbling and unique pyramids that seemed to hypnotically weave in and out of each other. They are undeniably a team of exceptional caliber.

Need Competition Music Blue 1

World Cup – Omni

Shifting to the International U18 Non-Tumbling Coed 6 division, World Cup Omni emerged as the dominant force. Their routine, marked by its innovative choreography began with a truly remarkable throw, and incorporated several unique pyramid executions, earning them a final score of 94.2334 and zero deductions. It wasn’t just a performance; it was a statement – a testament to their creative prowess and technical mastery.

Port City Athletics – Lux

In the intensely competitive Limited XSmall Senior Coed division, it was Port City Athletics’ Lux that hit zero and claimed victory. Scoring a phenomenal 95.8042, their routine was an exhilarating display of dynamic stunts and complex choreography, showcasing not just their skills but the seamless coordination and unity of the team.

Xtreme Cheer – Inferno

In the International Open Coed Non-Tumbling category, Xtreme Cheer’s team Inferno stole the show. Capturing the top spot with a score of 97.5476, their routine was a captivating fusion of athletic agility and creative choreography, leaving the audience in awe.

AT-LARGE BIDS:

Upper Merion All Stars – Royals

Coached by Kylie Franks, the Upper Merion All Stars’ team Royals showcased a commendable performance at the Spirit Cheer Super Nationals, earning them an “At Large” Bid. Securing 2nd place in the Extra Small 6 division with a score of 91.8125, their routine was a testament to their rigorous training and synchronization. Despite a deduction of 2.25, the team’s great floor work stood out. Their routine was characterized by exceptional synchronization, a factor that resonated strongly with their audience and judges alike. The Royals’ performance was a clear display of their dedication and potential, making them a team to watch in future competitions.

South Jersey Storm – Snow Angels

The South Jersey Storm’s team Snow Angels delivered an impressive performance at the Spirit Cheer Super Nationals, securing an “At Large” Bid. Finishing 2nd in the International U18 Non-Tumbling 6 division with a score of 90.2947 and no deductions, their performance was a display of impeccable timing and innovative choreography. The routine began with a unique sequence that immediately captured the attention of the audience, setting the tone for their high-caliber performance. The team’s ability to “hit zero” – a term used in cheerleading to denote a routine with no deductions or errors – was particularly noteworthy. Their execution and the originality of their choreography made their performance memorable, positioning the Snow Angels as a promising team in the cheerleading landscape.

As the curtains fell on this grand spectacle, the audience was left spellbound, eagerly awaiting the next chapter in this thrilling saga of cheerleading excellence. And below, you’ll find the detailed results (which are searchable), complete with scoring, deductions, and the coveted bids, all testament to the extraordinary talent that graced the stage at the Spirit Cheer Super Nationals 2024.

Spirit Cheer Super Nationals 2024 Results (Final Day)

Results (Day 1)

Steve Pawlyk Signature Full

IPP's Premade Mixes are USA Cheer Compliant and customizable!  Add Sound FX, swap songs, & more!  Add your Team Name to the mix for only $10! 

SLAM artwork
Full_Out_130 mp3 image
1 minute cheer mix
WAKE UP THE FIRE
SLAM artwork
WAKE UP THE FIRE
Full_Out_130 mp3 image
1 minute cheer mix

タイトル: 熊本大学の快挙!日本初の世界チアリーディング選手権金メダル

Kumamoto Universitys Remarkable Achievement Japans First World Cheerleading Championship Gold Medal 2024

By Steve Pawlyk

Published January 7, 2024

言語/Language

こんにちは、チアリーディングファンのみなさん!今日は、とってもワクワクするニュースをお届けしますよ。熊本大学が、なんと世界チアリーディング選手権で日本初の金メダルを獲得したんです!これはすごい快挙ですよね。

もちろんです、こちらがその内容を日常的な日本語での翻訳です。


やあ、みんな!今回は、2023年11月に群馬県の高崎アリーナで開催された第11回世界チアリーディング選手権のすごい話をしよう。この大会、コロナの影響でしばらく開催されなかったんだけど、久しぶりに戻ってきて、18カ国から100以上のチームが集まったんだよ。

そしてね、熊本大学チアリーディングクラブの藤森勇気さんが、混合小グループ部門で金メダルを獲得したんだ。これ、日本人としては初めての快挙なんだよ!コロナのせいで練習もままならない中、彼とチームはあきらめずに頑張って、世界大会で目立つ成績を収めたんだ。

高崎はチアリーディングを熱くサポートする街として知られていて、この大会を3回目の開催。競技はエネルギッシュで、創造性とアスリートの才能が詰まったパフォーマンスで、観客を魅了したんだ。

しかも、この大会は第35回全日本大学選手権と同時に行われて、国際的な選手と国内の選手が同じステージで腕を競い合ったんだよ。そのせいで、もっと多くの人が集まって、さらに盛り上がったんだ。

今年の大会の大成功で、もう次の世界選手権への期待も高まっているよ。これからもチアリーディングの世界は、もっとワクワクする展開が待ってるはずだね!

Need Competition Music Blue 1
チームワークは、熊本大学チアリーディングチームが世界選手権で金メダルを獲得する上で重要な要素でした。チームメンバーは高校生から社会人まで幅広く、関東や関西など遠方から集まっていたため、信頼関係の構築と技術の磨き上げが特に重要でした。これは、チアリーディングが個々の技術だけでなく、メンバー全員の協力によって成り立つスポーツであることを示しています。
 
藤森勇気さんは、11回目の世界チアリーディング選手権にて混合小グループ部門で日本代表として参加し、金メダルを獲得しました。彼の成功は、チームメンバー間の強い絆と共同の努力の結果でした。大会中、会場からの「日本!日本!」という声援がチーム全員に力を与え、パフォーマンス終了後の勝利発表時には、チームメンバーとコーチが喜びで抱き合いました。
 
チアリーディングでは、スタントやタンブリングなど、ほとんどの技術が複数人での協力を必要とします。練習や大会でのサポート、意思決定、責任感の共有、指導とフィードバックはチームワークを構築する上で不可欠な要素です。これらの要素は、チームの成功に寄与するだけでなく、個人の成長にも大きく貢献します。日本のチアダンス界では、チームワークが強みとされ、これが国際大会での成功につながっています。
 

このように、熊本大学チアリーディングチームの成功は、単に技術の高さだけでなく、チームワークという大きな力によってもたらされたものです。彼らの情熱とコミットメントは、学校に誇りをもたらすと同時に、日本のチアリーディング界に新たな光を当てています。

Kumamoto University's Historic Win: Japan's First Gold in World Cheerleading Championships

I’m excited to share the historic achievement of Kumamoto University at the World Cheerleading Championships, where they secured Japan’s first gold medal.

Event Recap:

The 11th World Cheerleading Championships, held in Takasaki Arena, Japan, in November 2023, was a milestone event. Returning after a COVID-19 hiatus, it drew over 100 teams from 18 countries, showcasing the sport’s global appeal.

Standout performer Yuki Fujimori, from Kumamoto University’s Cheerleading Club, made history in the mixed small group division. Overcoming the pandemic’s challenges, his gold medal win marked a first for Japan in this category and highlighted his resilience and dedication.

This victory was more than just a personal success; it was a significant moment for Japan on the international cheerleading stage. Fujimori’s performance, uplifted by enthusiastic audience support, reflected the sport’s competitive spirit and underscored the importance of teamwork and national pride.

Need Competition Music Blue 1

The Championships also coincided with the 35th Japan National College Championships, creating a unique atmosphere that combined national and international talent. This blend of competitions heightened the excitement and attracted a larger audience, emphasizing cheerleading’s growing recognition as a competitive sport.

Takasaki, known for its vibrant cheerleading community, hosted the event for the third time, providing a perfect setting for the high-energy and creative performances that captivated the audience.

With this year’s championship’s success, anticipation for future World Championships is already building, promising even more thrilling developments in cheerleading.

Steve Pawlyk Signature Full

IPP's Premade Mixes are USA Cheer Compliant and customizable!  Add Sound FX, swap songs, & more!  Add your Team Name to the mix for only $10! 

SLAM artwork
Full_Out_130 mp3 image
1 minute cheer mix
WAKE UP THE FIRE
SLAM artwork
WAKE UP THE FIRE
Full_Out_130 mp3 image
1 minute cheer mix

Torrey Pines High School Cheer Squad: Triumph at the CIF San Diego Section Championship

torrey pines high school cheer champions san diego

By Steve Pawlyk

Published January 4, 2024

The Torrey Pines High School cheer squad etched their name in history on December 2nd by clinching the prestigious CIF San Diego Section championship. This victory was not just a testament to their athletic prowess but also a culmination of dedication, team spirit, and relentless hard work.

@fitness_cheer Torrey Pines High School #torreypines ♬ original sound – FitnessCheer


Journey to the Championship

In an astounding display of athleticism and team spirit, the Torrey Pines High School competitive cheer squad clinched the CIF San Diego Section championship in the Small Group Division II. The event, held at Montgomery High School on December 2nd, witnessed the Falcons showcasing a flawless routine that earned them this prestigious title.

Renowned for their impeccable performances, the team’s winning routine was a product of creative collaboration. Choreographed by Anna Haskell, a former NFL cheerleader and collegiate dancer, the music routine resonated with dynamism and energy. Complementing this, the cheer choreography, crafted by Head Coach Olivia Bogert, who also teaches AP literature and creative writing at Torrey Pines, added layers of sophistication and technique to the performance.

The Championship Day

On December 2nd, the Torrey Pines High School competitive cheer squad delivered a breathtaking performance at the CIF San Diego Section championship in Small Group Division II, held at Montgomery High School. Their routine, a blend of stunts, tumbling, jumping, dancing, and chants, was meticulously crafted over months of preparation. The choreography prepared by Anna Haskell and Head Coach Olivia Bogert, highlighted their exceptional skill in execution, technique, and difficulty. This performance not only won them the championship title but also marked their first victory in Traditional Cheer Competition and their first playoff appearance since competitive cheer was recognized as a sport. Their success at this event is a historic milestone for Torrey Pines and sets the stage for their next challenge: the CIF State Championships.

Need Competition Music Blue 1

The CIF Regional Cheer Championships, a gathering of 56 high school squads from across San Diego, is the arena where these teams vied for the top spot at various levels. Torrey Pines High School, standing out among these contenders, marked a historic moment by winning their first Traditional Cheer Competition championship. This victory was even more significant as it was their first playoff appearance since competitive cheer was acknowledged as a sport by the California Interscholastic Federation.

The rigorous preparation for this championship started in early October, with the team dedicating three to four sessions weekly after school and on weekends. Their two-and-a-half-minute routine, encompassing stunts, tumbling, jumping, dancing, and chants, was evaluated on execution, technique, and the difficulty degree. This dedicated preparation period was instrumental in honing their skills to perfection.

With this remarkable achievement, the Torrey Pines competitive cheer team is now gearing up for the next challenge – the CIF State Championships, scheduled at Mira Costa High School in Manhattan Beach, California, on January 27th. Here, they will compete against the top high school cheer teams in the state, aiming to add a California championship title to their accolades.

This triumph not only underscores the team’s exceptional talent and hard work but also sets a new standard of excellence for the Torrey Pines High School cheer program. As they prepare for the upcoming state championships, the squad carries with them the momentum of this victory and the support and pride of their school and community.

Steve Pawlyk Signature Full

IPP's Premade Mixes are USA Cheer Compliant and customizable!  Add Sound FX, swap songs, & more!  Add your Team Name to the mix for only $10! 
SLAM artwork
Full_Out_130 mp3 image
1 minute cheer mix
WAKE UP THE FIRE
SLAM artwork
WAKE UP THE FIRE
Full_Out_130 mp3 image
1 minute cheer mix

7 Creative Strategies for Boosting Cheer Team Performance

7-Creative-Strategies-for-Boosting-Cheer-Team-Performance

By Steve Pawlyk

Published October 2, 2023

The secret to standing out is constant innovation. You need creative strategies to boost your cheer team’s performance and guarantee not only precision but also awe-inspiring execution.

Today, we will delve into 7 creative strategies to elevate your cheer team’s performance to the next level. Whether you’re a coach, an athlete, or a cheer enthusiast, these tips will help you bring a breath of fresh air to your routines.

1. Add a Dash of Gymnastics

Incorporating gymnastic elements into your routine can significantly boost the dynamic energy of your team. Gymnastic techniques not only add a wow factor but also showcase your team’s technical prowess. Moves such as handstands, flips, and cartwheels can be seamlessly integrated into your existing routines.

Tips:

  • Consult a Gymnastic Coach: To ensure proper technique and safety.
  • Start Small: Incorporate basic elements first before moving on to more complex maneuvers.
  • Safety First: Make sure all team members are comfortable and physically prepared for the new elements.

2. Visual Storytelling Through Routine

Narrative routines are catching on as they add depth to the performance. Instead of merely stringing stunts and cheers together, create a storyline that can be easily followed throughout the routine.

Tips:

  • Storyboarding: Plan out the story you want to tell.
  • Choreographic Transitions: Use transitions to move the narrative along.
  • Facial Expressions: Teach your team to use facial expressions to convey emotions and tell the story effectively.
Need Competition Music Blue 1

3. Utilize Props Creatively

Props are not just fillers; they can be the star of your show. Think pompoms, banners, or even custom-made props that align with your routine’s theme.

Tips:

  • Thematic Relevance: Ensure that the props contribute to the story or theme.
  • Safety: Make sure the props are safe to use and won’t cause any accidents.

4. Crowd Interaction

Engaging the crowd can elevate your performance and energize your team. The energy of the audience often mirrors that of the performance.

Tips:

  • Audience Cues: Pre-plan moments where your team directly engages with the crowd.
  • Interactive Cheers: Develop cheers where the audience can respond or participate

5. Incorporate Technology

In the modern age, technology is your friend. From LED lights sewn into uniforms to the use of projection screens, technology can add a unique twist.

Tips:

  • Sound Effects: Use tech to incorporate sound effects that align with your routine’s theme.
  • Lighting: Strategically use lighting to highlight key moments in your performance.

6. Encourage Individuality Within Unity

While the essence of cheerleading lies in perfect synchronization, allowing for moments where individual talents shine can make your team memorable.

Tips:

  • Spotlight Moments: Create segments within the routine where individual talents can be showcased.
  • Personal Flair: Encourage team members to bring their unique flair to their moves, without breaking the team’s harmony.

7. Embrace the Power of Music

Never underestimate the impact of a well-chosen soundtrack. Music can make or break your routine. Customized cheer music can give your performance a unique edge.

Tips:

  • Theme Alignment: Choose or create music that aligns with your theme.
  • Dynamic Rhythms: Use varying tempos and rhythms to emphasize different sections of your routine.

Creativity is the secret sauce that will set your cheer team apart from the rest. From adding a dash of gymnastics to embracing the power of custom cheer music, these seven creative strategies can significantly boost your cheer team’s performance.

Incorporate these strategies into your practice and performance routines to see dramatic improvements. Here at YouHitZero, we’re all about helping you reach the pinnacle of cheerleading excellence

Steve Pawlyk Signature Full

IPP's Premade Mixes are USA Cheer Compliant and customizable!  Add Sound FX, swap songs, & more!  Add your Team Name to the mix for only $10! 

SLAM artwork
Full_Out_130 mp3 image
1 minute cheer mix
WAKE UP THE FIRE
SLAM artwork
WAKE UP THE FIRE
Full_Out_130 mp3 image
1 minute cheer mix

Mastering Toss Hands

mastering-toss-hands cheerleading

By Steve Pawlyk

Published August 14, 2023

Male cheerleaders around the world may face unique challenges, particularly when it comes to performing toss hands. If you are in your early years of cheerleading and struggling with getting the right height on your toss, but seem to have no problem with shoulder sits, you are not alone.

Understand the Role of Strength Training

Lift More Weights: Building strength is key. Focus on the big 3 lifts – deadlifts, squats, and cleans.

  • Deadlifts and Squats: These exercises target the muscles needed for tosses and can significantly enhance your power.
  • Cleans: This is useful for developing explosive strength, but it requires proper technique to be effective.

While coaches often emphasize technique over strength, having more strength to tap into will never be detrimental. It can, in fact, provide an edge in your performance.

Deadlifts

Deadlifts are great for building overall strength, targeting muscles in your legs, back, and core. Here’s a step-by-step guide:

1. Starting Position:

  • Stand with feet hip-width apart.
  • Place the barbell over the middle of your feet.
  • Bend at the hips and knees to lower your body to the bar.
  • Grip the bar with both hands, either overhand or mixed grip.
  • Keep your back flat, chest up, and shoulders slightly in front of the bar.

2. Lifting Phase:

  • Engage your core and push through your heels.
  • Extend your hips and knees simultaneously to lift the bar.
  • Keep the bar close to your body, traveling in a straight line.
  • Fully extend your hips at the top, standing tall.

3. Lowering Phase:

  • Reverse the movement, pushing hips back first.
  • Lower the bar by bending the hips and knees.
  • Return to the starting position with control.

4. Key Tips:

  • Maintain a neutral spine throughout the movement.
  • Focus on engaging your glutes and hamstrings.
  • Avoid rounding your back.

Squats

Squats are a cornerstone exercise for building leg and core strength. Follow these steps:

1. Starting Position:

  • Stand with feet shoulder-width apart.
  • Hold a barbell across your upper back or place hands on hips for bodyweight squats.
  • Keep your chest up, shoulders back, and eyes forward.

2. Descending Phase:

  • Begin by pushing your hips back.
  • Bend your knees while keeping them in line with your feet.
  • Lower your body until thighs are at least parallel to the ground.
  • Keep your chest up and back straight throughout the movement.

3. Ascending Phase:

  • Push through your heels to stand back up.
  • Extend hips and knees simultaneously.
  • Return to the starting position, maintaining good posture.

4. Key Tips:

  • Keep your knees from caving in or going past your toes.
  • Engage your core throughout the movement.
  • Focus on controlled, smooth motions.

5. Variations:

  • Goblet Squat with a dumbbell or kettlebell.
  • Front Squat with the barbell in front of your shoulders.

Both Deadlifts and Squats are powerful exercises that require attention to form and technique. It may be wise to consult with a fitness professional or coach to ensure proper execution, especially if you are new to these movements.

Need Competition Music Blue 1

Cleans:

The Clean is a complex and powerful exercise often used by athletes to develop explosive strength. It can be particularly beneficial for cheerleaders who need to enhance their toss ability. Here’s a detailed, step-by-step guide to performing the Clean exercise:

1. Starting Position:

  • Stand with feet shoulder-width apart.
  • Grip the barbell with a hook grip, hands slightly wider than shoulder-width.
  • Position the bar over the mid-foot.
  • Lower yourself by bending at the knees and hips, keeping the chest up.
  • Engage your core and ensure that your back is straight.

2. First Pull:

  • Begin by driving through your heels to lift the bar off the floor.
  • Maintain a flat back and keep the bar close to your body.
  • Extend your legs while keeping your shoulders over the bar.

3. Second Pull (Explosive Phase):

  • As the bar reaches knee height, explosively extend your hips and knees.
  • Shrug your shoulders and pull the bar upward with your arms.
  • Think of “jumping” the bar upwards rather than just lifting it.

4. Catch Phase:

  • Quickly drop under the bar by pulling yourself into a squat position.
  • Rotate your elbows forward to catch the bar on your front shoulders.
  • The bar should rest on your fingertips or the heel of your hand, not the palm.
  • Your thighs should be at least parallel to the ground in the catch position.

5. Recovery Phase:

  • Stand up by pushing through your heels, fully extending your hips and knees.
  • Maintain a straight back and keep the bar in front of your shoulders.

6. Return:

  • Safely lower the barbell back to the starting position or drop it to the floor if using bumper plates.

7. Key Tips:

  • Focus on powerful hip extension rather than pulling with the arms.
  • Keep the bar close to your body throughout the movement.
  • Ensure a smooth transition from the pull to the catch.
  • Practice with lighter weights or a PVC pipe to master the technique before adding weight

Safety Considerations

Given the complexity of the Clean, it may be beneficial to break down the movement into its constituent parts and practice them individually. Working with a certified coach or trainer who understands the biomechanics of the exercise can also help you develop proper form and technique.

Cleans are an advanced lifting technique that requires coordination, timing, and power. They can be a valuable addition to a cheerleader’s training program, helping develop the explosive strength needed for various cheer maneuvers.

Repetition and Understanding Your Flyer

The Reddit user also highlighted the importance of repetition and knowing your flyer’s timing.

  • Repetition: Practicing your toss hands again and again will eventually lead to mastery. Don’t shy away from dedicating time to consistent practice.
  • Understanding Your Flyer: Building synergy with your flyer can make a world of difference. If you understand each other’s timing and movements, you’ll find that executing toss hands becomes much more fluid.

If you’re grappling with toss hands, the combination of targeted weight lifting, repetitive practice, and cultivating a strong understanding with your flyer could be the solution you need.

There’s no one-size-fits-all answer, but these tried and tested methods have proven to be effective for many. With dedication and focus, you too can overcome this challenge and take your skills to new heights.

Steve Pawlyk Signature Full

IPP's Premade Mixes are USA Cheer Compliant and customizable!  Add Sound FX, swap songs, & more!  Add your Team Name to the mix for only $10! 

SLAM artwork
Full_Out_130 mp3 image
1 minute cheer mix
WAKE UP THE FIRE
SLAM artwork
WAKE UP THE FIRE
Full_Out_130 mp3 image
1 minute cheer mix

Enhancing Spatial Awareness for Improved Tumbling in Cheerleading

Enhancing-Spatial-Awareness-for-Improved-Tumbling-in-Cheerleading--A-Comprehensive-Guide

By Steve Pawlyk

Published August 1, 2023

Cheerleading is a demanding sport that requires a high degree of physical strength, agility, and precision. Among these crucial skills, spatial awareness stands out as a significant contributor to a cheerleader’s performance, particularly in tumbling. If you’re a cheerleader finding yourself getting lost mid-full, you’re not alone. We’re here to discuss strategies that can help you refine your spatial awareness and get back on track with your tumbling.

Spatial awareness is a sense of one’s physical position in relation to the surroundings. In cheerleading, it is essential for executing complex tumbling sequences, like standing fulls or full whips, without losing orientation. However, developing and maintaining this sense can be challenging.

Revisit Basics

When struggling with spatial awareness during complex sequences, it can be beneficial to revisit the basics. Try practicing simpler moves and gradually increasing the difficulty. This can help your body regain the sense of spatial orientation and build a solid foundation.

Mental Visualization

Visualize your routines. Before executing a move, imagine each step vividly in your mind. Picture yourself in the air, your rotation, and your landing. This mental rehearsal can help improve your spatial awareness and execution of the skills.

Eye-Focus Training

Try to consciously keep your eyes open during your routines. It’s common for cheerleaders to close their eyes involuntarily during tumbling, which can disrupt spatial orientation. Practice drills where you focus on a particular point during the maneuver can help you stay oriented.

Need Competition Music Blue 1
Spatial-Awareness-for-Improved-Tumbling-in-Cheer

Use Spotting Techniques

Spotting techniques involve focusing on a particular point in your surroundings to maintain balance and orientation. These can be incredibly helpful during full rotations and can prevent you from getting lost mid-move.

Invest in Coaching and Feedback

If you’re still struggling, consider seeking advice from your coach or even investing in additional professional guidance. They can provide personalized feedback, identify problem areas, and suggest targeted exercises to improve your spatial awareness.

Try Proprioceptive Exercises

Proprioceptive exercises that focus on balance and body movement can help improve your spatial awareness. These can include activities like yoga, Pilates, or even specific balance-focused exercises on a stability ball or BOSU.

Refining your spatial awareness as a cheerleader can feel like an uphill battle, but with the right strategies and dedication, you can regain your confidence and excel in your tumbling. Remember, it’s essential to be patient with yourself during this process. Improvements might not be noticeable overnight, but consistent effort will yield results

Steve Pawlyk Signature Full

IPP's Premade Mixes are USA Cheer Compliant and customizable!  Add Sound FX, swap songs, & more!  Add your Team Name to the mix for only $10! 
SLAM artwork
Full_Out_130 mp3 image
1 minute cheer mix
WAKE UP THE FIRE
SLAM artwork
WAKE UP THE FIRE
Full_Out_130 mp3 image
1 minute cheer mix

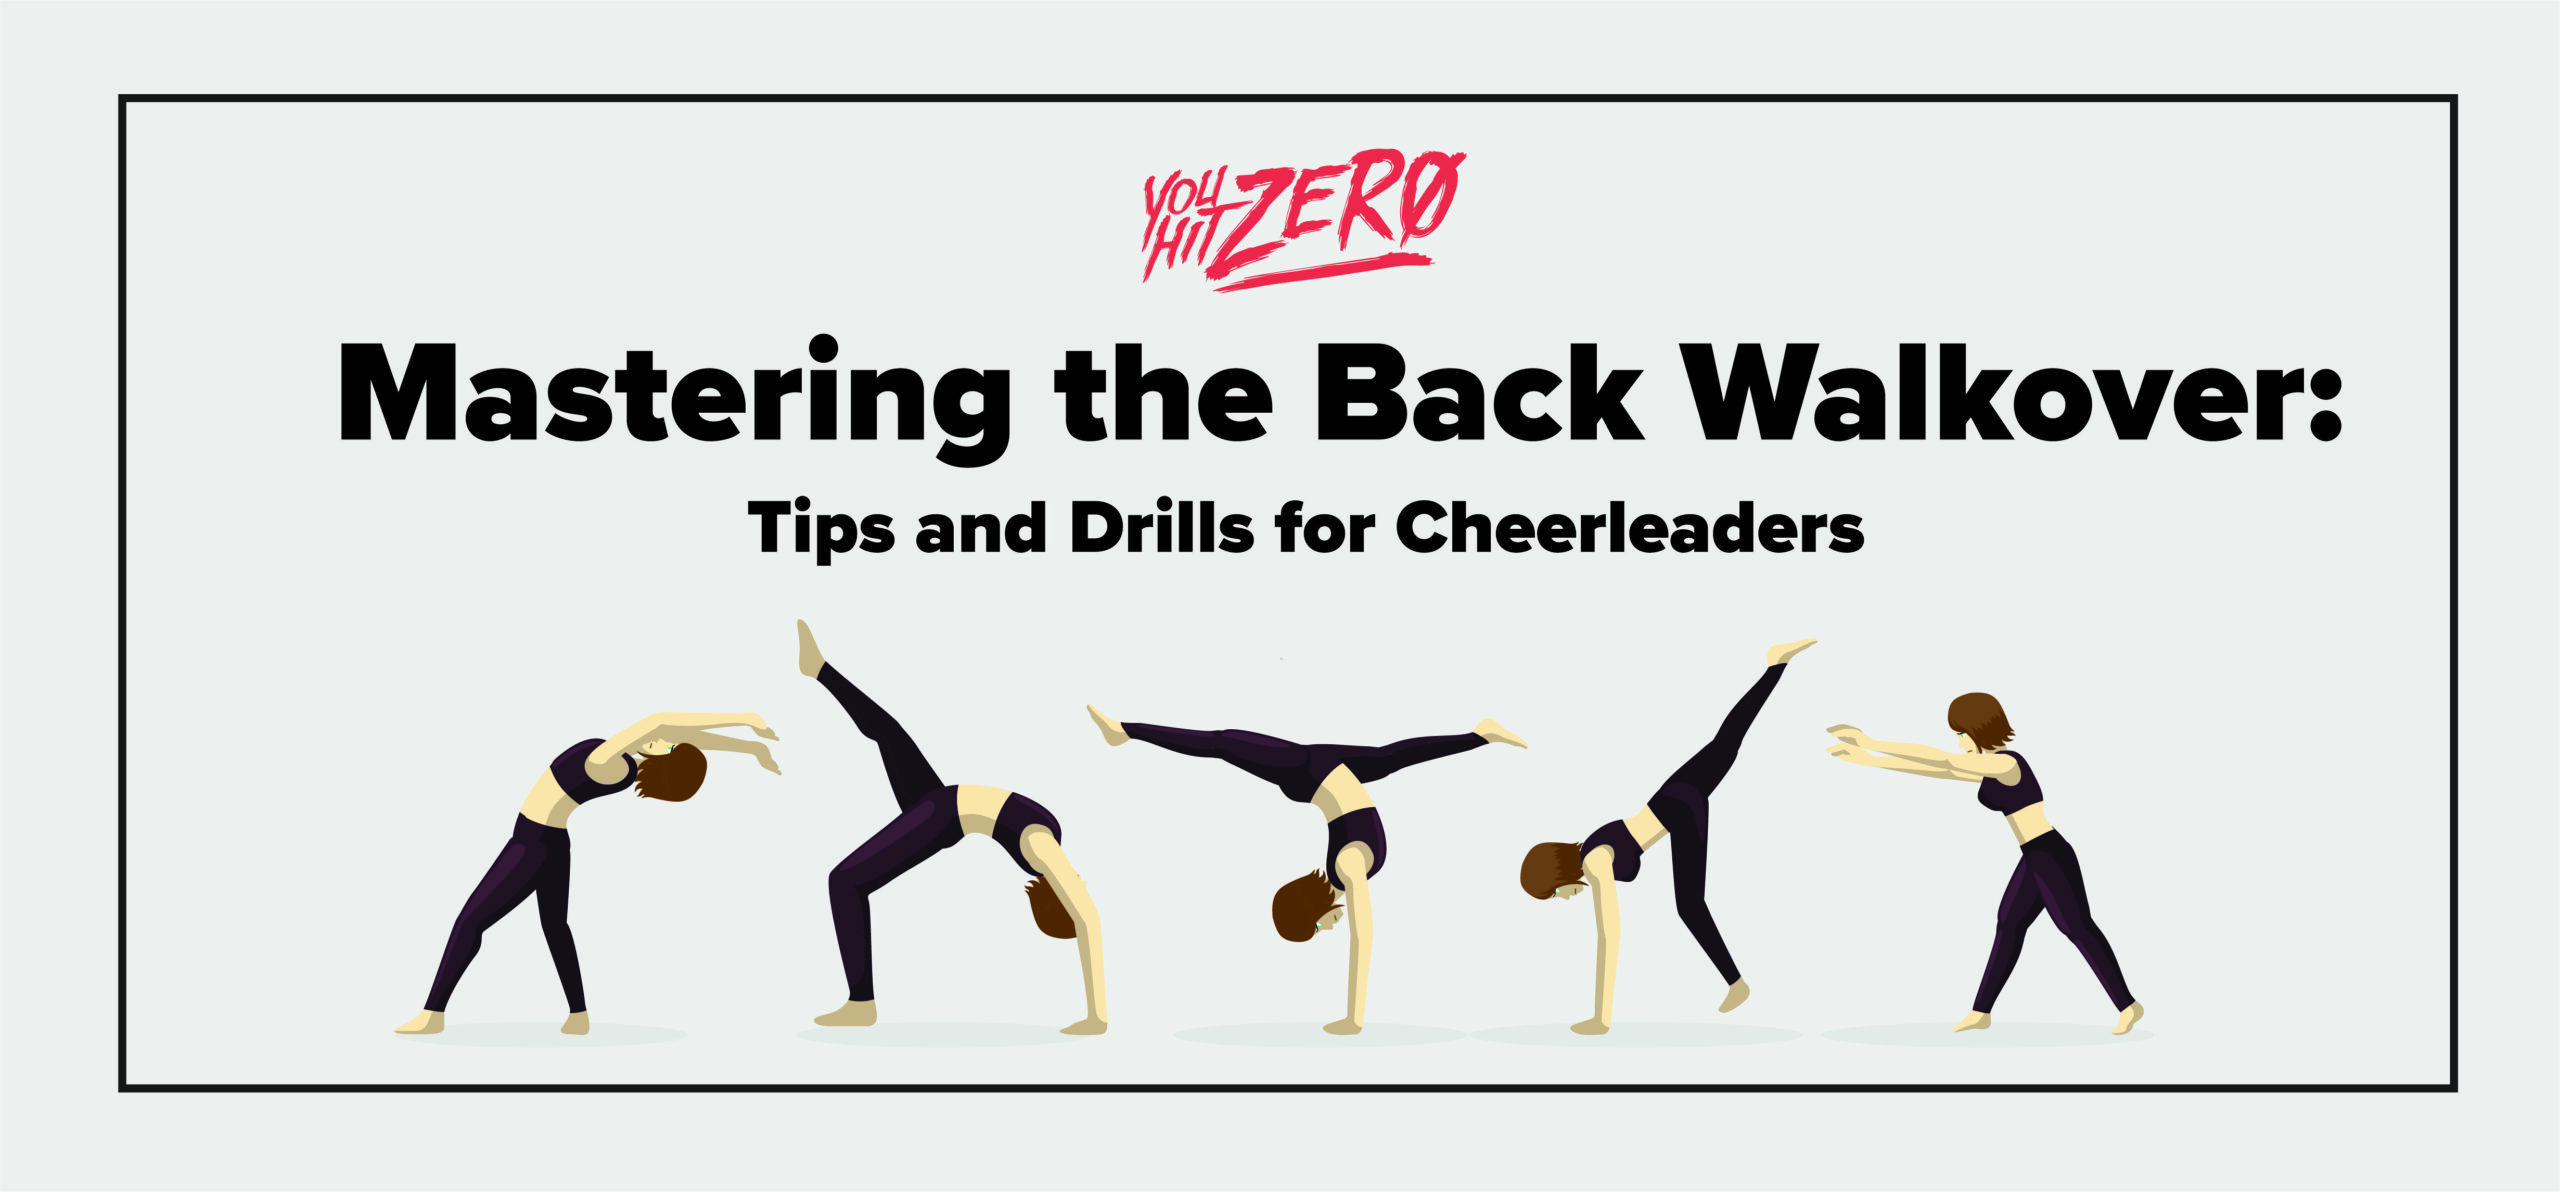
Mastering the Back Walkover: Expert Tips and Drills for Cheerleaders

Mastering the Back Walkover: Expert Tips and Drills for Cheerleaders

By Steve Pawlyk

Published July 14, 2023

Today, we’re addressing a common challenge that many cheerleaders face: mastering the back walkover. This skill is a fundamental part of many routines and can be a hurdle for some athletes. Often cheerleaders struggle with back walkovers, despite regular practice and stretching. So let’s dive into some tips and drills that can help you conquer this move.

Understanding the Back Walkover

The back walkover is a gymnastic skill that requires a combination of strength, flexibility, and balance. It involves starting from a standing position, reaching backwards into a bridge, and then kicking over to return to a standing position. The cheerleader who posted her frustration with this on Reddit mentioned that she can fall into a bridge but struggles with the kick over. This suggests that she may need to focus on building strength and improving technique.

Building Strength

While flexibility is crucial for a back walkover, strength is equally important. You need strong shoulders, back, and core muscles to control your body as you kick over from the bridge position. Here are a few exercises to help build this strength:

1. Planks: Planks are excellent for strengthening your core. Try to hold a plank for 30 seconds to a minute, and gradually increase your time as your strength improves.

2. Push-ups: Push-ups can help build shoulder and arm strength. If regular push-ups are too challenging, start with knee push-ups and gradually progress to full push-ups.

3. Bridge push-ups: These target your shoulders, back, and core. Start in a bridge position and try to push your body up and down.

Improving Technique

The technique is key in a back walkover. Here are a few drills to help improve your technique:

1. Bridge kickovers: Start in a bridge position with your feet on an elevated surface like a mat or a step. Kick over one leg at a time. This drill can help you get the feel of the kickover motion.

2. Spotter-assisted back walkovers: Ask a coach or a teammate to spot you as you attempt your back walkover. They can provide support as you kick over, helping you understand the movement and build confidence.

3. Wall walkovers: Stand a few feet away from a wall, facing away from it. Reach back into a bridge against the wall and use it to push off and kick over. This drill can help you practice the kickover motion with some support.

Increasing Flexibility

Even though our cheerleader friend has been stretching daily, she might need to incorporate some specific stretches to increase her back and shoulder flexibility:

1. Doorway stretch: Stand in an open doorway, place your hands on the door frame slightly above your head, and lean forward to stretch your shoulders.

2. Cobra pose: This yoga pose is great for increasing back flexibility. Lie on your stomach, place your hands under your shoulders, and push your upper body off the ground.

3. Bridge stretch: Regularly practicing your bridge can also help improve your flexibility. Try to hold the position for longer periods and work on straightening your legs and pushing your shoulders over your hands.

Perfecting the Back Walkover: A Detailed Breakdown

The back walkover can be a challenging skill to master, but breaking it down into smaller, more manageable movements can make it easier to understand and execute. Let’s delve into a more detailed explanation of the back walkover, focusing on the bridge position and the transition to the kickover.

The Bridge Position

When you’re in the bridge position, it’s important to push your shoulders forward as far as possible. This movement will naturally start to straighten your legs. The goal here is to create a strong, stable base from which you can initiate the kickover.

The Kickover Transition

Once your legs are close to straight, bring one foot in, so one leg is bent and the other is straight. This is the starting position for the kickover. From here, you’ll want to look at your hands and aggressively push the bent leg straight while lifting the other leg up.

It’s crucial to think of this movement less as a “kick” and more as a “push and swing.” You’re pushing through the bent leg so it extends fully, and simultaneously swinging the straight leg up and over. This combination of movements creates the momentum you need to complete the back walkover.

Working with a Spotter

If you’re still finding the back walkover challenging, working with a spotter can be very helpful. They can provide physical support and guidance as you practice the movement, helping you build confidence and improve your technique.

You can also practice back walkovers going down a cheese mat (an incline mat) with a spotter. The incline can help make the movement easier by using gravity to assist with the momentum. This can be a great way to get a feel for the back walkover and understand how the movements should flow together.

The Back Walkover vs. The Kickover

Interestingly, many cheerleaders find the back walkover easier to perform than a kickover from a bridge. This is because the momentum going backwards in a back walkover naturally makes your legs follow, making the movement feel more fluid and less forced.

So, if you’re struggling with the kickover, try practicing back walkovers instead. You might find that the backwards momentum helps you understand and execute the movement more easily

Remember, mastering a skill like the back walkover takes time, patience, and lots of practice. Don’t be discouraged if you don’t get it right away. Keep practicing, stay consistent with your strength training and stretching, and don’t hesitate to ask for help from your coach or teammates. You’re not alone in this journey, and with dedication and perseverance, you’ll be able to nail that back walkover in no time 👍

Steve Pawlyk Signature Full

IPP's Premade Mixes are USA Cheer Compliant and customizable!  Add Sound FX, swap songs, & more!  Add your Team Name to the mix for only $10! 

SLAM artwork
Full_Out_130 mp3 image
1 minute cheer mix
WAKE UP THE FIRE
SLAM artwork
WAKE UP THE FIRE
Full_Out_130 mp3 image
1 minute cheer mix

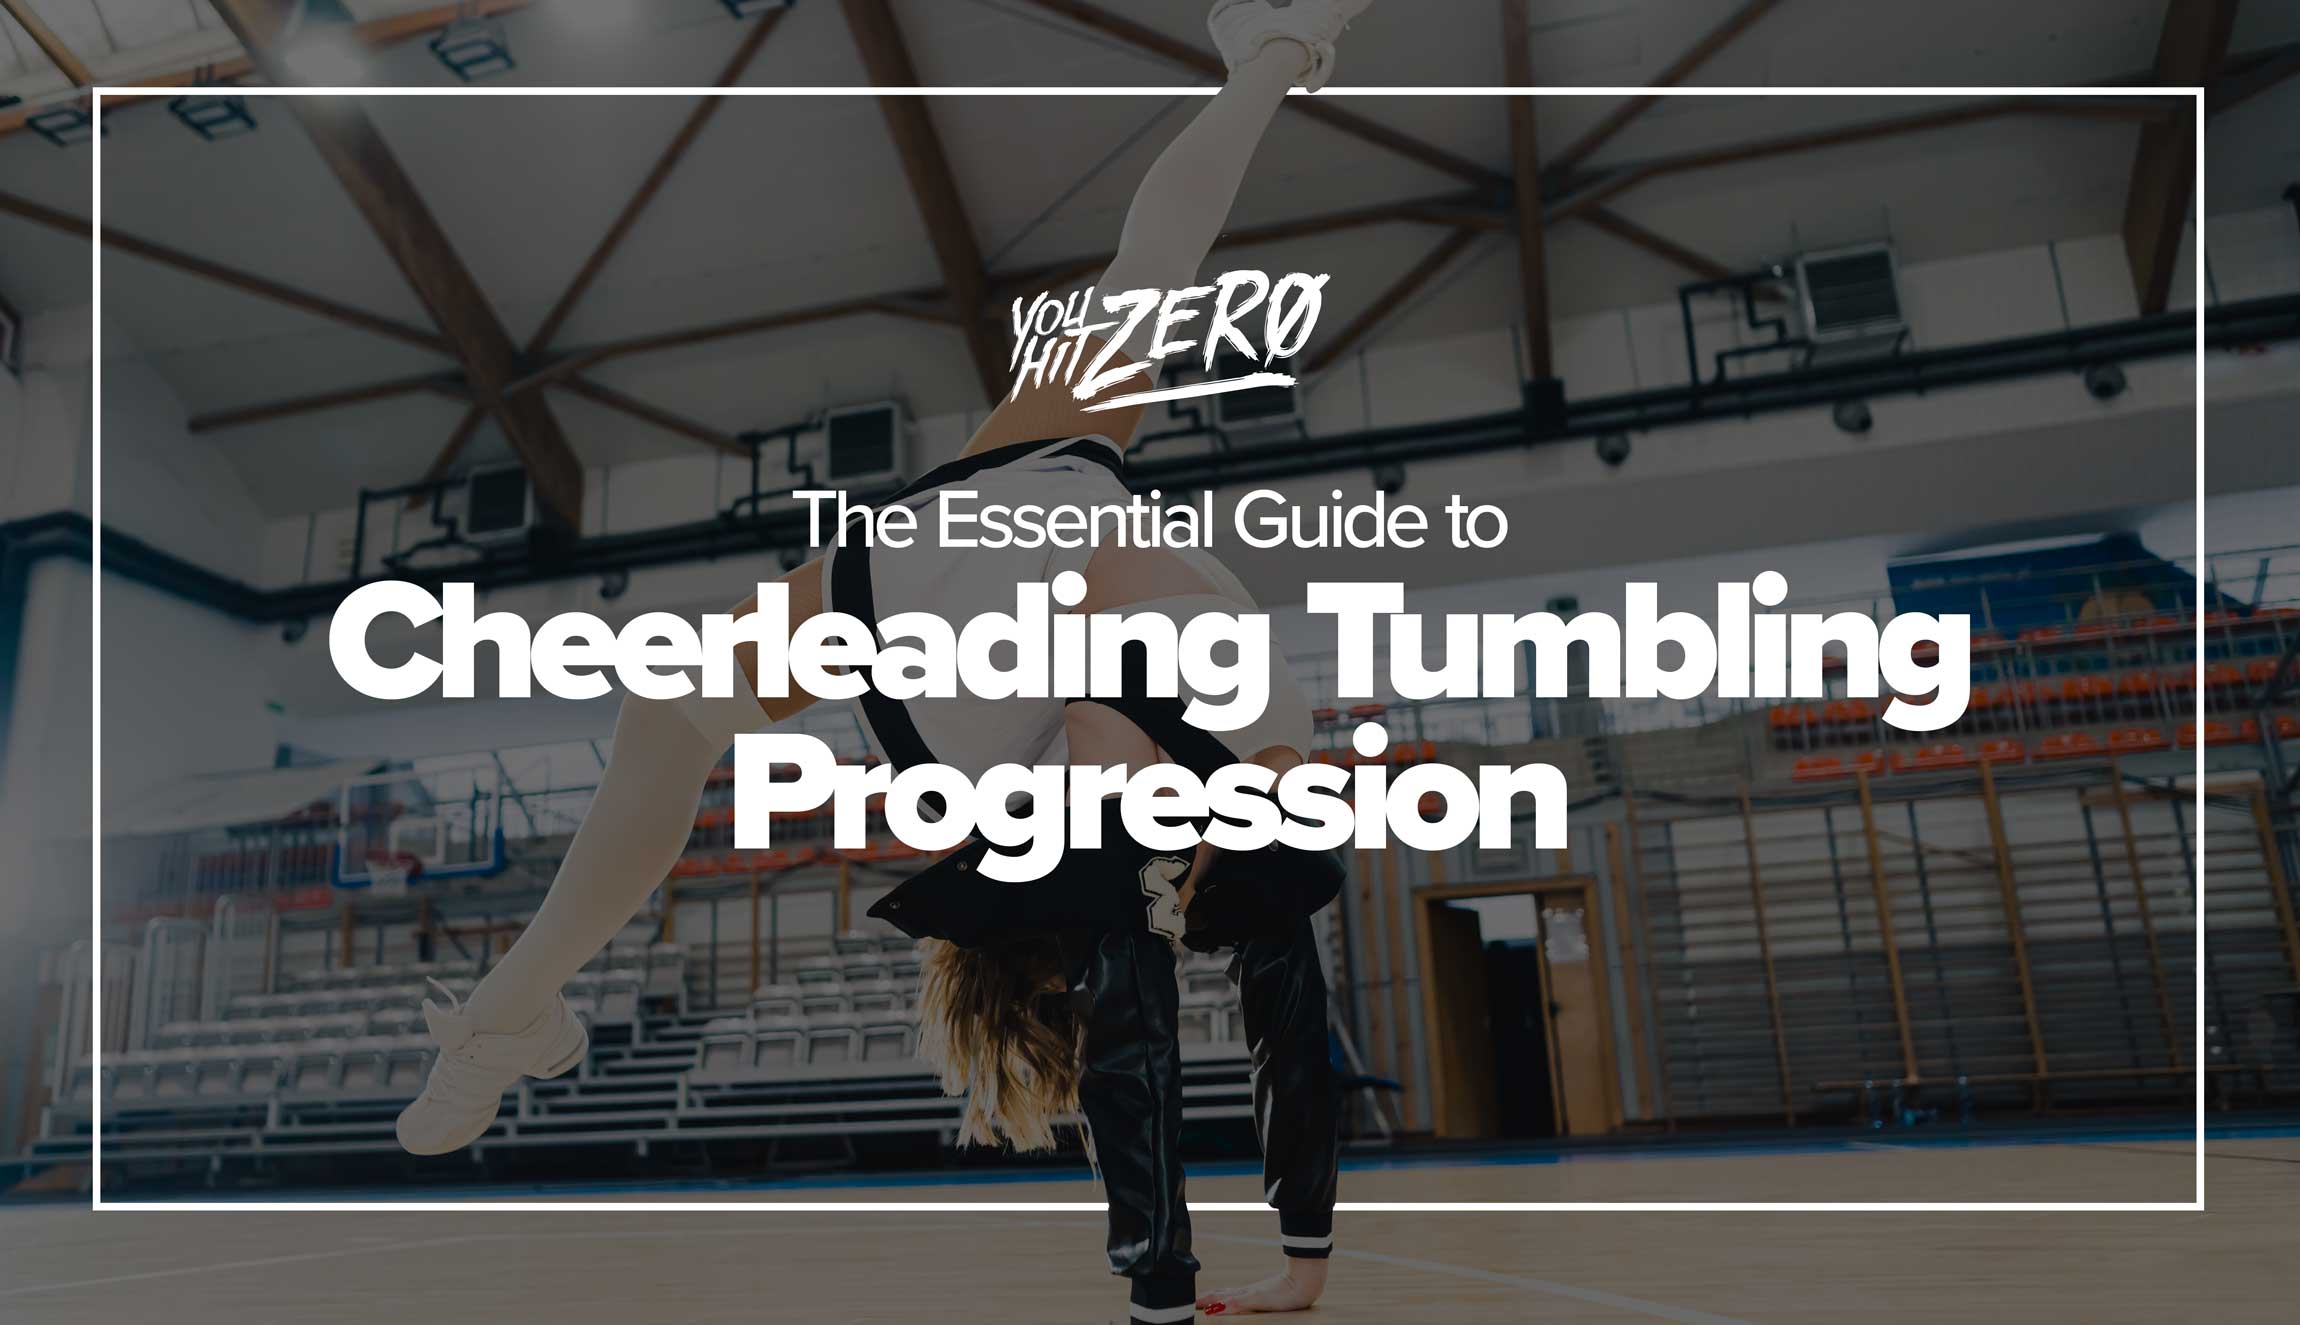
The Essential Guide to Cheerleading Tumbling Progression

cheer tumbling progression chart

By Steve Pawlyk

Published June 29, 2023

Tumbling is an integral part of cheerleading. It enhances the visual appeal of routines and showcases the athletic prowess of the cheerleaders. However, learning tumbling skills is a gradual process that requires consistency, patience, and above all, a clear understanding of progression levels. In this article, we will walk through the tumbling progression guide, breaking down each level to help cheer coaches better structure their athletes’ training.

  • Level 1.0: The Foundation
    The first level focuses on basic gymnastic skills that lay the groundwork for more advanced moves. At this level, athletes will learn forward and backward rolls, handstands, and cartwheels, as well as handstand snap-downs, bridge downs, and opposite cartwheels. Each of these moves builds core strength, flexibility, and body awareness, critical attributes for future progress.
  • Level 1.5: Building Momentum
    At Level 1.5, the focus is on slightly more complex skills that build on the foundations set in Level 1.0. Here, athletes start learning moves like 2-step round-offs, power hurdle round-offs, backward roll press ups, and front and back walkovers. The Valdez, a graceful move performed from a seated position, also makes its debut at this level.
    • Level 2.0: Introducing the Back Handspring

      The back handspring – a cheerleading staple – is introduced at Level 2.0. Also added to the repertoire are round-off back handsprings, front handsprings, front walkover-round-offs, and back extension rolls. These moves require and help develop upper body strength, better control, and enhanced spatial awareness.

    • Level 2.5: Mastery of the Back Handspring

    Level 2.5 emphasizes the mastery and integration of the back handspring. The goal is to perform multiple back handsprings and seamlessly transition from a front walkover to a round-off back handspring. This level encourages fluidity in motion and lays the foundation for complex tumbling sequences.

    • Level 3.0: Daring Heights

      By Level 3.0, cheerleaders should be comfortable performing solo and sequence back handsprings. They’re now ready for high-flying moves like round-off back handspring tucks, standing tucks, and aerials. The cheerleader will also start working on coin tosses, punch fronts, and toe touch back handsprings, further expanding their tumbling skill set.

    • Level 4.0: Layouts & Advanced Skills
      Level 4.0 focuses on layouts and more advanced skills. Athletes start to incorporate skills like the round-off back handspring layout, cartwheel tuck, T-jump tuck, and whip throughs into their repertoire. They will also work on punch front step-outs, front handspring front punches, and Onodis.
    • Level 5.0: Full Twisting and Arabians
    • With a strong foundation in place, Level 5.0 cheerleaders are ready for full twists and Arabians. They’ll also learn whip tucks, toe touch tucks, and standing fulls. At this level, athletes also start practicing fulls with kicks, further enhancing their flexibility and control.

  • Level 6.0: Elite Tumbling
    Level 6.0 is the final and most advanced stage in this tumbling progression. Athletes at this level are expected to execute difficult skills like back handspring fulls, whip punch double twists, and Arabian step outs to double twists. They also continue practicing fulls with kicks. Mastery at this level reflects the pinnacle of tumbling proficiency.
  • Conclusion

    The process of learning and mastering tumbling in cheerleading is a journey that requires patience, practice, and persistent effort. By understanding and following this tumbling progression guide, cheer coaches can ensure their athletes develop the necessary skills in a safe and systematic manner. Remember, each level forms the foundation for the next – it’s important to master each skill before moving on to more advanced moves. Happy tumbling!

    Steve Pawlyk Signature Full

    IPP's Premade Mixes are USA Cheer Compliant and customizable!  Add Sound FX, swap songs, & more!  Add your Team Name to the mix for only $10! 
    SLAM artwork
    Full_Out_130 mp3 image
    1 minute cheer mix
    WAKE UP THE FIRE
    SLAM artwork
    WAKE UP THE FIRE
    Full_Out_130 mp3 image
    1 minute cheer mix

    The 3 Key Moves in Cheerleading: Boosting Your Routine with IPP Music

    Boost your cheer routine with key moves: High V, T-Jump, Liberty Stunt

    By Steve Pawlyk

    Published May 30, 2023

    When it comes to mastering the art of cheerleading, understanding key moves is crucial. These moves form the basis of any routine, and perfecting them can take your cheerleading performance from good to exceptional. At IPP Music, we understand the power of rhythm and music in enhancing these moves, which is why we provide tailored cheerleading music to support and uplift your performance.

    Cheerleading is an energetic, powerful, and dynamic sport that requires skill, agility, and precision. With the combination of tumbling, jumps, stunts, and dance, cheerleading is as much about athleticism as it is about spirit and synchronization. 

    To help you boost your cheerleading routine, we will outline three key moves in cheerleading that every cheerleader should know. These moves are the High V, the T-Jump, and the Liberty Stunt. With the right music from IPP Music, you can make these moves pop and make your performance unforgettable.

    The High V

    The High V is a foundational move in cheerleading, often used in cheers, chants, and routines. It’s a move that every cheerleader learns early in their training. Here’s how to perfect your High V:

    1. Stand tall with your feet hip-width apart.
    2. Extend your arms up and out in a V shape. 
    3. Keep your arms straight, and make sure your palms face outward.
    4. Maintain a tight, sharp position, with your thumbs facing the back.

    The High V is great for creating a dramatic effect, especially when matched with powerful, beat-driven music. IPP Music offers a range of tracks that can help you make the most of this move, helping to create a captivating and exciting performance.

    The T-Jump

    The T-Jump, or toe touch, is a classic cheerleading jump that demands flexibility and precision. Here’s how to perform a T-Jump:

    1. Start with your feet together and arms in a High V.
    2. Bend your knees and jump off both feet.
    3. At the peak of your jump, split your legs into a V shape.
    4. Reach your hands towards your toes, creating a T shape with your body.
    5. Land safely with your knees slightly bent to absorb the impact.

    Matching the T-Jump with the right music can add a significant impact to your routine. At IPP Music, we provide a diverse selection of music to suit any cheerleading routine, whether you’re looking for fast-paced tracks to match the energy of the T-Jump or slower beats for a graceful execution.

    The Liberty Stunt

    The Liberty Stunt is a popular move that involves a flyer balancing on one foot, held up by bases. It’s a move that showcases teamwork and trust among cheerleaders. Here’s how to perform a Liberty Stunt:

    1. The flyer stands on one foot, while the bases support the flyer’s foot with their hands.
    2. The flyer keeps the other leg bent at the knee, creating a 90-degree angle.
    3. The back spot supports the flyer’s back and helps to keep her steady.
    4. The flyer extends her arms into a High V for balance and effect.

    The Liberty Stunt is a dramatic and impactful move that requires just the right music to match its intensity. IPP Music provides a range of music that can help accentuate this stunt, making your routine stand out from the rest.

    In conclusion, there are six main levels in cheerleading, each with its unique set of skills and requirements. These levels provide a roadmap for cheerleaders, helping them progress from beginners to advanced athletes. Understanding these levels is essential for anyone interested in cheerleading, whether they’re aspiring cheerleaders, parents, or fans of this dynamic sport.

    So, next time someone asks you, “How many levels of cheer are there?” you’ll be ready with an informed answer that will illuminate the complex and fascinating world of cheerleading. Stay tuned for more insights into the sport of cheerleading!

    Conclusion

    The High V, the T-Jump, and the Liberty Stunt are three key moves in cheerleading that, when executed correctly and paired with the right music, can take your cheerleading routine to the next level. IPP Music is dedicated to providing the best cheerleading music that complements your routine

    Steve Pawlyk Signature Full

    SHARE YOUR CART