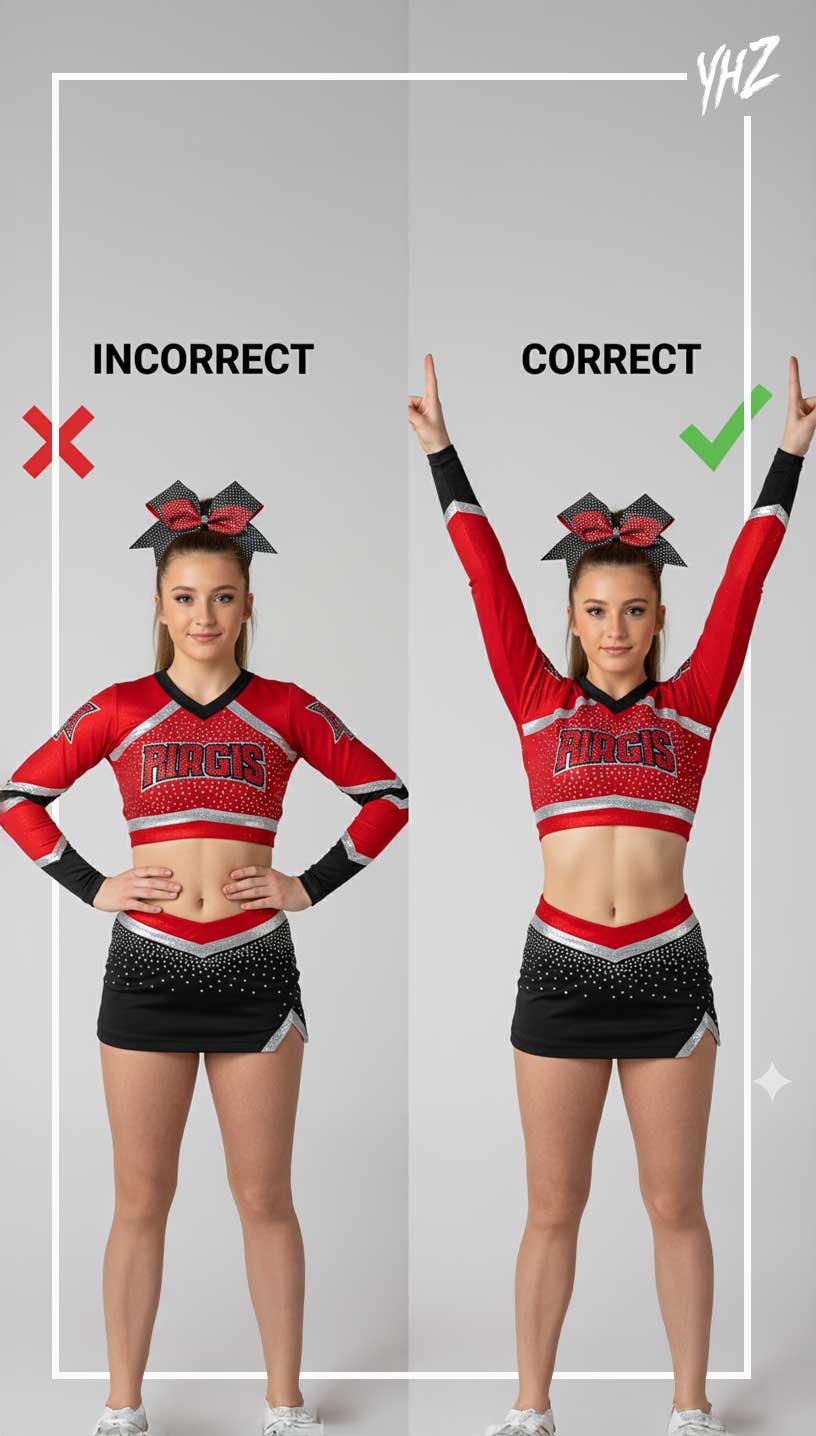
Tag Archives: all star cheer coaching

The summer skills audit: stop choreographing the cheer team you wish you had

cheerleading skills audit before choreography

By Steve Pawlyk

Published June 29, 2026

Every coach has done it.

You look at the team in June or July and imagine what they could become by competition season. The stunt group is close. The tumbling is almost there. The flyer has the body position if she stays tight. The bases can hit it when everyone is fresh. The jumps are not sharp yet, but they will be.

So the routine gets built around the future version of the team…a version that may never show up.

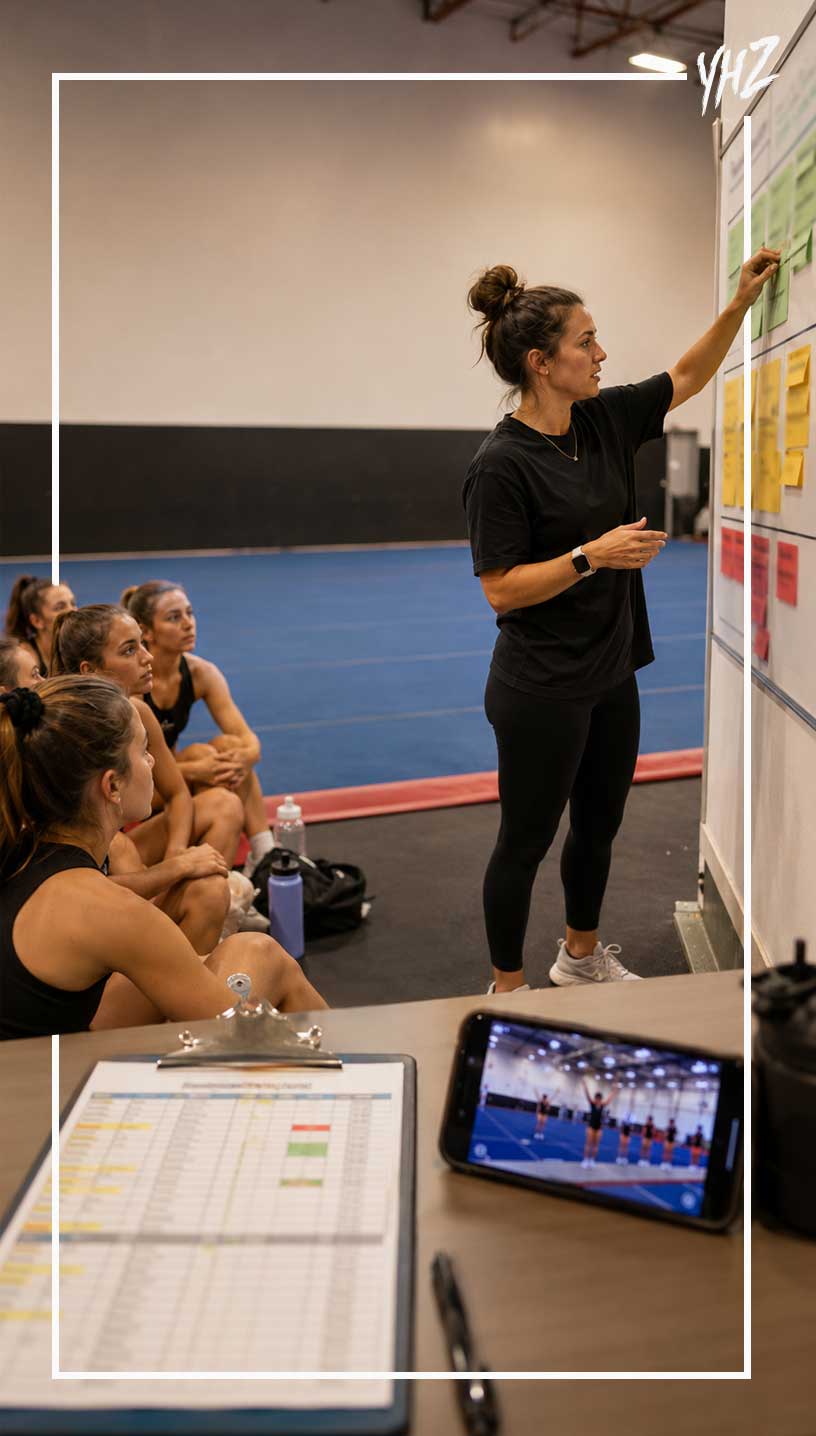
This is where a summer skills audit helps. It forces coaches to separate what athletes can actually hit from what they might hit later. That difference matters before choreography starts, before music gets ordered, and before athletes spend weeks learning a routine that does not fit them.

The goal is not to lower expectations. The goal is to build a routine with clean, realistic skills and smart upgrade paths. Coaches can still push the team. They just need to know which skills belong in the routine now, which skills need more time, and which skills should stay out until the team proves they can handle them.

What is a summer skills audit?

A summer skills audit is a routine-readiness check; not a tryout. It’s not a punishment or a way to embarrass athletes who are behind. It is a coaching tool.

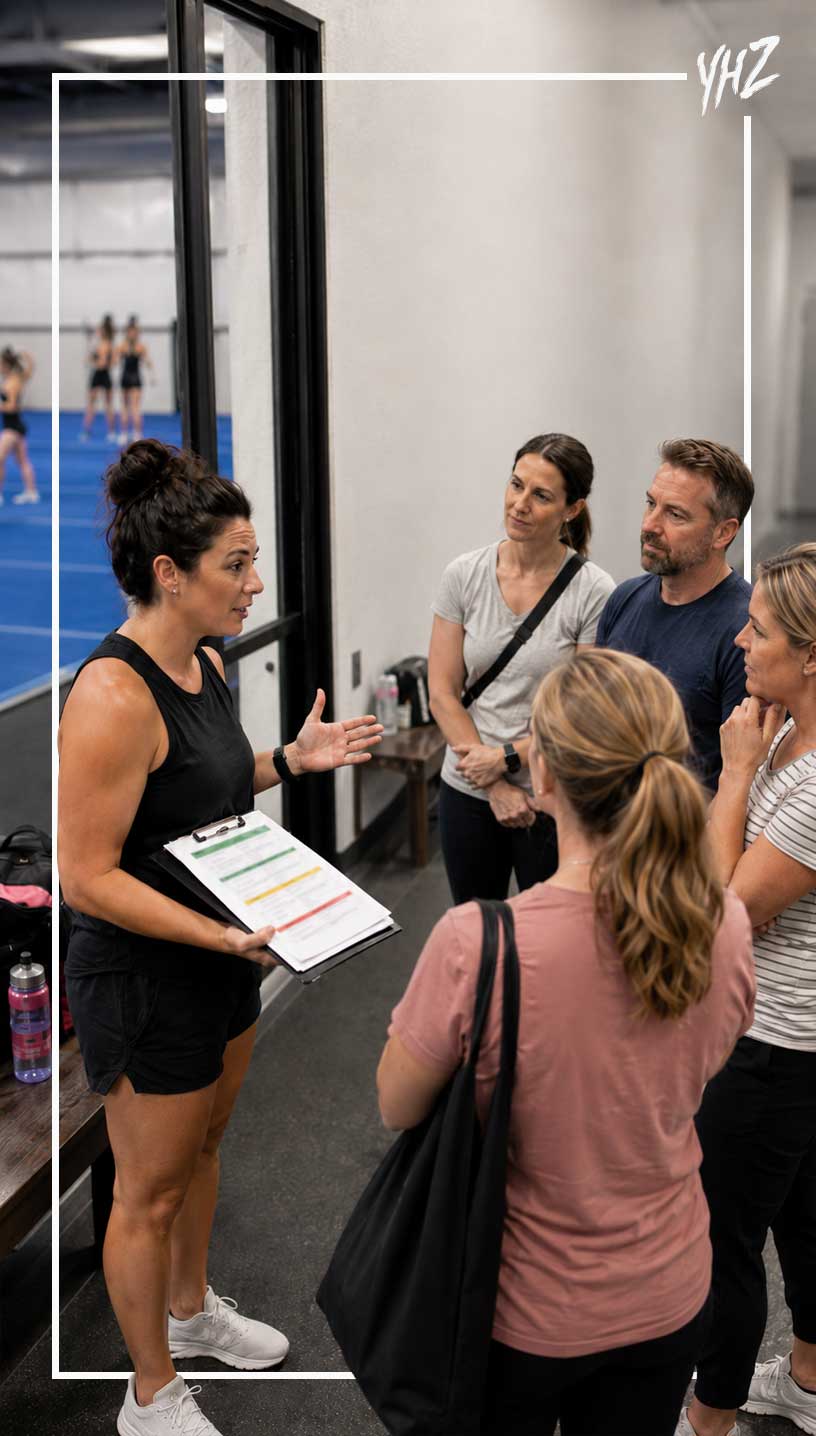
The audit asks one question over and over: Can this team perform this skill safely, cleanly, and consistently enough for choreography?
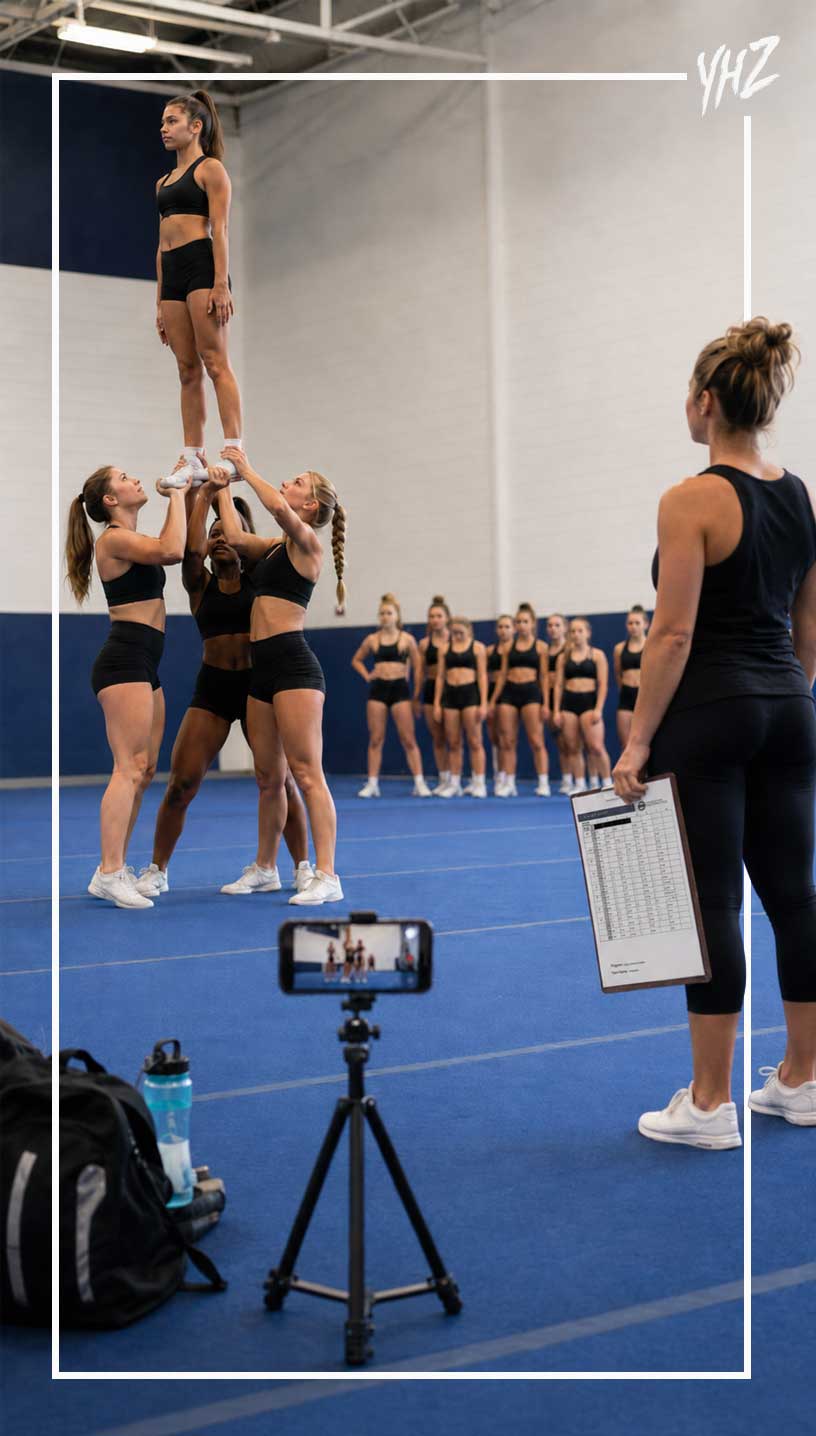
cheerleading practice plan

A skill that hits once in practice is not ready. A stunt that works only with one perfect group is not ready. A tumbling pass that lands when the athlete feels good but disappears under pressure is not ready. A pyramid section that needs five coach saves before it works is not ready. Summer is when coaches should find that out. Too many routines get choreographed around hope. Hope is fine in a team meeting.  It’s not a routine strategy.

Why coaches overestimate summer skills

Coaches usually do not overestimate their teams because they are careless. They do it because cheer makes almost-finished skills look tempting.

A stunt that hits three times in a row can feel routine-ready. Then the group loses it when they add counts, music, formations, fatigue, and pressure. A tumbler who lands a pass on a dead mat can look ready. Then the pass changes when the athlete has to wait through a transition, run from a new corner, and perform after jumps.

A flyer may hit a body position during drills. Then the same body position falls apart inside a full sequence with choreography before and after it. That’s normal…practice skills and routine skills are not the same thing. A summer skills audit closes that gap. It asks athletes to prove the skill in conditions that look more like the routine.

The 8-out-of-10 rule

A clean routine needs skills that repeat. For most teams, a useful standard is simple: if a skill does not hit cleanly at least 8 out of 10 times in practice, it should not be locked into choreography yet. That doesn’t mean the team stops training it. It means the coach treats it as an upgrade, not a foundation.

Use 3 categories:

Green skills are ready. They hit most of the time. Athletes understand the timing. Coaches do not have to stop practice every time the skill appears. The skill can handle counts, music, and pressure.

Yellow skills are close. They hit sometimes, but they still need help. Timing changes. Technique slips. Groups need extra resets. These skills may work in a routine if the coach builds a backup plan.

Red skills are not ready. They miss too often, need heavy spotting, create safety concerns, or only work when conditions are perfect. Red skills belong in training, not choreography.

The categories should stay flexible. A yellow skill can become green. A green skill can become yellow when the team adds movement or music. The audit is not a one-day verdict. It is a way to keep the routine honest.

Need Competition Music Blue 1

Audit stunts first

Stunts deserve the first audit because they take the most time to fix after choreography. A shaky stunt section does not stay isolated. It affects formations, transitions, pyramid timing, music pacing, athlete confidence, and the rest of practice. If a coach builds the routine around stunt skills that are not ready, the team spends the whole season chasing the routine instead of cleaning it.

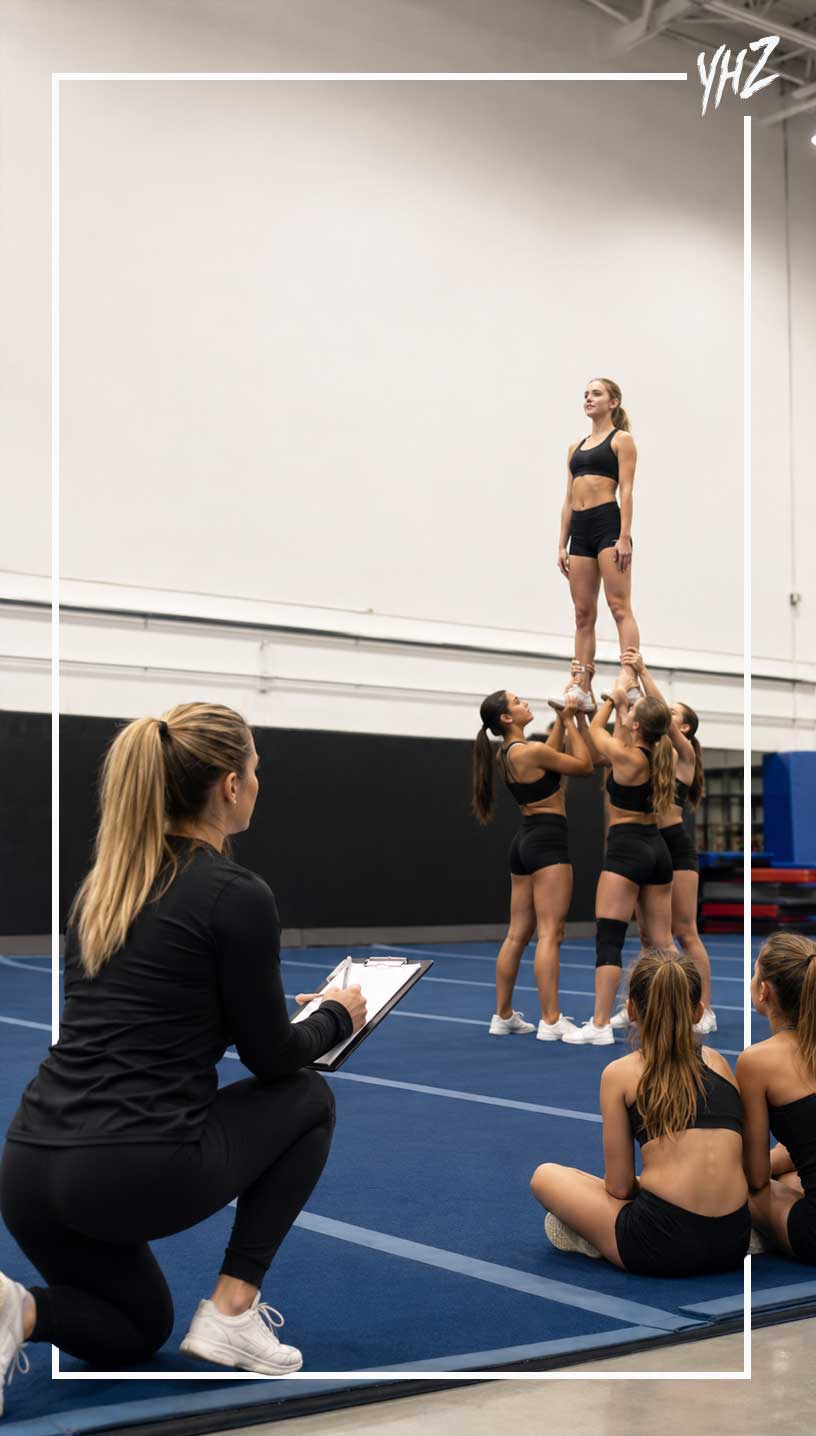
Start with each stunt group by itself. Ask the group to perform the skill ten times. Track clean hits, shaky hits, missed grips, late dips, unstable body positions, rough dismounts, and coach saves. Don’t count a skill as clean just because nobody fell.

A clean hit should look controlled. The flyer should show the intended body position. Bases should stay under the stunt. The back spot should not rescue every rep. The dismount should land safely. Athletes should know where they go next.

Then test the skill in motion. Add the entrance. Add counts. Add the transition before it. Add the transition after it. Add nearby groups. Add music when possible.

This is where the truth usually shows up. A stunt that looks good in isolation may not survive the routine. That does not make the skill useless. It tells the coach where the skill belongs.

Maybe it stays in training. Maybe it moves later in the routine. Maybe it gets simplified. Maybe only one group performs it. Maybe it becomes an upgrade after the first competition. That decision is easier in July than October.
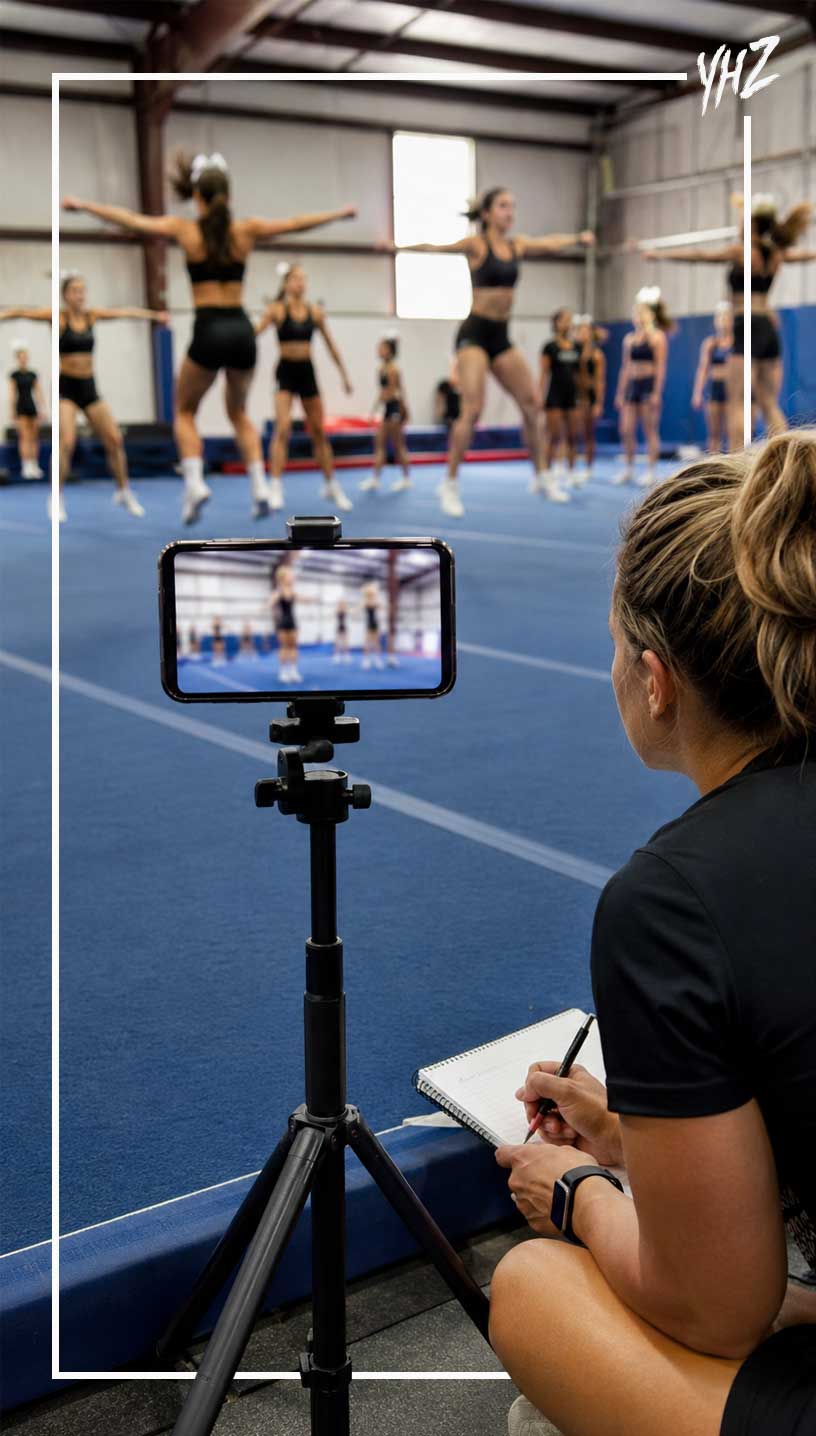
summer skills audit

Do not let one strong stunt group trick you

One strong group can make a team look more advanced than it is. That group hits the elite skill. Everyone gets excited. The routine gets built around that level of difficulty. Then the other groups spend months trying to catch up.

This is a bad trade.

Competition routines are judged as full-team products. If one group looks great and two groups fight for survival, the routine does not look strong. It looks uneven. The summer skills audit should judge the team, not the best group.

If only one group can hit the skill, the coach has a choice to make. Feature that group intentionally, or choose a skill the full section can hit. Both choices can work. Pretending the whole team owns the skill does not work.

A clean stunt section with slightly lower difficulty will usually age better than a high-difficulty section that scares everyone in the gym.

Audit tumbling under routine conditions

Tumbling is another place where coaches overcount skills.

An athlete may have a pass. That does not mean the pass belongs in the routine.

Test tumbling in the way the routine will use it. If the athlete has to run from a corner, test that corner. If the pass comes after jumps, test it after jumps. If the pass comes after a long transition, test it after movement. If the athlete has to wait on music, test the timing.

A tumbling pass should not count as routine-ready until the athlete can land it with the same setup they will use in the routine.

Coaches should also separate technical readiness from performance readiness.

A pass may be legal and land safely, but still look messy. Bent legs, low chest, uncontrolled rebounds, and scary landings can hurt the routine. They can also make the athlete less confident over time.

Some passes need more training. Some need a different placement. Some need to come out until the athlete can hit them without the whole section holding its breath.

That is not negative coaching. That is good routine design.

Audit jumps without lying to yourself

Jumps often get treated as a small section. They should not.

A weak jump section can make a polished routine look unfinished fast. Bent knees, low height, loose arms, bad timing, and messy landings are easy to see. Judges do not need replay to notice them.

A summer jump audit should test three things: technique, timing, and recovery. Technique asks whether the jumps have the shape the coach wants. Timing asks whether the team can hit together. Recovery asks whether athletes can land and move into the next skill without falling apart.

That last part matters. Many jump sections look acceptable until the team has to tumble, transition, or stunt immediately after. If the jumps drain the athletes so much that the next section suffers, the coach needs to know that now.

Do not build the jump section around the one athlete with great flexibility. Build it around what the team can hit together. Clean, synchronized jumps usually beat ambitious jump combinations that land like popcorn.
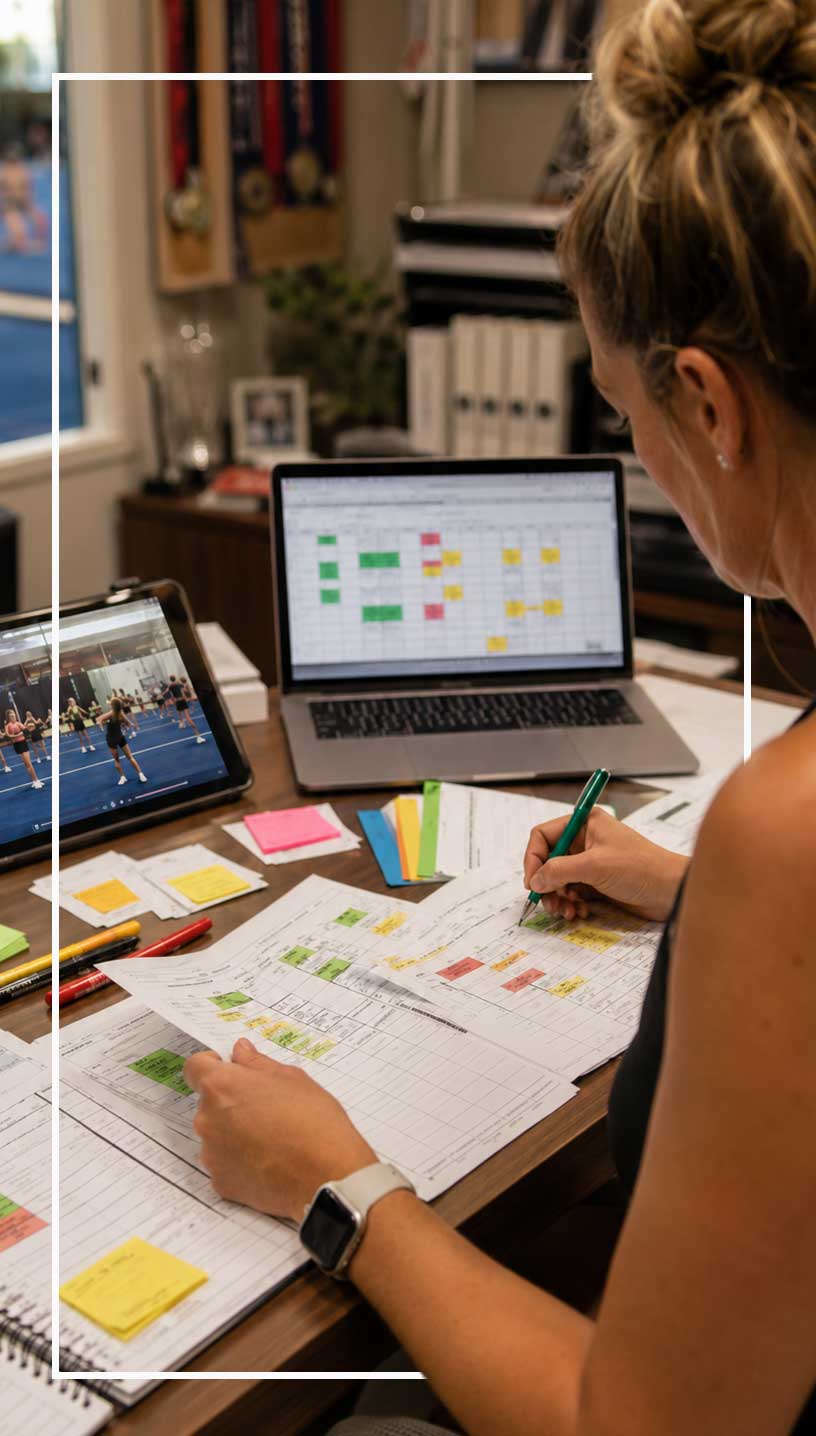
cheer routine planning

Audit pyramids in pieces

Pyramids can fool coaches because small pieces may work even when the full structure is not ready. Start with the parts.

Can each group hit its job? Can the bracers stay connected? Can flyers maintain body positions? Can bases move safely? Can the team hit the timing without a coach talking them through every count? Then connect the pieces.

This is where pyramid problems usually appear. Groups that hit alone may not travel well. Bracers may arrive late. Flyers may look unsure. Transitions may take more counts than expected. The pyramid may technically hit, but the visual may not read from the front.

The audit should include a front-view check. Record the pyramid from the judges’ angle and watch it without sound. If the visual does not make sense on video, music will not fix it. Pyramid difficulty should serve the routine. It should not become a maze the team barely survives.

Audit transitions like skills

Transitions are skills. Coaches do not always treat them that way, but they should.

A transition needs timing, spacing, body control, traffic awareness, and performance quality. Bad transitions make strong skills look worse. They also create avoidable stress for athletes.

During the summer audit, coaches should identify the athletes who struggle with spacing, speed, direction changes, and formation responsibility. That information should shape choreography.

Some teams can handle fast, layered transitions. Some teams need cleaner pathways and simpler movement. Some teams need extra counts because they have younger athletes, mixed experience levels, or big formation changes. That does not mean the routine has to feel slow. It means the routine has to move in a way the team can execute.

A coach who ignores transition skill level will end up cleaning the same traffic problems all season.

Film everything

Video makes the audit harder to argue with.

Athletes often feel like a skill hit because they survived it. Coaches may remember the best rep because it was exciting. Parents may hear that a skill is close and assume it should go in the routine.

Film solves a lot of that.

Record stunt reps, tumbling passes, jump sections, pyramid pieces, and short routine-style sequences. Watch them from the front. Watch them without stopping after the first hit. Watch the misses too.

The camera shows what the judges will see.

It also helps coaches spot patterns. Maybe a stunt group misses every time the flyer rushes the body position. Maybe a tumbler changes technique when tired. Maybe the jump timing problem starts with the arms, not the legs. Maybe the transition looks messy because two athletes cross the same lane.

Those details are easy to miss live.

A summer skills audit does not need fancy software. A phone camera and honest eyes are enough.

summer skills audit

Create a no-drama scoring system

A skills audit can get emotional if athletes think every result is a judgment of their worth. Keep the language clean.

Do not label athletes as good or bad. Label skills as ready, close, or still training. That distinction matters.

A flyer is not a problem because one body position is inconsistent. A base is not a failure because one grip needs work. A tumbler is not behind as a person because one pass is not routine-ready.

The audit should help athletes see the path forward.

Use simple notes:

Ready for routine
Needs more reps
Needs technique fix
Needs safer version
Use only in featured spot
Train as upgrade
Do not use yet

That kind of language gives coaches useful information without turning the audit into a public ranking.

Build the routine with a base version and upgrades

The smartest coaches do not choose between easy and hard. They build layers.

Start with a base routine the team can hit. Then plan upgrades that can replace sections when the team earns them.

For example, a stunt group may start with a cleaner prep-level body position, while training the extended version as an upgrade. A tumbling section may start with the passes athletes can land under pressure, while keeping harder passes ready for later. A pyramid may use a safer connection first, then add a harder visual once timing improves. This approach gives the team confidence early.

It also keeps the routine from becoming stale. Athletes can work toward upgrades without feeling like the first version is a failure. The base version should still look intentional. It should not look like a watered-down placeholder. It should be choreographed to score as cleanly as possible.

If the upgrade never becomes safe or consistent, the team still has a routine. That is the point.

Set deadlines for routine decisions

A skill cannot stay “almost ready” forever. Coaches need decision deadlines. Without them, the team keeps waiting for skills that may not arrive in time.

Set a date before choreography when each major skill must prove itself. Set another date after choreography for upgrades. Set a final date before the first competition when the coach stops adding risk and starts cleaning.

The exact timeline depends on the program, but the principle stays the same. At some point, a skill either belongs in the routine or it does not. This protects the team. It also protects practice time.

A team that changes major routine sections too late loses cleaning reps. Athletes get nervous. Coaches get frustrated. Music edits pile up. The routine starts to feel temporary. Temporary routines do not perform with confidence.
cheerleading tumbling audit

Watch for the “one more week” trap

“Give it one more week” can become a season-long habit. Sometimes one more week makes sense. A group may need reps. An athlete may be coming back from vacation. A stunt may need one technical fix. But coaches should ask what will actually change in that week.

Will the team get more reps with the full group present? Will a coach fix a specific technique problem? Will the athlete get private tumbling work? Will the group drill the entry that keeps breaking?

If the answer is no, one more week may only delay the decision. Hope is not a training plan.

When a skill stays inconsistent after repeated chances, the coach should move it out of the routine and keep training it separately. That choice may feel disappointing in the moment. It usually saves the routine later.

Match skills to the team’s identity

The summer audit should not only ask what the team can do. It should ask what the team can sell.

Some teams are explosive. Some are sharp and clean. Some have strong stunt technique. Some have big personalities. Some have excellent dancers. Some have powerful tumbling but need simpler transitions. Some have young athletes who perform better when the routine is clear and confident. The routine should fit that reality.

Do not build a routine that hides the team’s best qualities because everyone is chasing difficulty. Use the audit to find what the team can own.

If the team has strong jumps, give the jump section a real moment.

If the team has one standout tumbler, feature that pass without forcing everyone else into skills they cannot match.

If the team performs well, give them music and choreography that let them connect with the crowd.

If the team has clean stunts, do not bury them inside overcomplicated transitions.

A good routine makes the team look more like itself. A bad routine makes the team look like it is pretending.

Use the audit to guide music and count sheets

The skills audit should feed directly into the count sheet.

If the team needs extra time for stunt setups, the count sheet should show that. If a transition needs more room, plan the counts before the music gets built. If the pyramid has one major visual, make sure the music supports that moment. If jumps need a clean recovery before tumbling, do not cram the next section too close.

Music cannot solve a routine that ignores skill readiness. A producer can help with pacing, energy, voiceovers, sound effects, and section changes. But the coach has to know what the team can actually execute.

The audit gives the music producer better information. It also helps the choreographer make smarter choices. This is where planning pays off. The routine feels less forced because the counts, skills, and music all come from the same honest picture of the team.

What to do when parents push for harder skills

Parents hear what their athlete says. Athletes often say the skill is close. That can create pressure.

A parent may ask why a stunt is not in the routine. An athlete may say they hit it at practice. Another parent may compare the team to a rival program. Someone may post a video of one successful rep and wonder why the coach will not use it. This is where the audit helps.

The coach can explain that routine decisions come from consistency, safety, and full-team execution. One hit does not decide choreography. Ten reps tell a better story. Routine conditions tell an even better one. Keep the message simple.

The team will train upgrades. The routine will use the skills that give the team the best chance to hit. The goal is not to avoid difficulty. The goal is to earn it.

Most parents can understand that when the coach explains it before emotions take over.

A sample summer skills audit plan

Coaches can run a basic audit in one or two practices. Start with stunts. Test the main skills each group wants to use. Track clean hits out of ten. Add entries and exits after the first round.

Move to tumbling. Test standing tumbling and running tumbling from routine-style setups. Record landings, timing, and consistency.
cheer tumbling readiness

Run jumps as a group. Check height, timing, arm placement, landings, and recovery into the next section. Break down pyramid pieces. Test each group, then connect sections. Film from the front.

Finish with transitions. Give athletes formation changes and watch spacing, speed, and confusion points. After practice, sort the results into green, yellow, and red.

Then make routine decisions from that list.

Green skills can go into the first choreography plan.

Yellow skills need backup versions.

Red skills stay in training until they prove they are ready.

The audit does not need to be complicated. It needs to be honest.

The coach’s real job

Cheer coaches live between ambition and reality. Push too little, and the team never grows. Push too much, and the routine becomes a weekly emergency.

The summer skills audit helps coaches find the middle. It gives athletes room to improve without letting unfinished skills take over the routine. It helps choreographers build around truth. It helps music producers support the routine instead of guessing. It helps parents understand why consistency matters more than one good video.

Most of all, it protects the team from spending the season chasing a version of itself that only exists in the coach’s imagination.

Build for the team in front of you.

Train for the team they can become.

Those are different jobs. Good coaches know when they are doing each one.

Steve Pawlyk Signature Full

IPP's Premade Mixes are USA Cheer Compliant and customizable!  Add Sound FX, swap songs, & more!  Add your Team Name to the mix for only $10! 

SLAM artwork
Full_Out_130 mp3 image
1 minute cheer mix
WAKE UP THE FIRE
SLAM artwork
WAKE UP THE FIRE
Full_Out_130 mp3 image
1 minute cheer mix

USASF 2026-2027 Cheer Rules: Nothing Changed. Now Use It.

USASF 2026 2027 cheer rules 1

By Steve Pawlyk

Published June 10, 2026

USASF just dropped its 2026-2027 update, and the headline was almost boring. No changes to the cheer rules. No changes to the cheer age grid.

A lot of coaches read that, shrugged, and scrolled past. Big mistake. A quiet rule year is the best gift your program gets all season.

cheer age grid 2026 2027

What stayed the same

The cheer age grid keeps its current structure for 2026-2027. Birth years move forward one year, the way they always do. The top and bottom age limits for each division hold steady.

That covers every division, including Flex and Non-Tumbling. USASF landed here after surveying and meeting with more than 2,000 members. So this was a deliberate call, not an oversight.

For you, the math stays simple. The athlete who fit a division last year fits the same division this year. Nothing about your roster planning gets harder.

What actually changed

Two things shifted, and both live on the dance side. If you only coach cheer, you can almost skip this part. Almost.

First, Intermediate and Premier dance routines get shorter. The max time drops from two minutes and fifteen seconds to two flat. That is fifteen seconds you have to cut and rebuild around.

Second, USASF added a Groups and Pairs safety rule on inverted movement. It limits how a dancer travels through an inverted position during a descent. If you coach dance, read the full rule text before you choreograph anything.

Why a “no changes” year is a gift

Most seasons, you burn your summer relearning rules. You decode new legality charts. You rebuild skills that suddenly crossed a line.

Not this year. Your progressions from last season still stand. The skills you taught in May are still legal in August.

That frees up something you almost never have. Time. You get a full off-season to make good athletes great instead of making legal athletes legal again.

Need Competition Music Blue 1

What to do with the calm

Go deep, not wide. Pick the skills your teams rushed last season and slow them back down. Clean up the technique you papered over when the clock was ticking.

Audit your progressions on paper. Map how a flyer moves from a basic skill to the hard one, step by step. A written progression survives staff turnover and keeps your gym consistent.

Then build depth where you are thin. If your seniors lacked bases, train younger athletes to fill that hole now. You know the rules will not move under your feet.

This is also the year to fix culture, not just skills. Set your standards and expectations before the season heats up. Calm rule years reward the programs that plan.

Don’t get too comfortable

Quiet now does not mean quiet forever. The IASF plans a new 100-point score sheet for the 2027 Cheerleading World Championships. Bigger scoring shifts are already on the way.

So treat this season as runway. The programs that build real skill depth now will adapt faster when the next change lands. Use the gift while you have it.

USASF rules update

USASF handed you a rare season with stable footing. The athlete who fit last year fits this year, and your progressions still hold. Smart coaches will not coast on that. They will pour the saved time into technique, depth, and culture.

Do that, and a boring rule update turns into your edge.

Steve Pawlyk Signature Full

IPP's Premade Mixes are USA Cheer Compliant and customizable!  Add Sound FX, swap songs, & more!  Add your Team Name to the mix for only $10! 

SLAM artwork
Full_Out_130 mp3 image
1 minute cheer mix
WAKE UP THE FIRE
SLAM artwork
WAKE UP THE FIRE
Full_Out_130 mp3 image
1 minute cheer mix

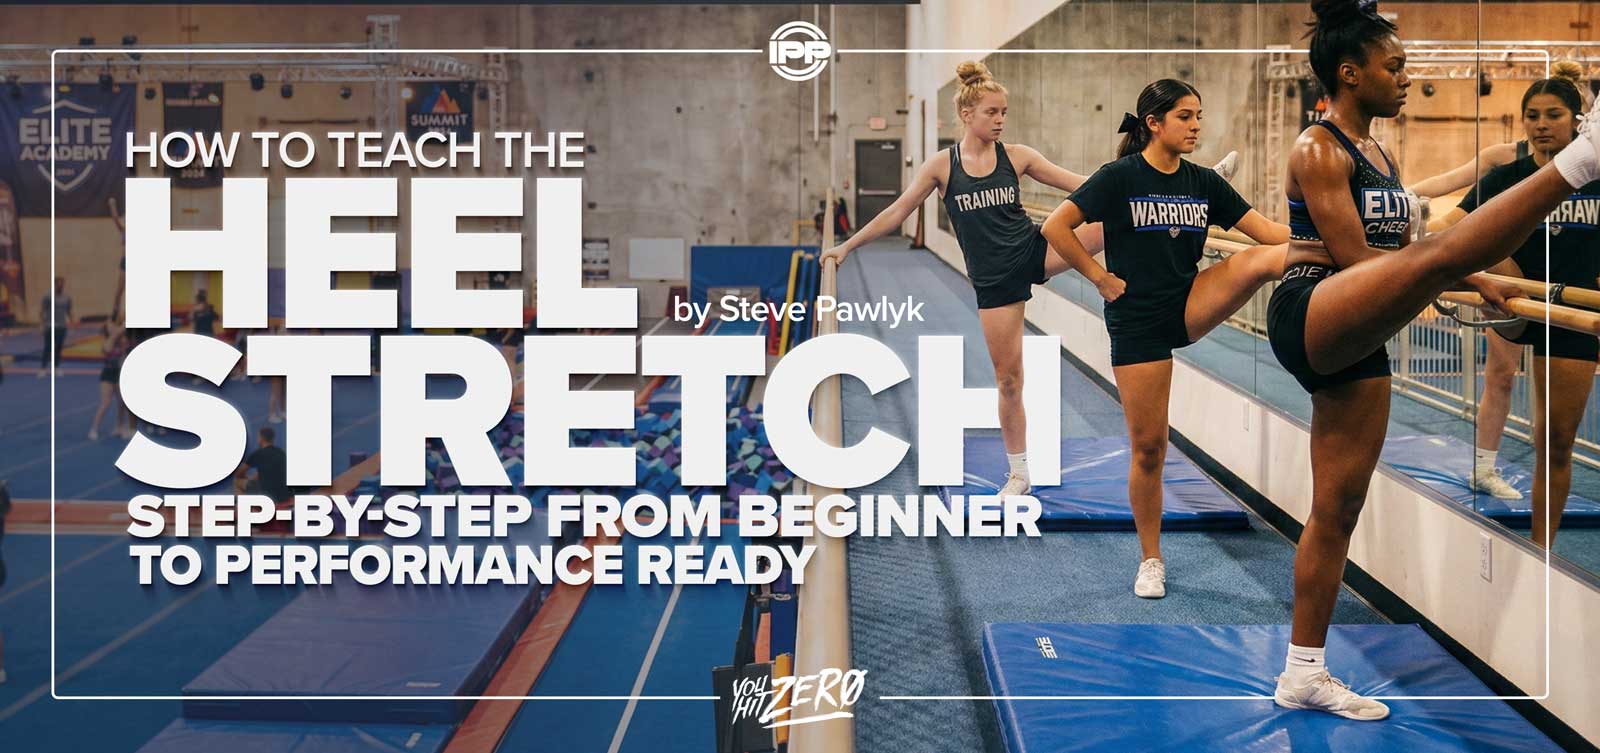
How to Teach the Heel Stretch: Step-by-Step From Beginner to Performance Ready

How to Teach the Heel Stretch Step by Step From Beginner to Performance Ready

By Steve Pawlyk

Published March 2, 2026

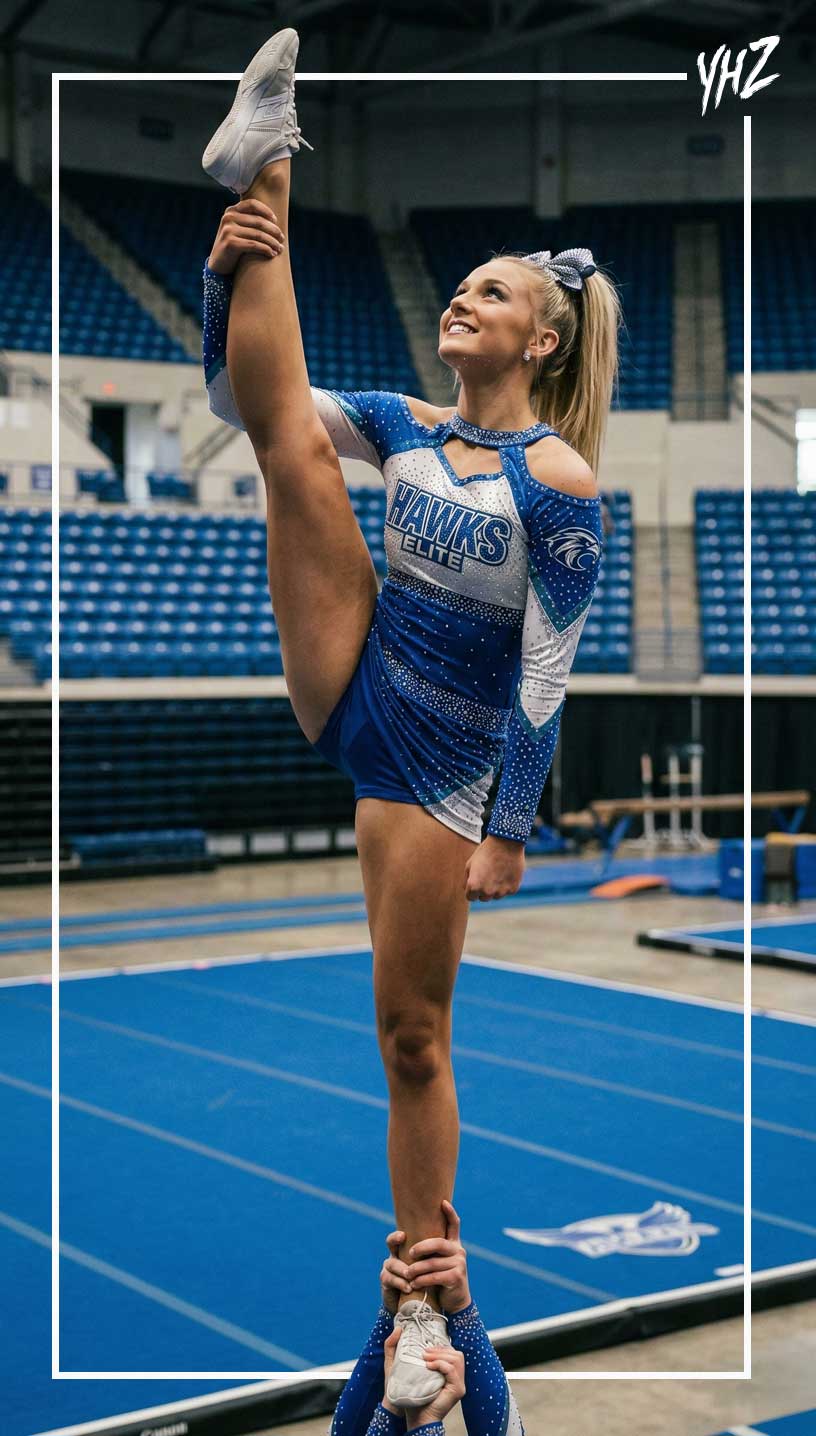
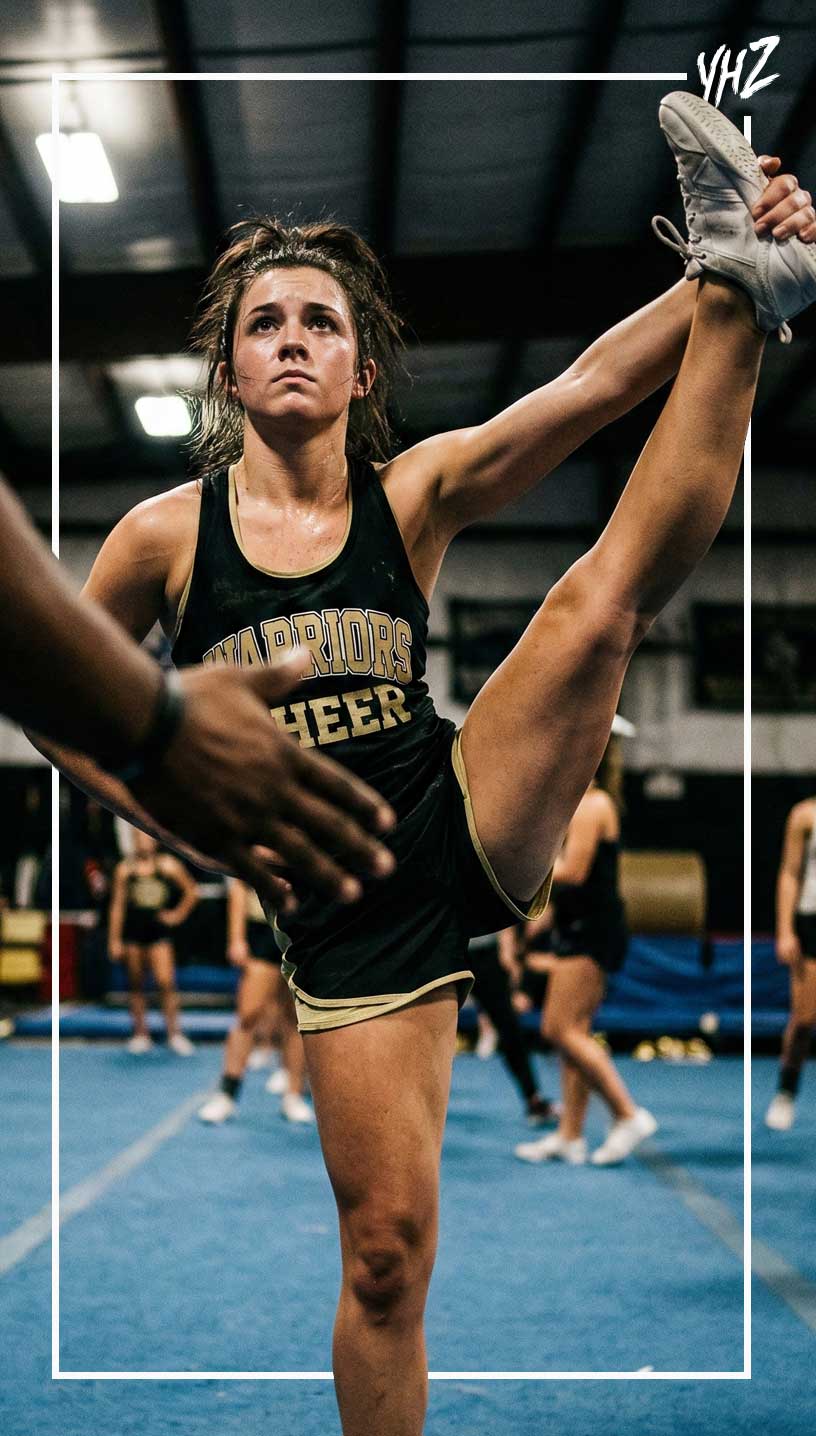
The Heel Stretch is one of the most recognizable flyer skills in competitive All-Star cheerleading — and one of the easiest to perform incorrectly. A clean Heel Stretch requires more than flexibility; it depends on balance, body awareness, and coordinated engagement through the core, back, and shoulders. Whether you’re coaching a first-time flyer or refining elite athletes, teaching this skill systematically helps prevent common issues like bent supporting legs, wobbly bases, and over-pulled extensions.
This guide walks you through a complete progression for teaching the Heel Stretch, including one-on-one coaching methods, small group practice structures, team integration, and drills for strength, balance, and flexibility.

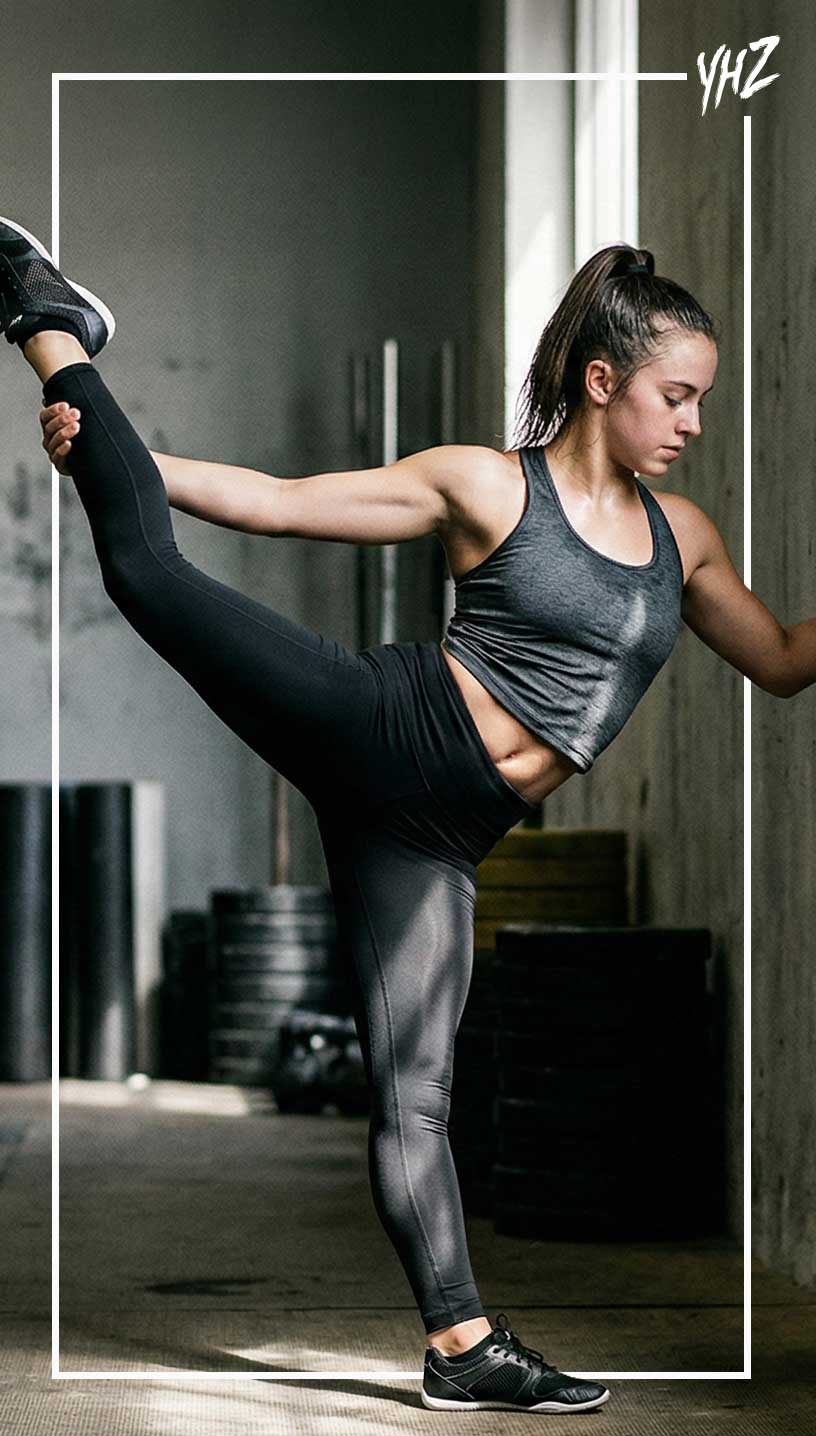
all star cheer coaching heel stretch drills

Understanding the Mechanics of the Heel Stretch

Definition:
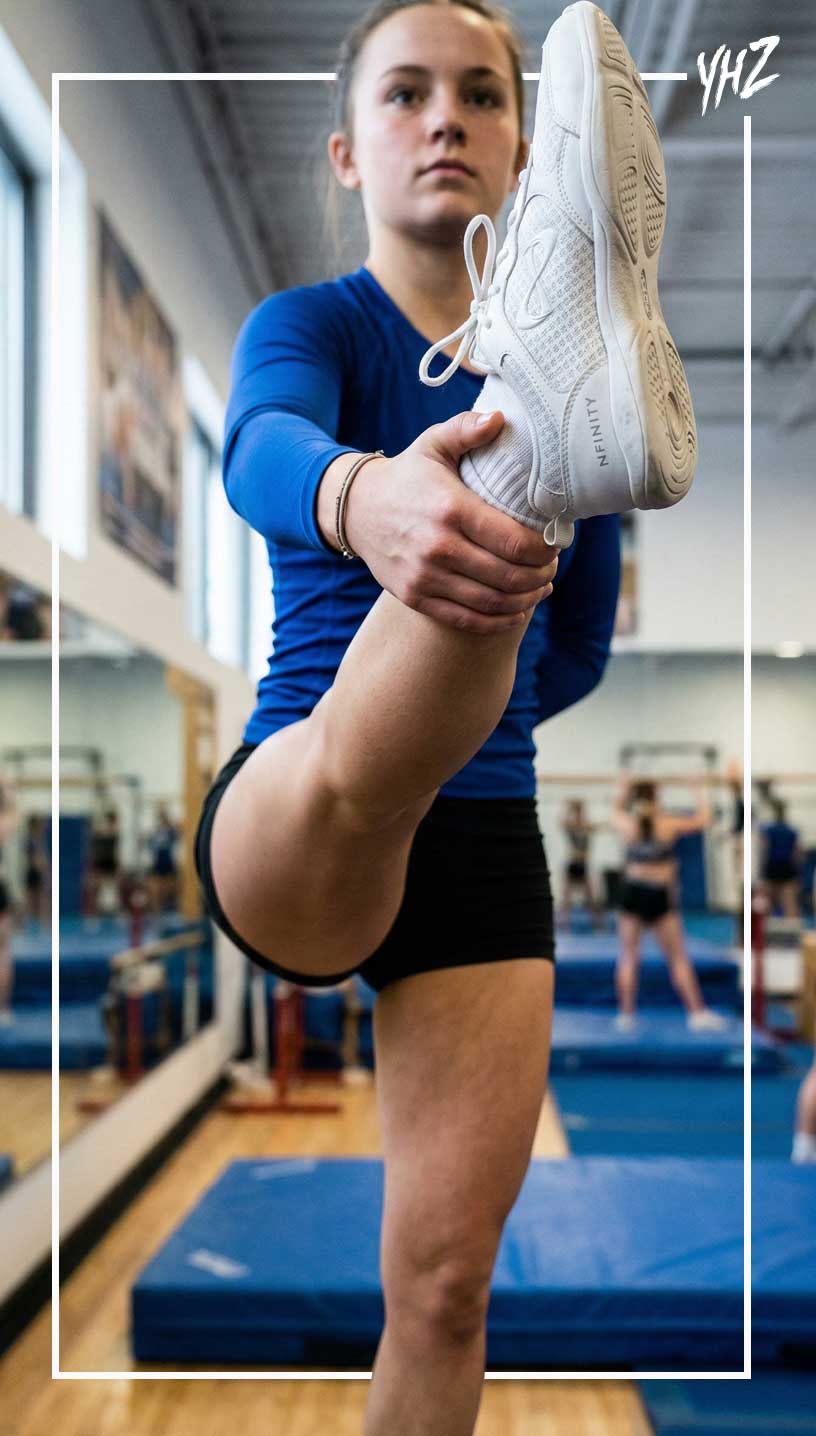
A Heel Stretch is a stunt or body position where the flyer balances on one leg while pulling the opposite leg straight upward, holding the heel with the same-side hand, and extending it near the head.

Technical Breakdown:

  • Base leg: Strong, locked, and aligned over the foot center.
  • Pulling arm: Reaches across to grab the same-side foot (right hand to right foot).
  • Pulling leg: Straightened through the knee, ankle pointed, foot flexed slightly inward.
  • Core: Engaged and centered; ribs remain stacked over hips.
  • Shoulders: Square, not twisted toward the pulled leg.
  • Chest: Lifted and open.

Key Concept:
The Heel Stretch isn’t a flexibility move — it’s a balance and control move that happens to require flexibility.

Step-by-Step: Teaching the Heel Stretch One-on-One

Step 1: Warm-Up and Flexibility Prep

Before any attempts, the flyer must stretch hamstrings, hips, and shoulders.

  • Dynamic prep: Leg swings, high kicks, and hip circles.
  • Static stretches: Pike stretch, seated straddle, standing quad hold.
    Cue: “Flexibility is freedom — control is what makes it beautiful.”

Step 2: Teach the Proper Grip

  • Have the athlete lift one leg slightly and grab the heel (not the arch or ankle).
  • Cue: “Thumb on the inside, fingers wrapping around the outside edge.”
  • The arm should extend upward and slightly outward to allow shoulder space.
Need Competition Music Blue 1

Step 3: Build Core Balance on the Ground

  • Begin on flat ground in front of a mirror.
  • Athlete holds a wall or barre for balance while lifting leg to waist level.
  • Cue: “Keep your standing knee locked and your hips even.”
  • Focus on posture and tension before adding height.

Step 4: Gradually Increase Height

Use progressive height goals:

  • Waist level → chest level → chin level → full extension.
    Between each, correct for shoulder tilt, bent leg, or hip rotation.

Step 5: Isometric Holds for Strength

  • Hold the Heel Stretch for 5–10 seconds, release slowly.
  • Cue: “Pull up through your heel, not from your back.”
  • Repeat 5 times per leg for strength and endurance.
cheer balance drills body control leg flexibility

Teaching Small Groups

Step 1: Partner Assistance for Grip and Balance

Pair flyers with a partner or coach to stabilize shoulders and hips.

  • The partner gently supports the flyer’s wrist or extended leg for form.
  • Cue: “Balance through your belly button — not your hand.”

Step 2: Mirror Group Training

Have 3–4 flyers practice Heel Stretches side by side facing mirrors.
Visual feedback helps reinforce symmetry and prevent over-pulling.

Step 3: Controlled Release Drills

Flyers practice controlled lowering from full stretch to prep position in 3 counts.
Cue: “Lower with control — don’t drop your power.”

cheer heel stretch flyer heel stretch

Teaching the Full Team

Step 1: Progression-Based Grouping

Divide flyers by readiness level:

  • Level 1: Learning grip and hip alignment.
  • Level 2: Holding at chest/chin height.
  • Level 3: Full extension and stability.

Each group works specific goals simultaneously to keep all athletes engaged.

Step 2: Integration With Bases

When progressing to stunt groups:

  • Bases must focus on stability first, not height.
  • Cue bases: “Drive through your legs, not your arms.”
  • Cue flyers: “Stand tall before you stretch — don’t chase the leg.”

Step 3: Team Visual Cohesion

When multiple Heel Stretches are performed at once (e.g., pyramid or opening stunt sequence), use video review to check for consistent pull angles and line heights.

Common Athlete Errors and How to Correct Them

Error

Cause

Correction Strategy

Bent pulling leg

Lack of hamstring flexibility

Add daily hamstring stretches and band-assisted leg lifts.

Hips rotate open

Over-pulling or weak glutes

Cue: “Square your hips to the front.” Incorporate hip stability drills.

Chest drops forward

Core disengagement

Add hollow holds and planks; cue “Lift your ribs.”

Shoulders twisted

Pulling across the body

Adjust grip; cue “Keep your sternum forward.”

Wobbling base leg

Weak ankle or poor balance

Train balance on Bosu ball or single-leg squats.

Drills to Build Heel Stretch Mastery

  1. Wall-Assisted Heel Stretch
    Flyer stands near wall, uses fingertips for support. Practice slow lifts to build stability and balance.
  2. Elastic Band Leg Lifts
    Attach a resistance band to the foot and hold the other end in the hand. Lift the leg upward for 8 reps to strengthen hip flexors.
  3. Three-Phase Hold Drill
    Lift and hold Heel Stretch for 3 counts, release halfway for 3 counts, then return to full stretch. Builds endurance and control.
  4. Mirror Line Drill
    Perform Heel Stretch facing mirror, aligning both hips and shoulders to the visual line.
  5. Full-Team Balance Challenge
    All flyers hold Heel Stretch for 10 seconds. Any wobble restarts the clock. Promotes focus and balance under pressure.

Conditioning for Heel Stretch Power and Stability

  • Single-leg Romanian deadlifts: 3×10 each leg for balance and hamstring control.
  • Core rotations with resistance band: 3×15 to stabilize trunk.
  • Glute bridges and clamshells: 3×20 for hip alignment.
  • Overhead shoulder presses: 3×12 for supporting arm endurance.
    Cue: “Every muscle that holds you still makes your Heel Stretch better.”

Final Coaching Takeaways

A perfect Heel Stretch blends flexibility with control. Teach it progressively — never force it. Prioritize core engagement, posture, and hip alignment before height. The best Heel Stretches look effortless because the strength and balance behind them are trained deliberately. With repetition and precision, your flyers will perform controlled, confident Heel Stretches that wow both judges and spectators.

cheer heel stretch technique

Steve Pawlyk Signature Full

IPP's Premade Mixes are USA Cheer Compliant and customizable!  Add Sound FX, swap songs, & more!  Add your Team Name to the mix for only $10! 

SLAM artwork
Full_Out_130 mp3 image
1 minute cheer mix
WAKE UP THE FIRE
SLAM artwork
WAKE UP THE FIRE
Full_Out_130 mp3 image
1 minute cheer mix

How to Build Muscle Memory for Strong, Consistent Motions Through Repetition Drills

How to Build Muscle Memory for Strong Consistent Motions Through Repetition Drills

By Steve Pawlyk

Published November 18, 2025

Consistency in motion execution is what makes a cheer team look professional and synchronized under pressure. Every perfect hit, clean line, and timed transition is the product of muscle memory – the body’s ability to reproduce movement automatically after enough structured repetition. Building that memory isn’t about doing endless reps; it’s about doing the right reps, with precision, timing, and awareness.
This guide provides All-Star and High School coaches with a system for teaching athletes how to engrain sharp motions into their neuromuscular patterns through progressive drills, cue phrasing, and conditioning that reinforce strength and accuracy over fatigue.

Understanding Muscle Memory in Cheer Technique

Definition:
Muscle memory is the automatic execution of a movement pattern through repeated neural reinforcement. When taught correctly, it allows athletes to hit perfect motions even under stress or fatigue.

How It Works:

  1. Cognitive Stage: Athlete consciously focuses on technique and positioning.
  2. Associative Stage: Movements become smoother as the brain refines timing and coordination.
  3. Autonomous Stage: The athlete executes motions without conscious effort – consistency achieved.

Key Principle:
Repetition alone doesn’t create good muscle memory – perfect repetition does. Poorly executed reps hardwire bad habits.

cheer muscle memory

Step-by-Step: Building Muscle Memory One-on-One

Step 1: Lock in Perfect Form

Before any repetition begins, correct form must be flawless.
Cue: “You’re not training speed yet – you’re training accuracy.”

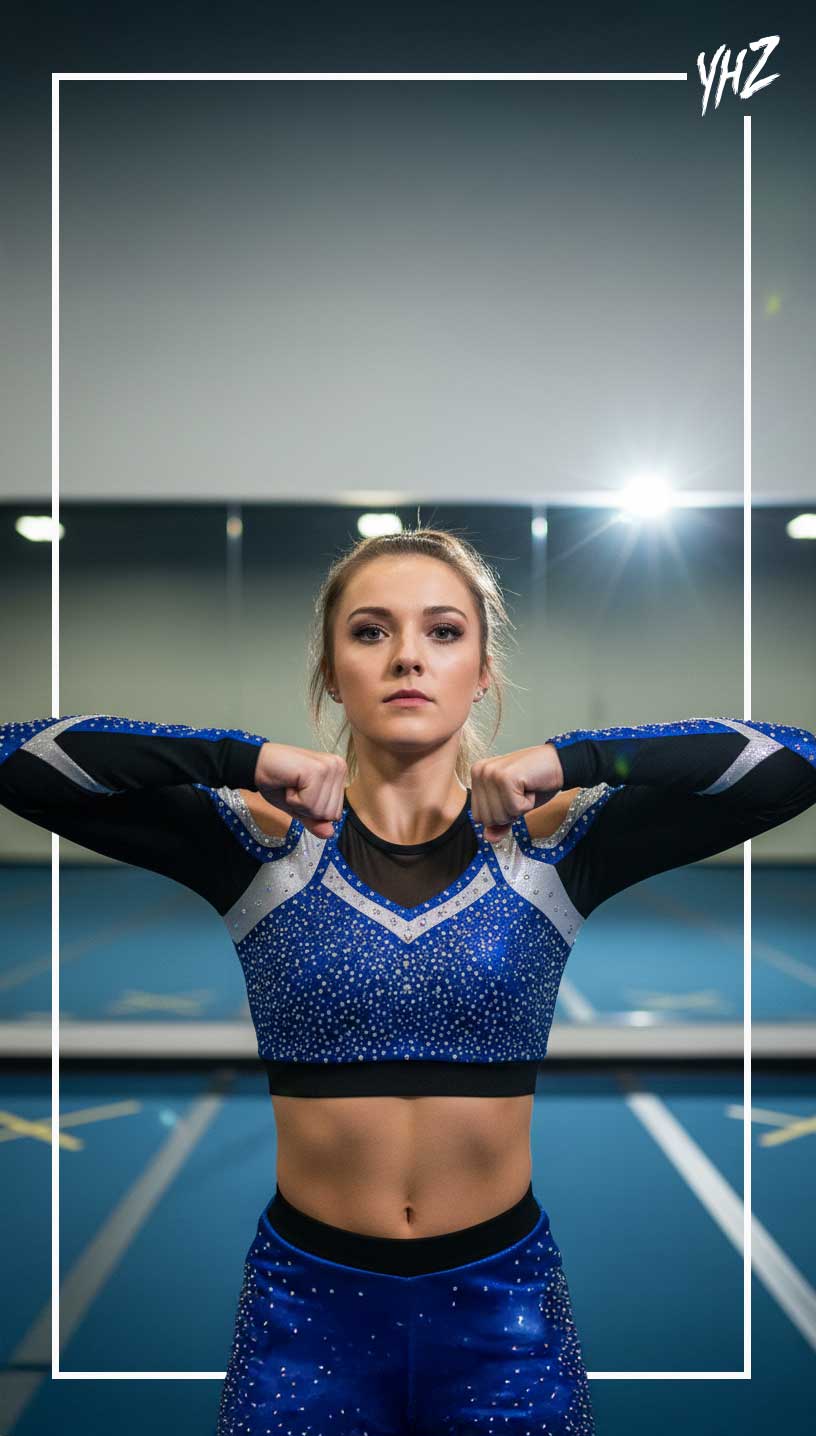
  • Have the athlete hold each motion (High V, T, Low V, etc.) for 10 seconds.
  • Check alignment: wrists, elbows, shoulders, and posture.
  • Only when it’s perfect, begin repetitions.

Step 2: Use Isolated Reps

Perform each motion independently for 20–30 reps.

  • Start slow (counted tempo).
  • Cue: “Every hit should feel identical – no freelancing.”
  • Record video for self-analysis if possible.

Step 3: Add Controlled Transitions

After form mastery, link two or three motions together (e.g., T → High V → Low V).
Cue: “Same path, same stop, same body tension every time.”

Step 4: Integrate Feedback Loops

Have the athlete perform 10 reps, pause, and assess one technical element (e.g., wrist height).
This breaks the mindless repetition cycle and keeps focus on micro-correction.

Teaching Small Groups

Step 1: Repetition Blocks

Group athletes in sets of 3–5 and assign a “motion captain.”

  • The captain counts rhythm and monitors alignment.
  • After 20 reps, rotate captains to develop peer correction habits.

Step 2: The “Mirror Wall” Method

Line up facing mirrors. Perform the same motion sequence simultaneously.
Cue: “Every reflection should move as one body.”

Step 3: Accountability Through Counting

Use a metronome or voice count (“1-2-HIT”) to unify timing.
If anyone breaks rhythm or position, the group restarts.
Encourages focus, teamwork, and precise repetition.

Teaching Full-Team Consistency

Step 1: Team Motion Circuits

Design circuits combining 4–6 motions repeated for 8-count cycles.
Example: High V → T → Punch → Low V → High V → T
Run for 4 sets of 8 counts each, resting 15 seconds between.

Cue: “Every rep builds your muscle’s memory bank – make it count.”

Step 2: Layered Speed Progression

  1. Slow drills for angle control.
  2. Medium-speed drills for rhythm.
  3. Full-speed music drills for endurance and performance readiness.

Step 3: Coach’s Visual Consistency Check

Record full-team reps from multiple angles.
Freeze frames to compare arm levels, tension, and spacing.

Need Competition Music Blue 1

Coaching Language That Reinforces Repetition Quality

Effective Cues:

  • “Precision over pace.”
  • “Your body learns what you repeat – teach it the right thing.”
  • “Every rep is a blueprint.”
  • “Consistency lives in your shoulders and core.”
  • “Don’t just move – memorize.”

Avoid:

  • “Again!” without feedback – it trains errors.
  • “Faster!” before accuracy is built.

Common Athlete Errors and How to Correct Them

Error

Cause

Correction Strategy

Inconsistent arm height

Visual feedback missing

Mirror or video recording between reps.

Fatigue leading to slouch

Weak shoulder/core endurance

Add plank variations and static V-holds.

Speed sacrificing control

Overemphasis on tempo

Return to half-speed repetitions with counts.

Bent elbows mid-rep

Poor tension control

Cue: “Steel arms, soft shoulders.” Use resistance bands.

Uneven motion timing

Lack of auditory rhythm

Drill with metronome or 8-count track.

Drills to Build Long-Term Muscle Memory

  1. Timed Repetition Sets
    Perform 30 seconds of continuous motions, focusing on identical form each rep. Rest 15 seconds. Repeat 3 sets.
  2. Mirror Match Drill
    Partner athletes to mirror one another’s timing and motion accuracy. Visual reinforcement builds synchronization.
  3. Count Control Drill
    Run 8-count transitions slowly, freezing on each count. Forces awareness of arm path and pause integrity.
  4. “Fade Test” Drill
    Perform 25 perfect reps, then 5 more at fatigue level. Evaluate how form deteriorates. Reinforces endurance awareness.
  5. Endurance Ladder
    Add one rep per round (10 → 11 → 12, etc.). Athletes must maintain quality under load.

Conditioning for Muscle Memory Retention

Muscle memory relies on neural efficiency and physical endurance. Integrate these supportive exercises:

  • Shoulder isometric holds: 3×30 seconds per position.
  • Core rotations: 3×15 to maintain torso control through motion.
  • Scapular pushups: 3×20 to reinforce shoulder stability.
  • 8-count repetition drills: 4 rounds at full speed to simulate performance pressure.

Cue: “Train your body to remember perfect, not just repeat motion.”

cheer repetition drills

Repetition is only effective when it’s intentional. Muscle memory develops through technical accuracy, consistent cueing, and mindful pacing. As an All-Star coach, your job is to make every repetition meaningful – teaching athletes that quality repetition builds confidence and reliability under competition stress. Perfect repetition creates automatic excellence.

Steve Pawlyk Signature Full

IPP's Premade Mixes are USA Cheer Compliant and customizable!  Add Sound FX, swap songs, & more!  Add your Team Name to the mix for only $10! 
SLAM artwork
Full_Out_130 mp3 image
1 minute cheer mix
WAKE UP THE FIRE
SLAM artwork
WAKE UP THE FIRE
Full_Out_130 mp3 image
1 minute cheer mix

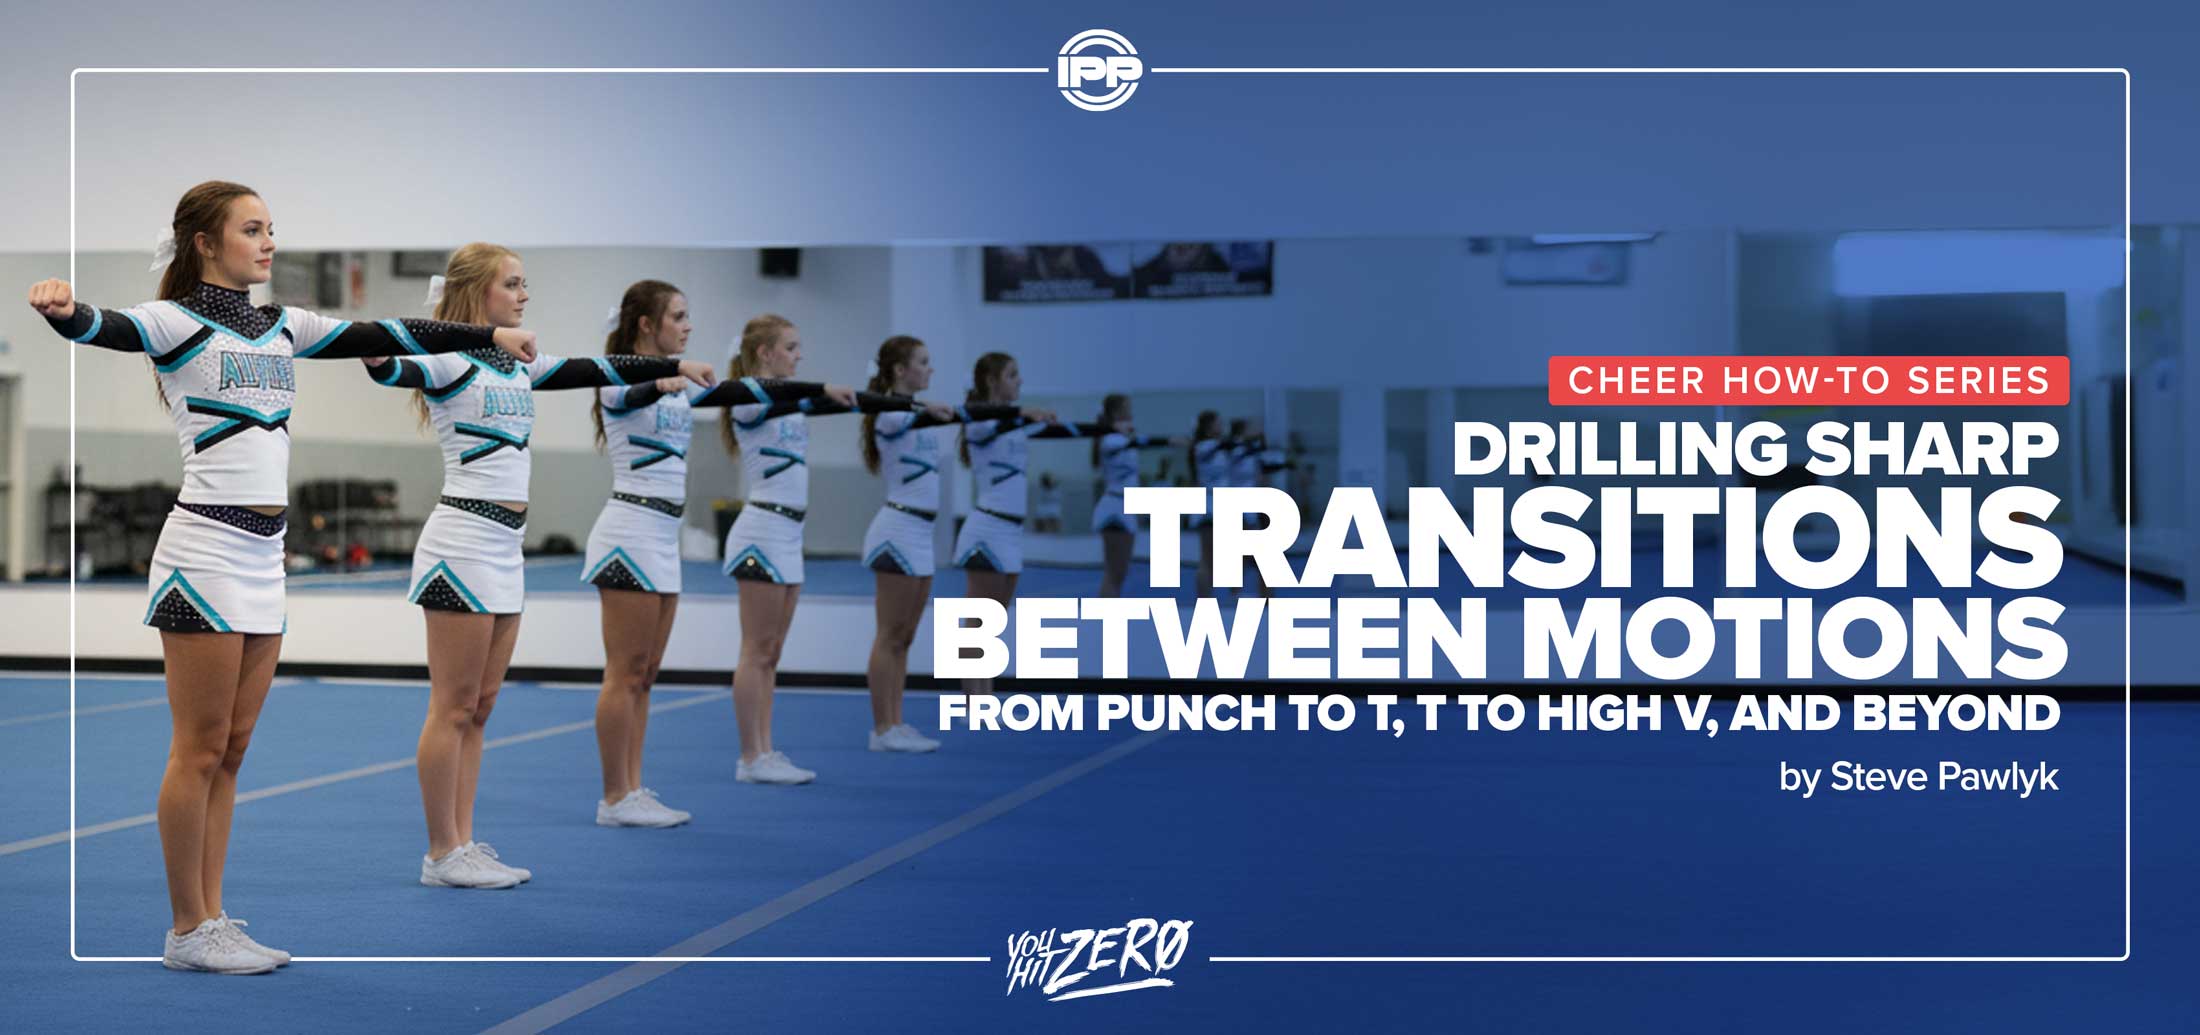
Drilling Sharp Transitions Between Motions: From Punch to T, T to High V, and Beyond

Drilling Sharp Transitions Between Motions From Punch to T T to High V and Beyond

By Steve Pawlyk

Published November 12, 2025

Sharp transitions are what separate a good routine from a championship-level one. Every clean line depends not only on where a motion lands but how it gets there. In All-Star cheer, those split-second pathways between positions – Punch to T, T to High V, High V to Low V – are where most visual sloppiness occurs. This guide explains how to teach precise, fast, and uniform transitions step-by-step, with drills and cue language that create muscle memory, synchronization, and control across your entire team.

cheer motion transitions

Understanding Motion Transitions

Definition:
A motion transition is the controlled movement connecting two defined positions in a routine. The transition must travel the shortest, most direct path with even tension and zero bounce at the endpoint.

Core Mechanics:

  • Economy of Motion: The arms travel the smallest path possible between positions.
  • Constant Tension: Shoulders, core, and wrists stay engaged throughout.
  • Timing: Every athlete hits the new motion on the same count.
  • Stillness Between Movements: Once a position hits, there is no residual wobble.

Common Transition Types:

  1. Linear: Straight pathways (e.g., T → High V).
  2. Rotational: Turning the arms around the axis of the shoulders (e.g., Punch → T).

3. Sequential: Linked multi-position changes (e.g., T → High V → Low V).

Step-by-Step: Teaching Sharp Transitions One-on-One

Step 1: Isolate the Start and End Points

Begin by teaching each motion independently until the athlete can hold both perfectly.
Cue: “You can’t travel cleanly between two crooked spots.”

Once the endpoints are mastered, have the athlete slowly connect them — pausing halfway to confirm arm path and shoulder control.

Step 2: Slow-Motion Rehearsal

Execute the transition in four counts:

  • Count 1–2: Travel halfway.
  • Count 3–4: Arrive at endpoint and freeze.
    Cue: “No swinging. No bouncing. Just slide and stop.”

Step 3: Gradual Acceleration

Once technique is clean, reduce to 2 counts, then 1 count, maintaining the same pathway discipline.
Use a metronome (90–120 BPM) to build rhythmic consistency.

Step 4: Add Visual Checkpoints

Use mirrors or record video to ensure elbows and wrists track symmetrically.
Cue: “Both hands should take the same route, same speed, same finish.”

Need Competition Music Blue 1

Teaching Small Groups

Step 1: Synchronization Drills

  • Have 3–5 athletes perform T → High V together to an 8-count.
  • Assign one athlete as “visual lead.” Others mirror their timing and endpoint.
  • Cue: “If you can see another arm move before yours, you’re late.”

Step 2: Mirror Pair Work

Partners face each other and perform transitions simultaneously.
Each athlete watches for delay, angle deviation, or path wobble.
Swap partners every 30 seconds for fresh observation.

Step 3: Pathway Consistency

Use painter’s tape on the mirror or wall to mark arm travel paths.
Have athletes trace those lines visually while transitioning.

cheer technique drills

Teaching the Whole Team

Step 1: Sectional Isolation

Work in formation lines. Each line executes a single transition (e.g., Punch → T) repeatedly on count 8.
Front line serves as timing reference for the rest of the team.

Step 2: Layered Tempo Progression

Run the same transition series at three speeds:

  1. Half-tempo with pauses for alignment.
  2. Full-tempo to counts.
  3. Music-speed under pressure.

Record each version for video review.

Step 3: Full-Team Transition Pyramid

Group the team by skill level: beginners drill T ↔ High V, intermediates add Low V, advanced groups run sequential combos.
Cue across levels: “Fast is fine, sloppy is not.”

cheer motion transitions

Coaching Language That Reinforces Clean Transitions

Effective Cues:

  • “Travel tight – elbows scrape your ribs.”
  • “Path, not power.”
  • “Snap through, don’t swing through.”
  • “Freeze like the motion owes you money.”
  • “Speed without chaos.”

Avoid:

  • “Faster!” – without form reference, it causes flailing.
  • “Bigger!” – encourages over-rotation

Drills to Build Transition Precision

  1. Four-Count Path Drill
Execute one transition in four controlled counts. Builds awareness of midpoint control.
  2. Metronome Timing Drill
Perform continuous transitions to beats at 100–120 BPM; freeze on downbeat. Develops rhythm discipline.
  3. Laser Line Drill
Use a low laser or elastic cord to mark shoulder height. Arms should never cross below or above during T → High V.
  4. Mirror Snap Challenge
Athletes face mirrors; coach calls random transitions (“T → Punch,” “High V → Low V”). Points for exact count accuracy.
    5. Full-Team Transition Ladder
Entire team runs a chain of motions (Punch → T → High V → Low V → T). Each error restarts the ladder. Builds endurance and focus.

Common Athlete Errors and How to Correct Them

Error

Cause

Correction Strategy

Arm swing too wide

Lack of spatial awareness

Tape floor/mirror lines; cue “Shortest path wins.”

Delay between counts

Weak timing control

Use audible 8-counts or metronome to reinforce rhythm.

Over-rotation or bounce

No core engagement

Add planks and hollow holds; cue “Stop from your ribs.”

Elbows bent mid-path

Fatigue or poor triceps activation

Strengthen with resistance bands; cue “Lock then travel.”

Unsynchronized finishes

Visual dependency

Drill “eyes closed” reps to develop proprioception.

Conditioning for Transition Endurance

Sharp transitions demand explosive muscle control and sustained tension. Integrate:

  • Shoulder raises: 3×12 front/lateral combo sets.
  • Core twists with med ball: 3×20 for torso stabilization.
  • 8-count motion circuits: Repeat 3 rounds nonstop for stamina.

Cue: “You don’t just hit motions — you connect them with power.”


Transitions define the rhythm, cleanliness, and energy of your choreography. Precision between motions communicates professionalism and teamwork.
Teach your athletes to value the space between counts as much as the counts themselves. Clean transitions are a learned habit — built through repetition, awareness, and exact language from you, the coach.

Steve Pawlyk Signature Full

IPP's Premade Mixes are USA Cheer Compliant and customizable!  Add Sound FX, swap songs, & more!  Add your Team Name to the mix for only $10! 

SLAM artwork
Full_Out_130 mp3 image
1 minute cheer mix
WAKE UP THE FIRE
SLAM artwork
WAKE UP THE FIRE
Full_Out_130 mp3 image
1 minute cheer mix

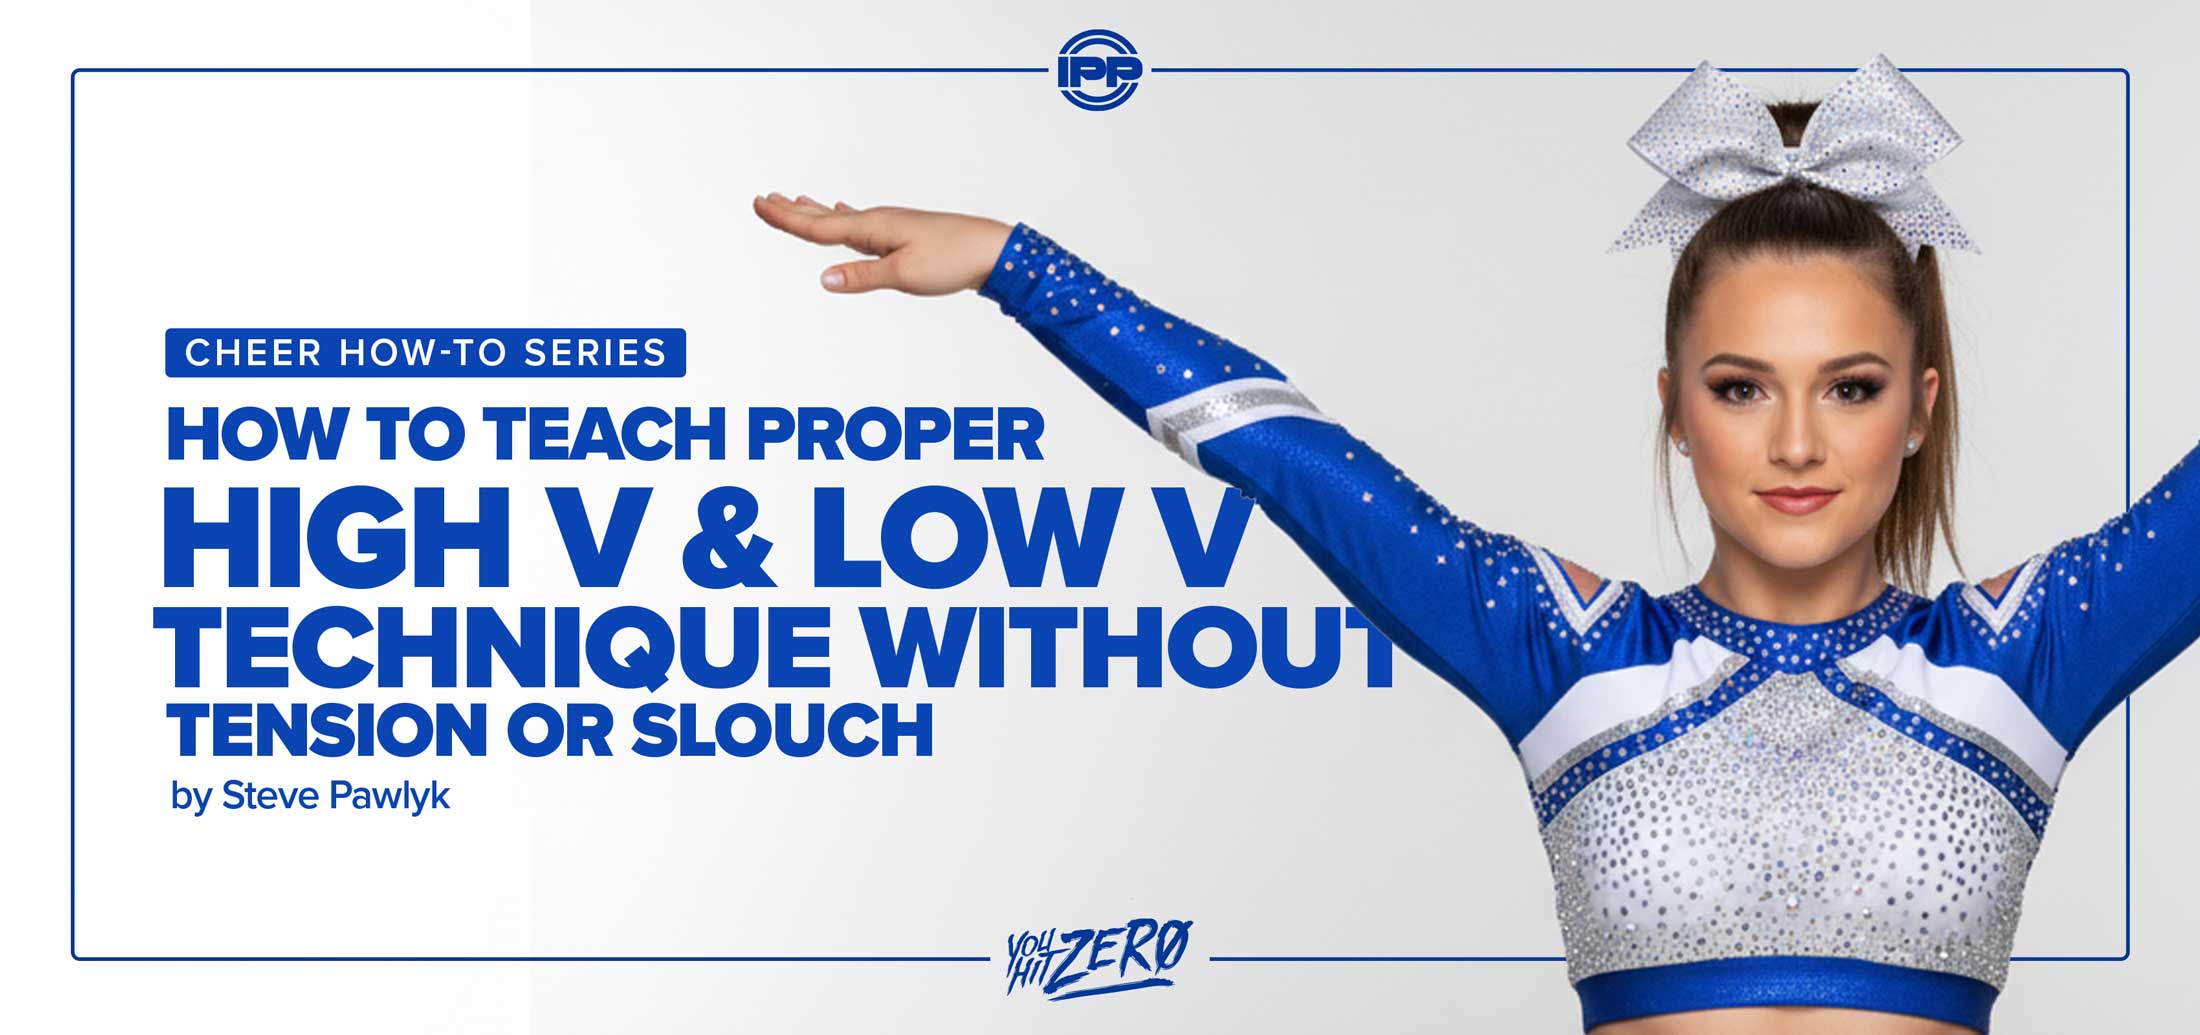
How to Teach Proper High V and Low V Technique Without Tension or Slouch

How to Teach Proper High V and Low V Technique Without Tension or Slouch

By Steve Pawlyk

Published November 11, 2025

The High V and Low V are two of the most common motions in competitive All-Star cheer – and two of the most frequently performed incorrectly. Even experienced athletes struggle with shoulder elevation, flared ribs, or collapsing posture that make these basic shapes look soft or uneven. For coaches, mastering how to teach and refine these motions builds the foundation for every visual element that follows.

Watch elite teams like Cheer Extreme Raleigh SSX (six-time World Champions as of 2025) or GymTyme Illinois Fever (back-to-back World Champions and 2025 MAJORS Champions), and you’ll immediately notice the razor-sharp precision of their V motions. Teams like South Coast Cheer Fearless (three consecutive World titles from 2023-2025) and Cheer Athletics Plano Cheetahs (2025 MAJORS Champions in Large Coed) demonstrate how flawless fundamentals translate to championship-level performances. Top Gun All Stars TGLC, with nine World Championship titles, and The Stingray Allstars Peach and Orange (both 2025 MAJORS Champions) exemplify what happens when shoulder placement, angle consistency, and core engagement become non-negotiable standards.

This guide breaks down the biomechanics, teaching progressions, drills, and cue language that produce clean, strong V-lines without stiffness or slouching – the same techniques that separate world-class programs from the rest.

Understanding the Mechanics of the High V and Low V

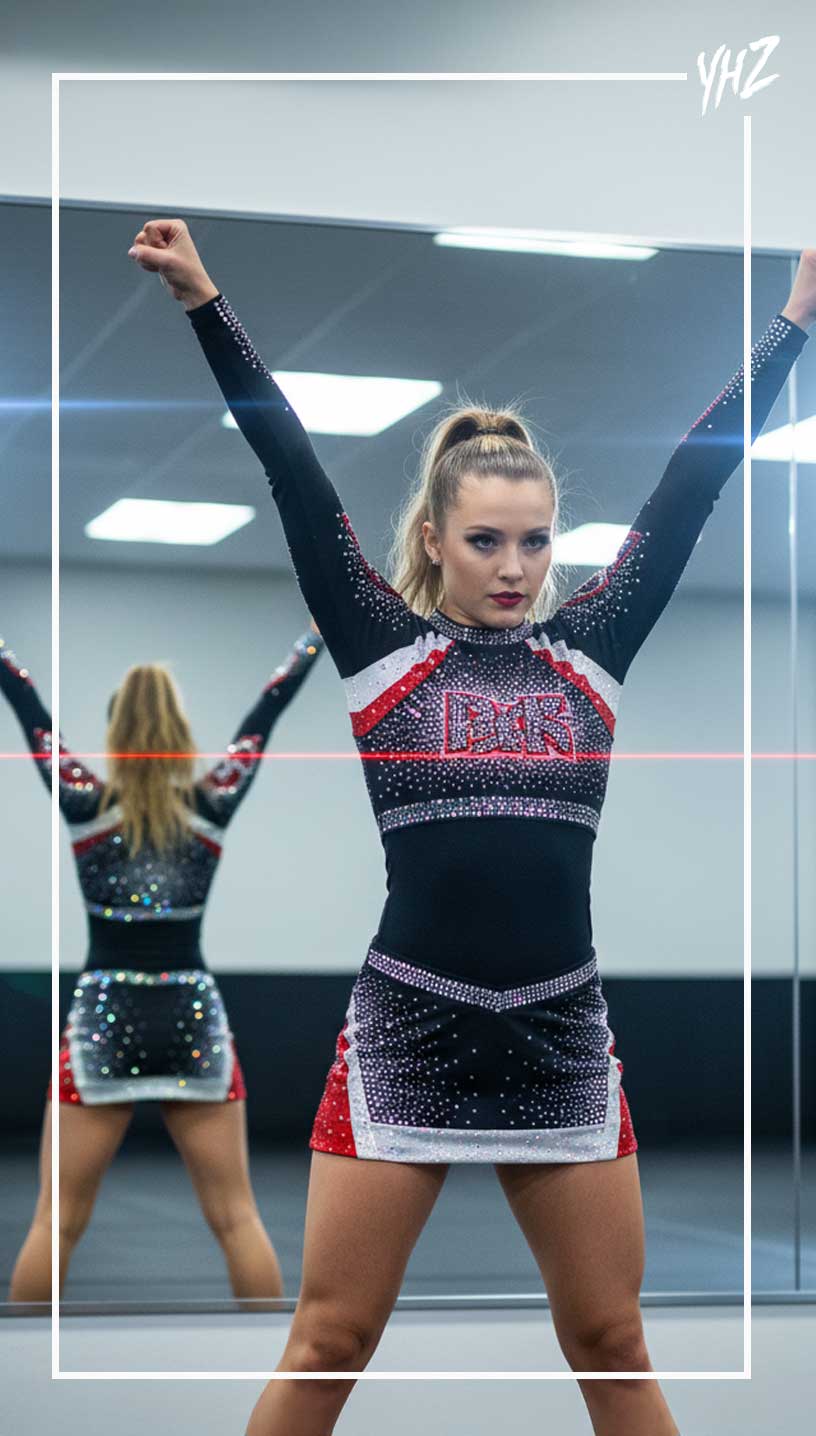
High V: Arms extend upward at approximately 45° from the head, forming a “V” with palms facing forward. Shoulders remain depressed, core engaged, and wrists aligned with the forearm.

Low V: Arms extend downward at approximately 45° from the hips with the same shoulder and palm orientation. The torso remains tall; no leaning or hip shift.

Key Concepts:

  • Shoulder stability: Press shoulders down and back to avoid lifting into the neck.
  • Core control: The rib cage should stay locked over the hips.
  • Angle precision: Both arms hit identical 45° angles from the body’s centerline.
  • Hand posture: Palms open, fingers tight, wrist flat with forearm.
cheer v motions

Step-by-Step: Teaching the High V and Low V One-on-One

Step 1: Establish Correct Posture

Have the athlete stand in front of a mirror, feet together, core tight.
Cue: “Imagine a straight pole running from your ears through your hips — stay tall against it.”

Checkpoints:

  • No rib flare.
  • No arched back.
  • Shoulders pressed down, not forward.
    Step 2: Build Arm Pathways
  • Start in a clean stance. Slowly lift arms to High V using a controlled path.
  • Cue: “Slide your arms up invisible rails until they stop at 45°.”
    Reverse to Low V while keeping the chest tall.
    Step 3: Activate Proper Muscle Engagement

Have the athlete perform isometric holds for 10 seconds in each position.

  • Cue: “Press your shoulders down into your back pockets while reaching long through your fingertips.”
    This balances relaxation and engagement — no over-tightening through the traps.

Teaching Small Groups

When working with 3–5 athletes, visual consistency becomes the goal.

Step 1: Mirror Line Drill

Athletes line up facing a mirror. Coach calls “High V!” — everyone hits and holds.
Cue: “Your wrists should live on the same invisible shelf.”

Step 2: Shoulder Suppression Awareness

Place light resistance bands under each athlete’s armpits, anchored behind them. As they hit High V, they feel upward resistance.
Cue: “Keep your shoulders under control — don’t let the band lift you.”

Step 3: Peer Alignment Feedback

Partners watch from the side to ensure the 45° line is consistent.
Correction language: “Your V is too narrow/wide — match your partner’s arm spacing.”

GymTyme Illinois is particularly known for their attention to technical detail in every transition and count. Coach Colleen Peddle notes that their athletes “strive to be their best every time they practice,” which is evident in Fever’s consistent execution of fundamentals like V motions throughout their championship routines.

Need Competition Music Blue 1

Teaching the Whole Team

Step 1: Floor Grid for Angle Consistency

Mark 45° lines on the floor with tape extending outward from each athlete’s center point. These act as alignment guides for both High V and Low V. Cue: “Hit your V to the line – not beyond it.”

Step 2: Visual Synchronization

Film the team from the front and above if possible. Pause frames at each V to identify uneven angles. Adjust arm width and height as a group.

This filming technique is standard practice at top programs. Watch any performance from The California All Stars Black Ops or World Cup All Stars Shooting Stars and you’ll see the results of this level of video analysis – perfect synchronization that creates powerful visual impact.

Step 3: Integration into Choreography

Transition drills: practice moving from T → High V → Low V → punch → High V on counts 1-8. Cue: “Every V is identical – same reach, same stop, same confidence.”

Coaching Language That Resonates

The words a coach uses determine how tension or relaxation manifests. Effective cues:

  • “Lift without shrugging.”
  • “Reach from your back, not your neck.”
  • “Arms long, ribs in.”
  • “Energy out your fingers, not your traps.”
  • “Tall spine, heavy shoulders.”

Avoid:

  • “Tighten up” – creates trap tension.
  • “Higher arms” – causes shoulder lift.

Common Athlete Errors and How to Correct Them

Error: Shoulders lift toward ears

Cause: Over-activation of upper traps

Correction: Cue downward press: “Slide shoulders into your back pockets.” Add lat-pull drills.

Error: Rib flare / arched back

Cause: Weak core engagement

Correction: Incorporate plank and hollow-body holds; cue “ribs down, core tight.”

Error: Uneven V angles

Cause: Dominant arm or shoulder imbalance

Correction: Mirror practice; use resistance band symmetry drills.

all star cheer coaching

Error: Soft wrists

Cause: Lack of forearm tension

Correction: Reinforce “blade hand” cue; add wall-press tension exercises.

Error: Bent elbows

Cause: Poor triceps control

Correction: Light dumbbell V-holds to build endurance.

South Coast Cheer Fearless has demonstrated how eliminating these errors at the foundational level leads to three consecutive World Championship titles. Their XSmall division team proves that when every athlete masters these corrections, the collective visual impact is unmatched.

Drills for Developing Perfect V Technique

1. Wall Alignment Drill

Stand six inches from a wall. Perform High V and Low V without touching it. If wrists or elbows hit, the V is too narrow or wide.

2. Resistance V Holds

Loop a light band around wrists. Maintain outward pressure while holding a High V for 15 seconds; repeat Low V. Builds symmetrical engagement.

3. Tempo V Transitions

Execute controlled V changes to a metronome (80–100 BPM). Focus on hitting exact 45° endpoints.

4. “Shoulders Down” Cue Drill

Coach places a palm lightly on athlete’s traps during motion. The goal: perform full V without rising into the hand.

5. Full-Team V Sync Challenge

Entire team hits alternating High V/Low V to 8-count music. Any misaligned athlete restarts the round. Reinforces collective accountability.

Elite programs like Top Gun All Stars Miami integrate these drills into daily practice. With nine World Championship titles for TGLC alone, their commitment to fundamental excellence in motions like the High V and Low V is evident in every performance.

Conditioning for V Endurance

Strong V positions require posterior-chain balance and shoulder stamina. Integrate:

* Reverse flys (3×12 at 8 lbs)

* Scapular retraction band pulls (3×15)

* Plank arm raises (3×10 each side)

* 30-second High V/Low V holds under fatigue conditions

Cue: “When your arms burn, hold the line – that’s your real V.”

Cheer Athletics Plano has partnered with Sports Academy to provide their Elite teams with specialized strength, flexibility, and conditioning programs for the 2025-2026 season. This type of targeted conditioning helps teams like Panthers (multiple World Champions) and Cheetahs maintain technical precision even under the physical demands of a full routine.

Celebrity Cheer York PA

Learning from the Best: What Championship Teams Do Differently

When analyzing the 2025 MAJORS and Cheerleading Worlds results, certain patterns emerge among champion teams:

  • Consistency Across All Athletes: Watch Cheer Extreme Raleigh SSX’s routines and you’ll see that every athlete – not just the strongest ones – demonstrates identical shoulder placement and angle precision in their V motions. This team consistency is what allowed them to score 164.85 with zero deductions at Worlds 2024.
  • Detail-Oriented Practice: GymTyme Illinois focuses on “every count” of their routines, according to their coaching staff. This attention to transitions and details extends to fundamental motions, ensuring that V positions are always sharp, never rushed or lazy.
  • Zero Tolerance for Technical Errors: The Stingray Allstars programs (with teams like Peach and Orange winning MAJORS divisions) maintain high standards for motion technique. A sloppy V is corrected immediately, reinforcing that fundamentals are never beneath any athlete’s attention.
  • Progressive Skill Development: Cheer Extreme Raleigh’s pathway from developmental teams to world-champion squads like SSX shows how building proper V technique from Level 2 creates athletes who can execute flawlessly at Level 6. They “track kids from one team to the next” to ensure proper technical foundation.

Teaching clean High V and Low V positions is about structural discipline, not brute force. The coach’s role is to train posture first, then angle precision, and finally tension control. Build awareness from the shoulders down, not the hands up.

The 2024-2025 season has shown us through teams like South Coast Cheer Fearless (three-peat champions), GymTyme Illinois Fever (back-to-back champions), Cheer Extreme Raleigh SSX (six-time champions), and Cheer Athletics Plano Cheetahs (MAJORS champions) that technical excellence in fundamentals is what separates good teams from championship programs. When you invest time in perfecting V motions, you’re not just fixing arm positions – you’re building a foundation for every elite skill that follows.

Steve Pawlyk Signature Full

IPP's Premade Mixes are USA Cheer Compliant and customizable!  Add Sound FX, swap songs, & more!  Add your Team Name to the mix for only $10! 

SLAM artwork
Full_Out_130 mp3 image
1 minute cheer mix
WAKE UP THE FIRE
SLAM artwork
WAKE UP THE FIRE
Full_Out_130 mp3 image
1 minute cheer mix
SHARE YOUR CART